
What did you do to your GE fit today?

Filled my rear torque mount with 80A urethane over the weekend and today did the clutch delay valve delete with a cmc from ITEM9. If you were on the fence about doing the delay valve delete. DO IT.
Went on a little over my budget this weekend.
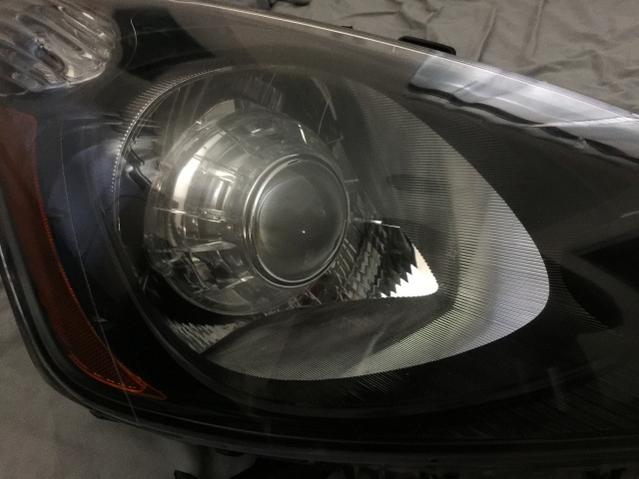
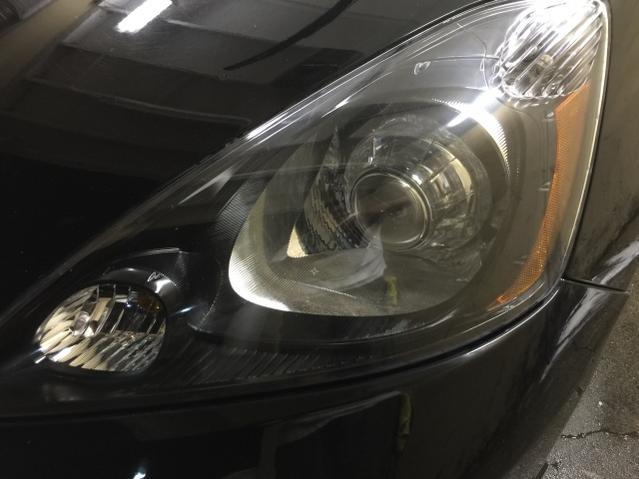
Picked up another set of Retrofitted Headlights.
LS460-R Projectors.
Osram CBI D2S 5000k Bulbs.
I need new ballast. I'll be ordering soon from RetroFit Source.
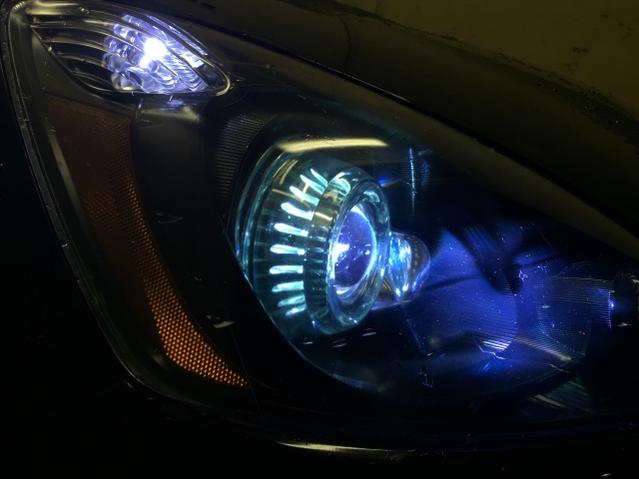
My prev set.
Infiniti M45 With TSX Clear Lens Swap.
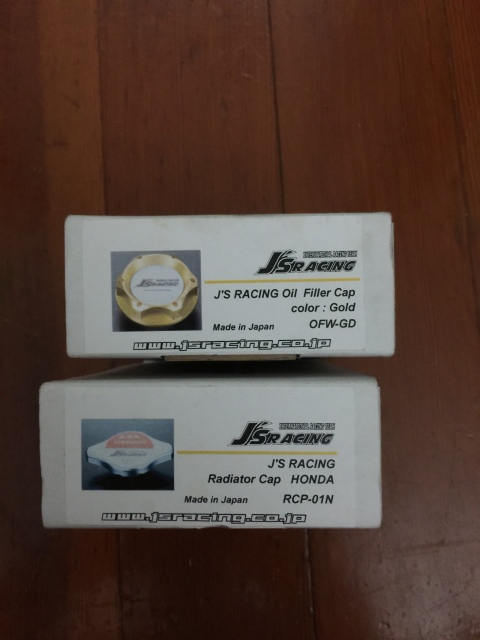
Also picked this set up.
J's Racing Oil Cap.
J's Racing Radiator Cap.
Picked up another set of Retrofitted Headlights.
LS460-R Projectors.
Osram CBI D2S 5000k Bulbs.
I need new ballast. I'll be ordering soon from RetroFit Source.
My prev set.
Infiniti M45 With TSX Clear Lens Swap.
Also picked this set up.
J's Racing Oil Cap.
J's Racing Radiator Cap.


Member
Joined: Jan 2012
Posts: 533
From: Alberta, Canada

I love the look of my J's oil cap. The J's rad cap is on my list of parts to buy over the winter.
That's the nice thing about Canada: We have two seasons for driving, a season for buying parts, and a season for doing the actual mods.
That's the nice thing about Canada: We have two seasons for driving, a season for buying parts, and a season for doing the actual mods.
LOL! I haven't gotten anything new for the fit for a while.
You got new Mugen not that long ago. haha
Yes, it's awesome.
Los Angeles is all year. Kinda good, kinda bad. hahaha
You got new Mugen not that long ago. haha
Yes, it's awesome.
Los Angeles is all year. Kinda good, kinda bad.
hahaha

What is happening?
^Welcome to last month, you just didn't notice they were made SM's
#newsteamassemble #voltron
September was my birthday month, I went big 
I just felt left out this month
+1 to Cali "seasons" I live here for a reason!
#newsteamassemble #voltron
I just felt left out this month
+1 to Cali "seasons" I live here for a reason!
Last edited by Waiz; Oct 14, 2014 at 11:37 PM.


Member
Joined: Feb 2011
Posts: 313
From: USA
Battery tray clean-up
I did a stupid thing 6-7 months ago, however well-intended. I was checking the battery electrolyte levels, and topped them up with distilled water. I overfilled the cells by mistake, forgetting they should only be filled above the plates, and just below the "ring" in each cell.
Fast forward to now. I had begun to notice a wet area and crud starting to appear beneath the battery tray area. Strangely, no buildup at all on the battery terminals themselves. Time to have a look and clean this up. Here's what it looked like before/after cleaning, what a mess.
https://www.facebook.com/photo.php?f...size=959%2C539
Gas generated by charging caused a good deal of acid to escape over time. I drained several ounces from each cell with a syringe to the proper level. Getting the battery tray out isn't hard, but the 2 12mm bolts beneath it are a pain. Need a long extension for the front one, and either a ratchet/socket or closed-end wrench for the back one. You only need to loosen them, as the tray has slotted mounts here.
Cleaned all areas with baking soda, scrubbed off the crud, rinsed/dried everything with compressed air. Then sprayed the frame rail and battery support tray with Rustoleum Rust Reformer. Didn't bother with top coat yet, but may do it later on.
One important note, when dealing with the battery terminal clamps, they have almost no tolerance if the battery posts are worn. I discovered this when I tried to tighten the + clamp, it wouldn't hold. You will need to add a post shim such as this:
http://shop.advanceautoparts.com/p/a...tery+post+shim
Keep a pair in your toolbox next time you need to remove the battery. No fun getting stranded if you can't make that clamp stay put!
Last edited by gkitf16; Oct 20, 2014 at 06:42 PM. Reason: Add photos
