When you click on links to various merchants on this site and make a purchase, this can result in this site earning a commission. Affiliate programs and affiliations include, but are not limited to, the eBay Partner Network.
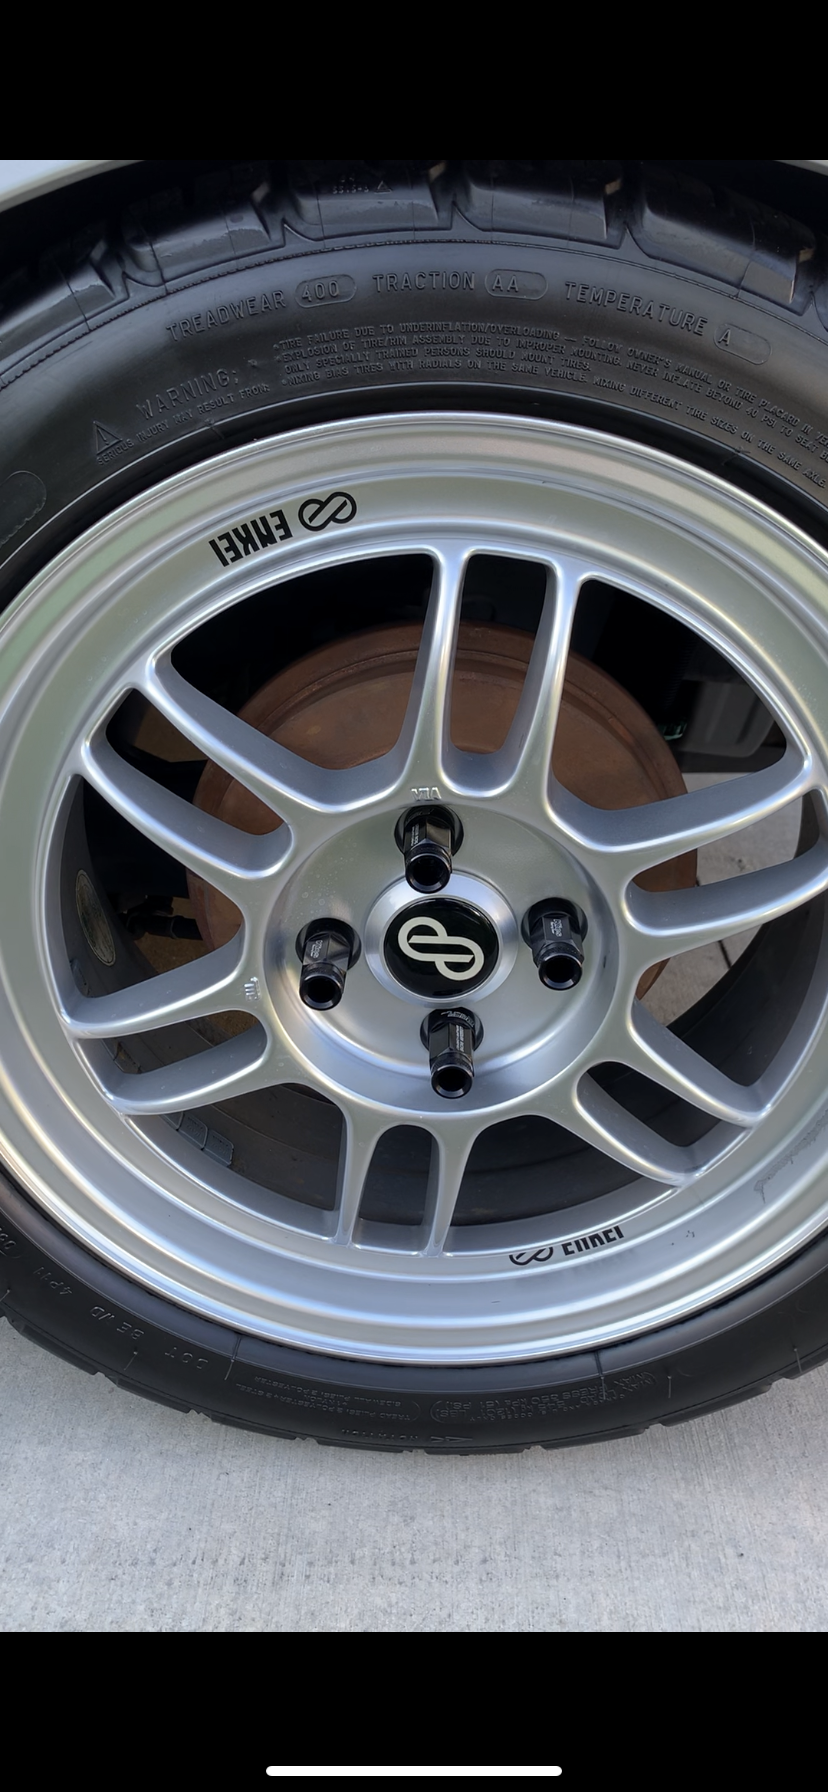
I did it! It felt better than I expected, made it up to 90km/h and even had an 18 wheeler rush past me and the car felt planted.
I'm impressed, but still some more work and testing to come.
rep J�s racing grille! On a USDM ge8? I�ve gotta see this! I�ve seen replicas before, but only for JDM Fits. Please post pics, a review and/or possibly a link if you feel so inclined!
QUOTE=eulogy;1463191]A couple days late.... Saturday i installed:
- painted spoon rep mirrors
- painted js racing rep grill
- bc racing coilovers
- new upper strut mounts
- Cusco front lower brace
- oem Honda right and left lower control arms
- moog japan outer tie rods (left n right)
Still need to make a few adjustments on the coils, reinstall the Spc camber bolts and get alignment.
So far the car feels excellent. X10 improvement.[/QUOTE]
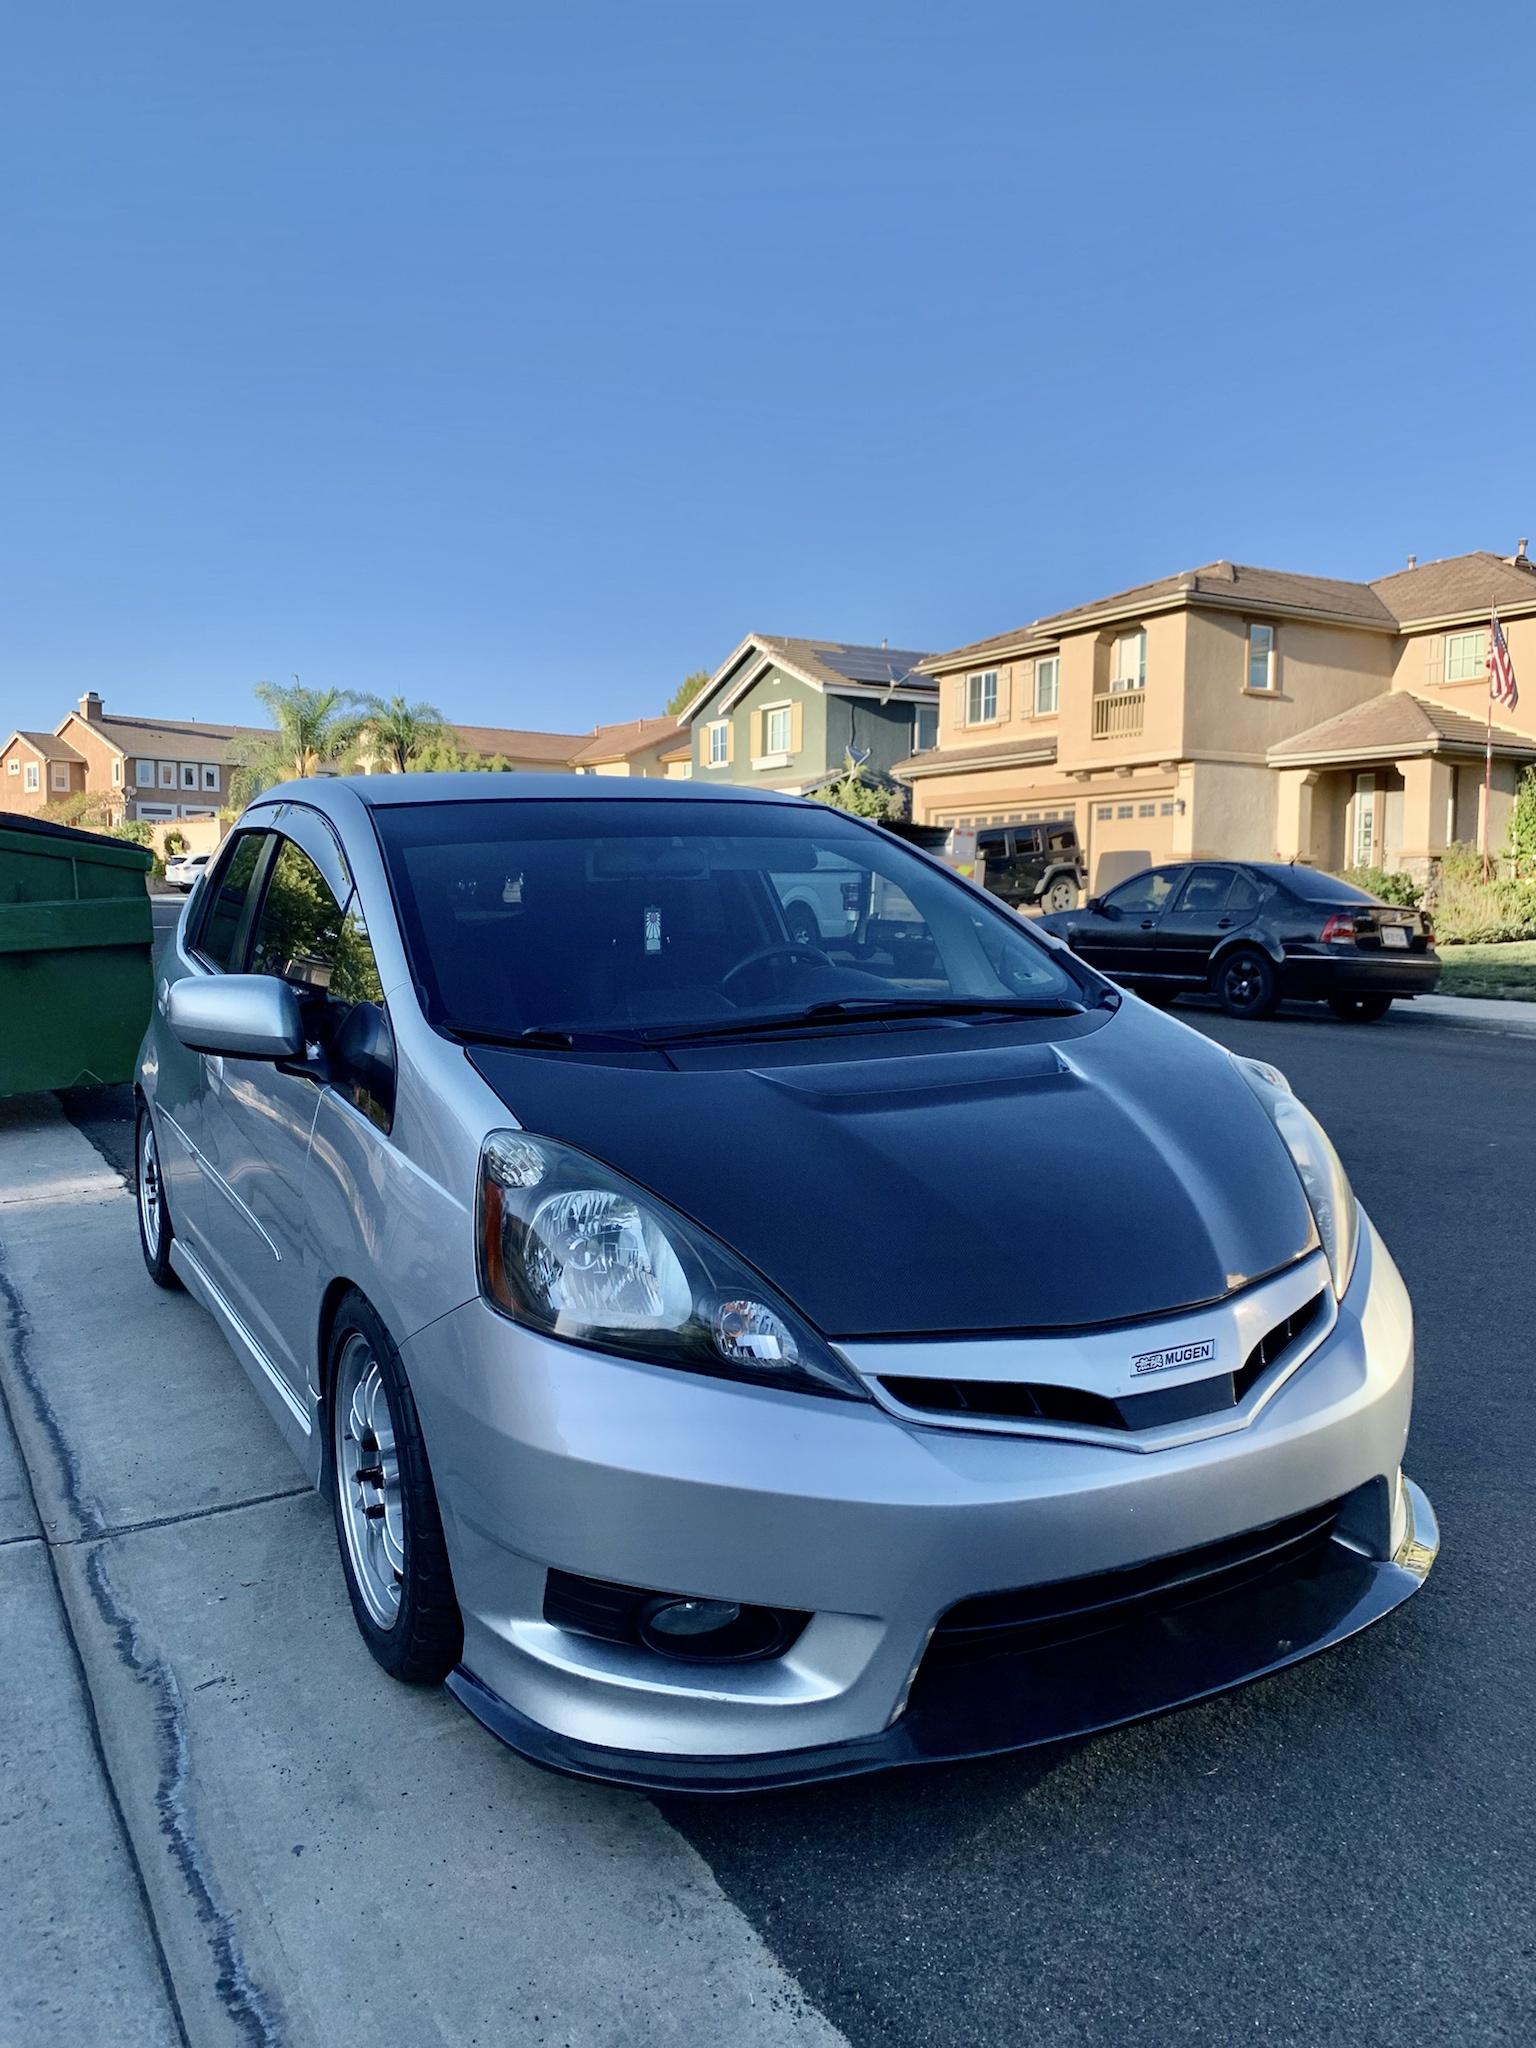
Sneak peek for mirrors and grill....overall im satisfied.
Grill is in fact for a jdm fit. Purchased locally from someone that backed out of trying to make it work. It Took lots of tweaking/cutting... and way too much time in my opinion. Ill post more details in my build thread soon. I didnt take pics of the process cuz i really doubted it would work. Its not color sanded yet...and i havnt decided if to put mesh in it ...so the corners by the headlights are sticking out a bit...but will be double sided taped down and flush when complete.
well I�m blown away! That grille looks incredible, same with the mirrors! Can�t wait to see that write-up on the grille! I�m a big fan of the black hood too, is it wrapped? I have a black hood on my white fit swapped from a salvage yard Fit haha.
Thanks!
your car looks good too...ive always liked white cars...and the panda look.
My hood is JDP carbon fiber. The more i see imperfections and the uneven fitment...the more dissatisfied i am with it. I have to just not look at them. Lol. Noone else makes one for the usdm so thats our only option for now
Might as well as post an update on my build too! Recently installed some taillights from Taiwan and I�m really into the look! I also pulled some black housing headlights from a salvaged 2013 Fit, no more full chrome headlights for me! I also found a full leather interior - including door cards, at a local pick-n-pull and got the whole set for around $150 USD. These are not clazio seat covers or anything similar, this was a custom leather upholstery that was glued/sowed directly into the seats themselves, and included a heated seat mechanism in front seats. I didn�t want to wire the heating function up just yet so I left that part alone, but now I have a full leather interior Fit! Mind you, the passenger seat cushion could use some TLC so I put a cover on it for the time being.
Thanks!
your car looks good too...ive always liked white cars...and the panda look.
My hood is JDP carbon fiber. The more i see imperfections and the uneven fitment...the more dissatisfied i am with it. I have to just not look at them. Lol. Noone else makes one for the usdm so thats our only option for now
Thank you! I never wanted a white car but now I�m definitely a big fan of the panda look, I call my Fit the angry panda haha. I�ve heard a lot of similar complaints about the JDP hood, but at least it photographs well! My hood has all sorts of imperfection given it was from a junkyard fit haha, I�m going to have to repaint it or wrap it at some point. I still have my original hood in the garage so maybe I�ll do fun project with this one.
I like the taillights. Almost looks like a GK Fit rear end.
Originally Posted by BaySFit
Might as well as post an update on my build too! Recently installed some taillights from Taiwan and I�m really into the look! I also pulled some black housing headlights from a salvaged 2013 Fit, no more full chrome headlights for me! I also found a full leather interior - including door cards, at a local pick-n-pull and got the whole set for around $150 USD. These are not clazio seat covers or anything similar, this was a custom leather upholstery that was glued/sowed directly into the seats themselves, and included a heated seat mechanism in front seats. I didn�t want to wire the heating function up just yet so I left that part alone, but now I have a full leather interior Fit! Mind you, the passenger seat cushion could use some TLC so I put a cover on it for the time being.
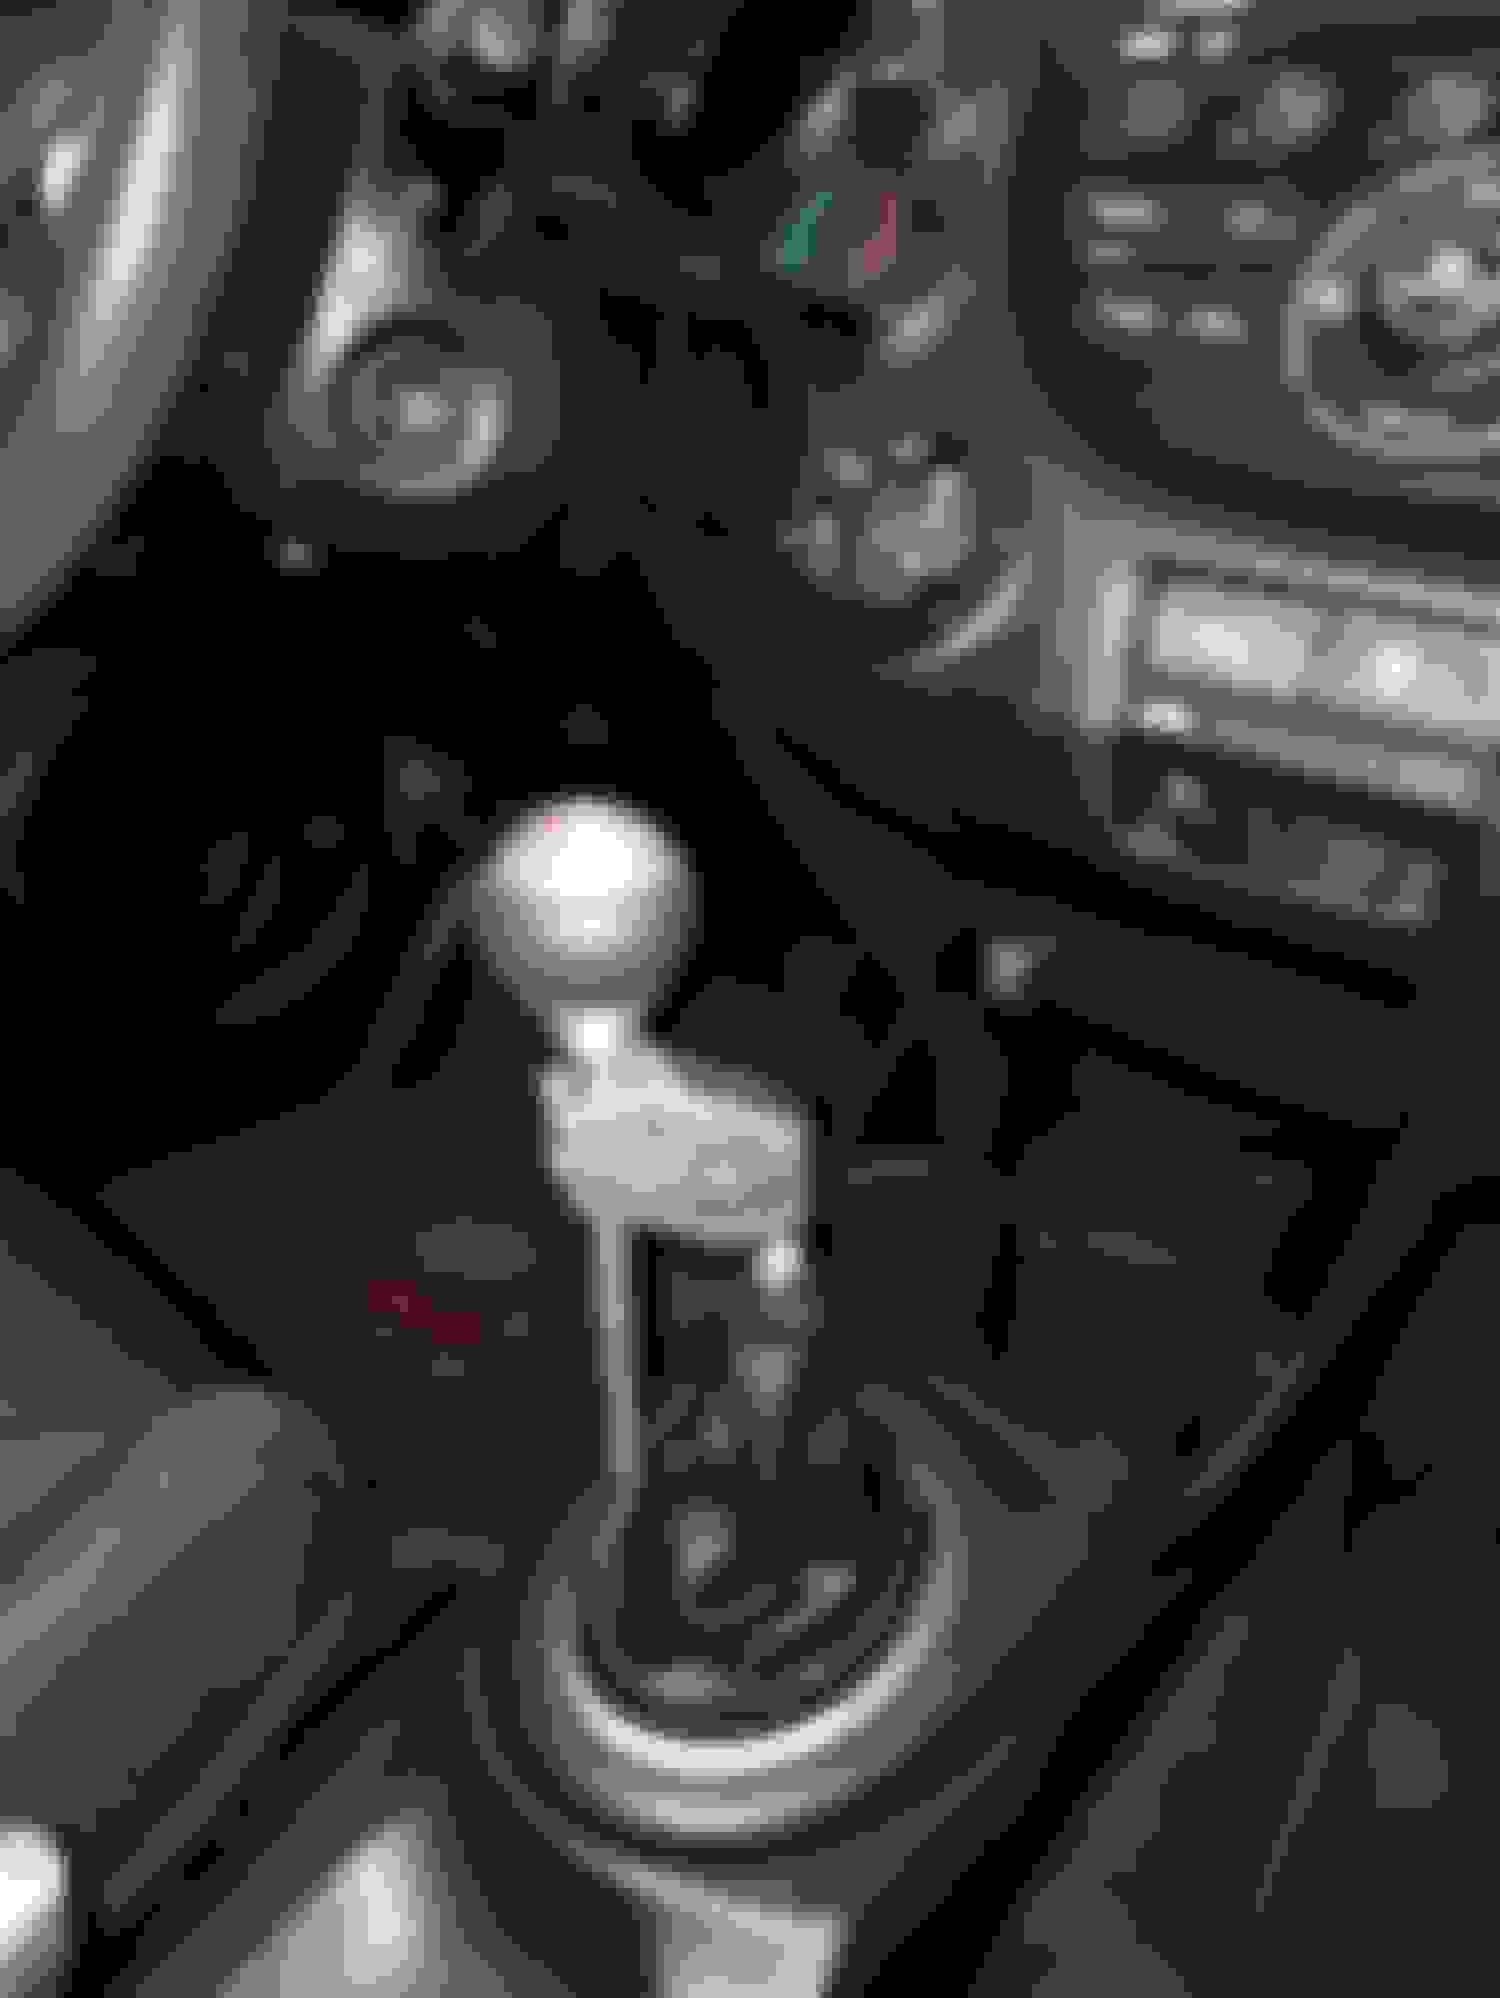
stuck a 1320 Performance offset shifter into my Fit today.
to get the shift knob exactly where it fit best, i had to drill a couple of inset holes for the set screws:
then used a belt sander to round the 90 degree edges that were stabbing my knuckles when i grabbed the shifter.
never gonna miss a 2nd to 3rd gear shift again!
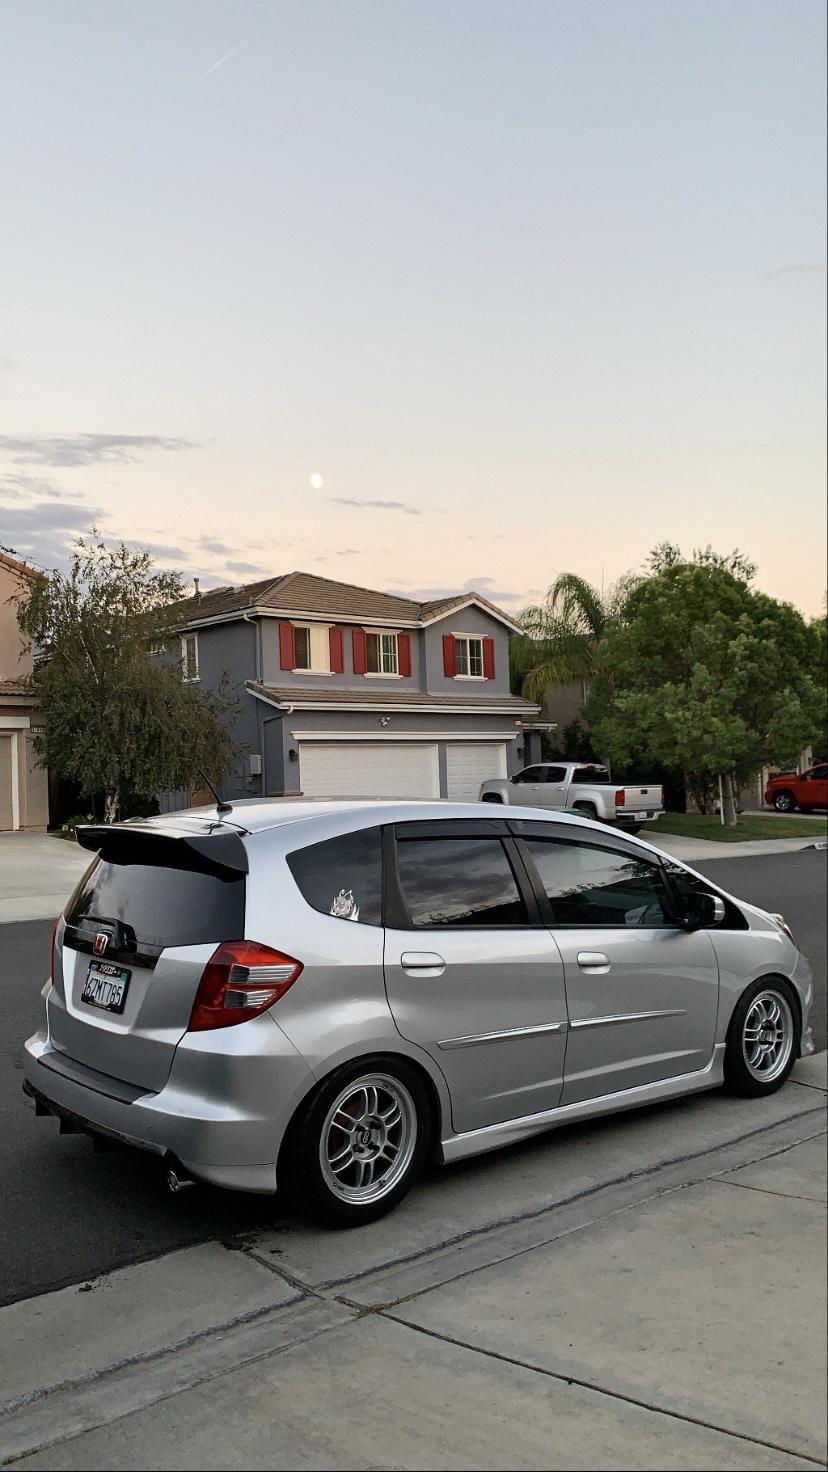
added these things on the side. makes my fit look lower? i think it looks good, for now haha. well see how long it will last :^).
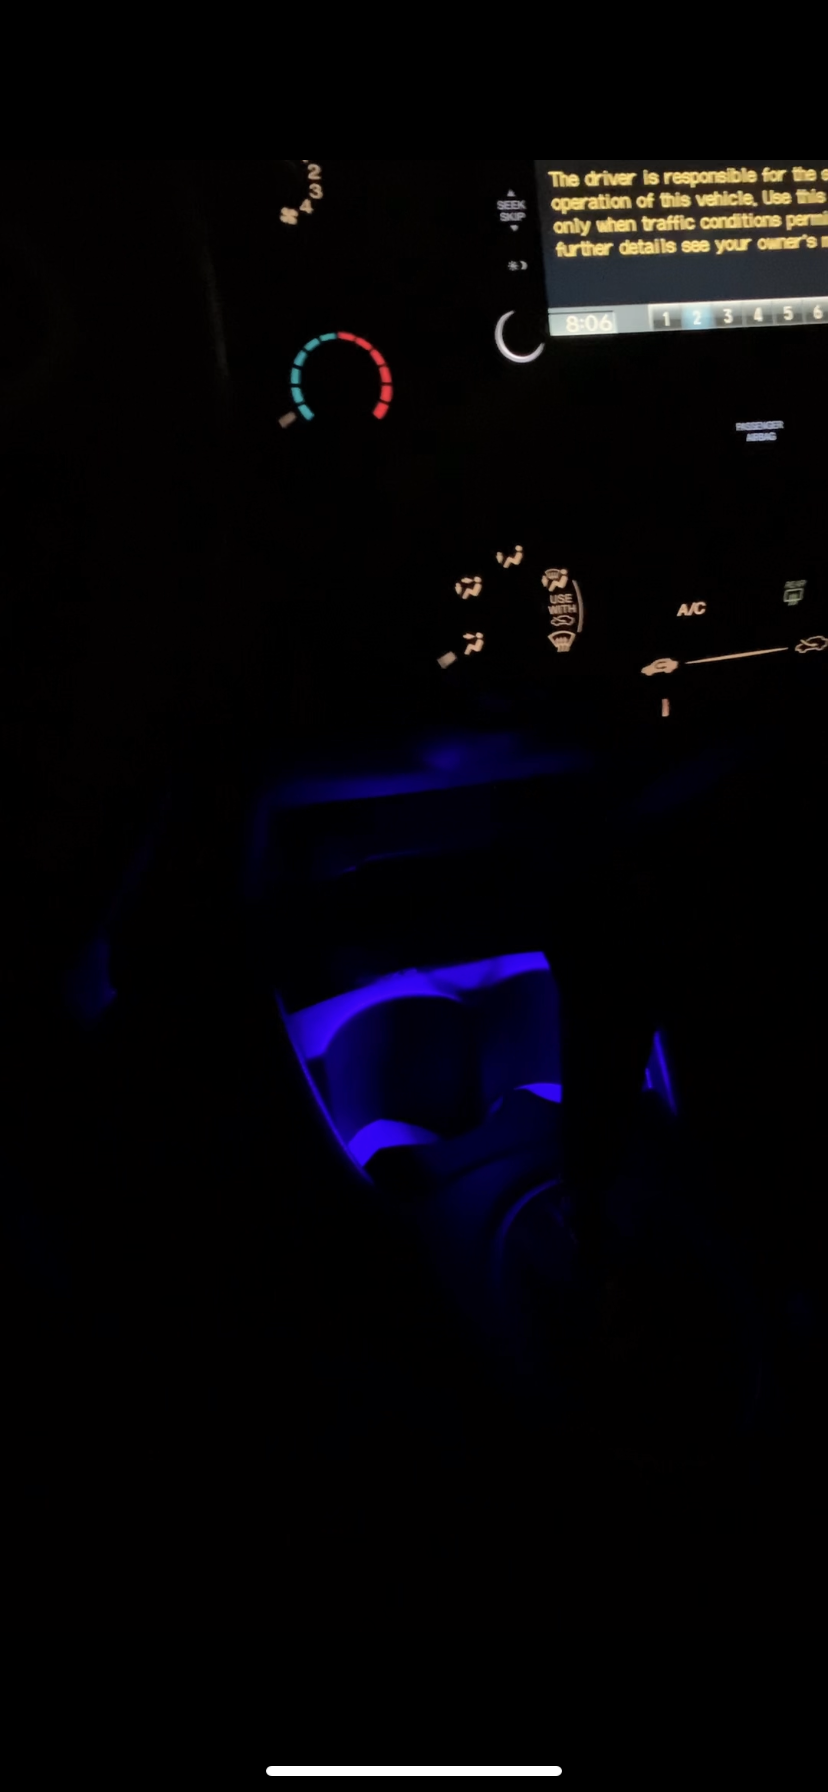
i changed out my cupholder light to a blue led. cool spaceship vibe at night lol.
also i installed some new drum brakes a month ago and the already look rusted. i made the mistake of getting unpainted ones, so next project will be cleaning them with a wire brush and painting them black with caliper paint!
oh and my hks exhaust is finally expected to ship soon after waiting almost 3 months for it. vividracing sucks, never again.
Last edited by slvrsoul.fit; Sep 17, 2021 at 10:39 PM.
i finally installed my jdp lip ive been holding since march. i was like you know what, today will be the day!
It wasn't a difficult installation, but took me longer than i expected. I didn't need to take off my bumper like the instructions said. I just masked the tabs on the lip where the holes are to be drilled with 3m masking tape, put the lip on and outlined the holes with a sharpie. Then went to lowes and picked up a drill bit set and first made a pilot hole on each tab. What i didnt realize at first was that the drill was spinning the wrong way lmao but i end up still making the holes. After pilot holes were made, made bigger holes with a bigger drill bit. Test fitted the lip, put to screws in and found that i need to make additional mounting holes on the end of the lip by the wheel well. After that, bolted everything again and found theres like a 5mm gap at the ends and also the middle of the lip was loose. . i guess the mold jdp uses isnt that good. To fix the loose middle, im thinking of drilling additional holes or use some 3m mounting tape to secure it. Its currently not as secure as i want it to be, but i will save that for another day. <-- hopefully this doesn't bite me anytime soon lmao.
So I installed the lip on my '09 a while back and took the bumper off because I was swapping to black surrounds for my headlights anyway. I found I had to pretty well "stretch" it across the leading edge of the lower bumper to get it to sit back far enough. There is still a mm or so gap between the end of the lip and the wheel well arch but it doesn't bother me.
i finally installed my jdp lip ive been holding since march. i was like you know what, today will be the day!
It wasn't a difficult installation, but took me longer than i expected. I didn't need to take off my bumper like the instructions said. I just masked the tabs on the lip where the holes are to be drilled with 3m masking tape, put the lip on and outlined the holes with a sharpie. Then went to lowes and picked up a drill bit set and first made a pilot hole on each tab. What i didnt realize at first was that the drill was spinning the wrong way lmao but i end up still making the holes. After pilot holes were made, made bigger holes with a bigger drill bit. Test fitted the lip, put to screws in and found that i need to make additional mounting holes on the end of the lip by the wheel well. After that, bolted everything again and found theres like a 5mm gap at the ends and also the middle of the lip was loose. . i guess the mold jdp uses isnt that good. To fix the loose middle, im thinking of drilling additional holes or use some 3m mounting tape to secure it. Its currently not as secure as i want it to be, but i will save that for another day. <-- hopefully this doesn't bite me anytime soon lmao.
one step closer to final build
I appreciate you're feedback on this. I am looking at JDP parts for mine. I shy away from things I have to drill but might give this a go.
I appreciate you're feedback on this. I am looking at JDP parts for mine. I shy away from things I have to drill but might give this a go.
I'll lend my experience with installation and say I only drilled two holes, both out by the lead edge underneath the fog lamps. Most all my holes lined up well but again I removed my bumper, YMMV.
Installed a Takeda attack intake last night! The installation was pretty straight forward. I did have to watch a K&N video about removing the stock airbox, MAF sensor, and crank case line. Then getting the filter down to the appropriate area was a bit difficult, but I managed to get it after some critical thinking (shout out brain games).
Immediately, I noticed the car felt more "eager" to get going. Takeda claims a 4 HP and 5 ft-lb increase, and I believe that. The car felt ever so slightly quicker on acceleration, butt dyno checks out. The best part though? THE V-TEC NOISES! I can finally hear the V-tec crossover and man this improves the fun factor big time. I wanna redline everywhere I go now. I can't wait to get a video of it from the outside, cause inside it sounds rowdy! Intake installed Attack intake
I highly recommend it for under $300 USD! This along with my HKS Hi-power exhaust really changes the personality of this car. Next up is coilovers and 15x8 wheels.
Last edited by RoulantG; Sep 22, 2021 at 01:21 PM.


 . i guess the mold jdp uses isnt that good. To fix the loose middle, im thinking of drilling additional holes or use some 3m mounting tape to secure it. Its currently not as secure as i want it to be, but i will save that for another day. <-- hopefully this doesn't bite me anytime soon lmao.