
New Project..


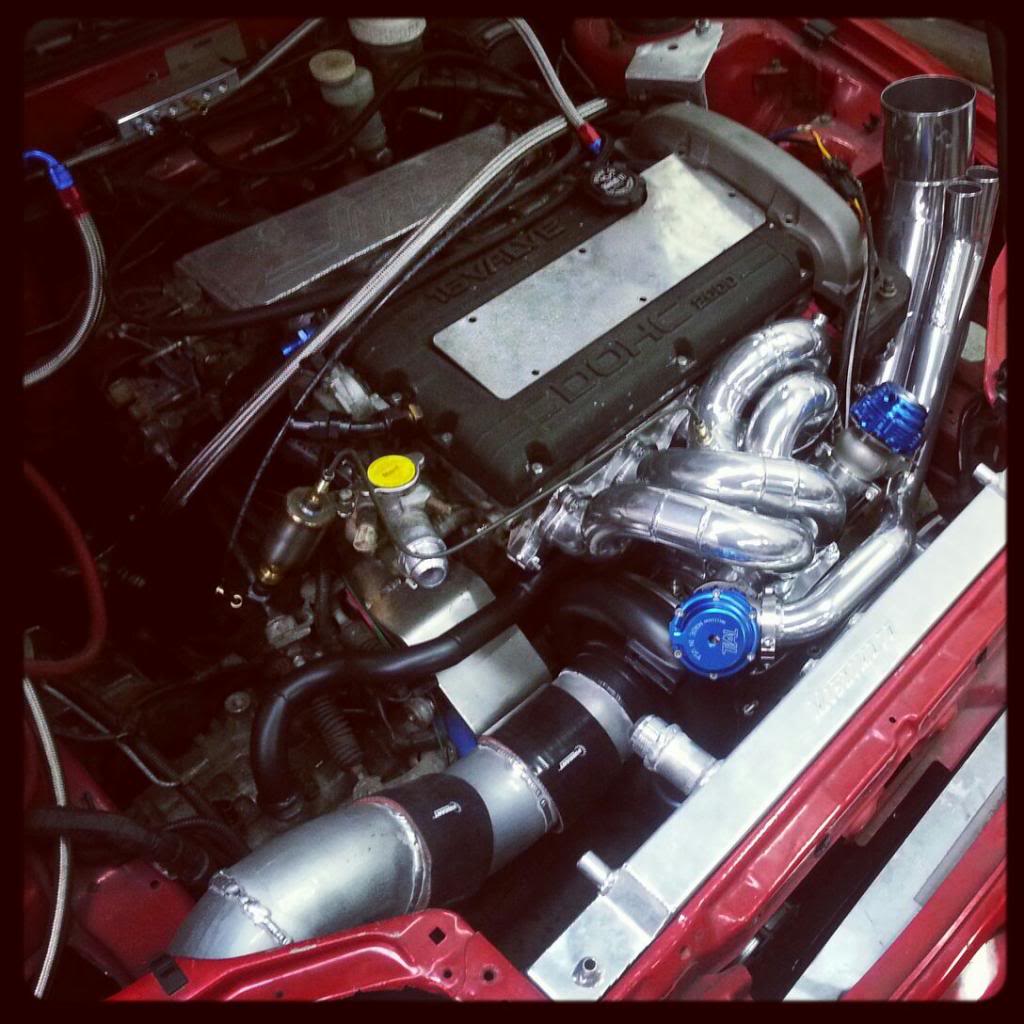
Mild turbo build that the customer has at least temporarily stopped paying on from what I remember lol
Unfortunately a lot of the Honda guys around there are total deadbeats.
Unfortunately a lot of the Honda guys around there are total deadbeats.
You really don't want it, part of the reason its run over his budget was because of how much needed to be addressed before the go faster bits could be put on.
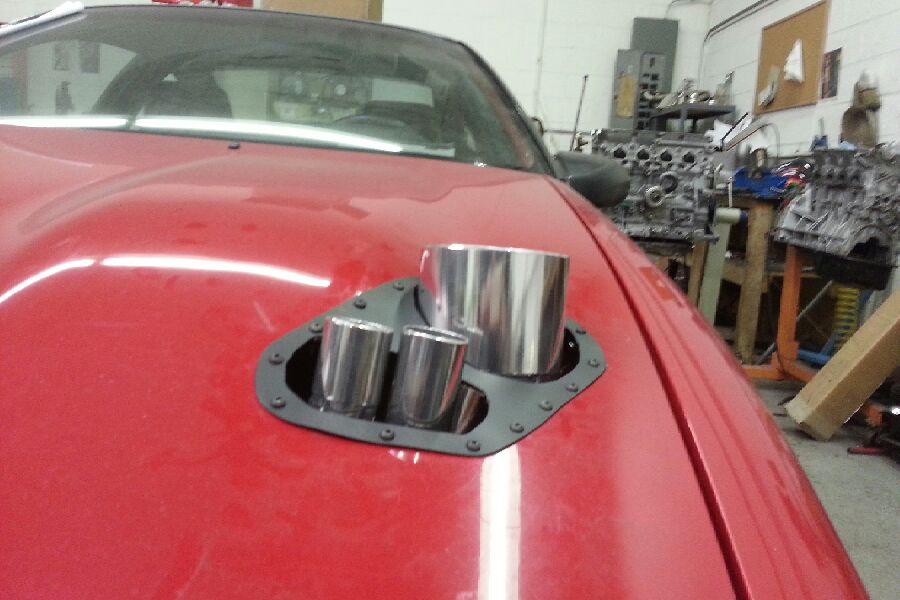
Got to say, I didn't really see this as more than a functional piece, but the diffusers have really grown on me:
Between the killswitch, battery terminals, parachute/mount and the diffusers .. it really makes a mean look. Add the goofy tonka truck stance, the hood exit exhaust, black sheet metal fascia/airdam on the front, hood-pins and a headlight scoop and it looks all business!


Banned
Joined: Feb 2013
Posts: 1,361
From: right coast
You might see a little better results if you extend the upper edge of your intake box out past the bumper or at least as far as the bumper. With the bumper (the farthest part forward) right now the air coming at the car (or the car hitting the air) should split at the bumper with about half going down under the car and the rest going up the bumper.
With your edge slightly set back behind the bumper the air taking the least path of resistance would want to go right up the bumper and over the hood.
Ignoring the reduced pressure from the running engine for the moment if you extend the top edge so it is further out into the air streaming up the bumper it SHOULD catch more of the air flowing up toward the hood resulting in a slight pile up (if you will) of air right in front of the intake so now the reduced pressure has a bunch more molecules to be forced in by the higher pressure.
And maybe extending the sides just a bit so there will be less "spill over" of the new extra air piling up.
For other aero and packing concerns thats not really an option. At 200+ mph that duct will be getting plenty of air.
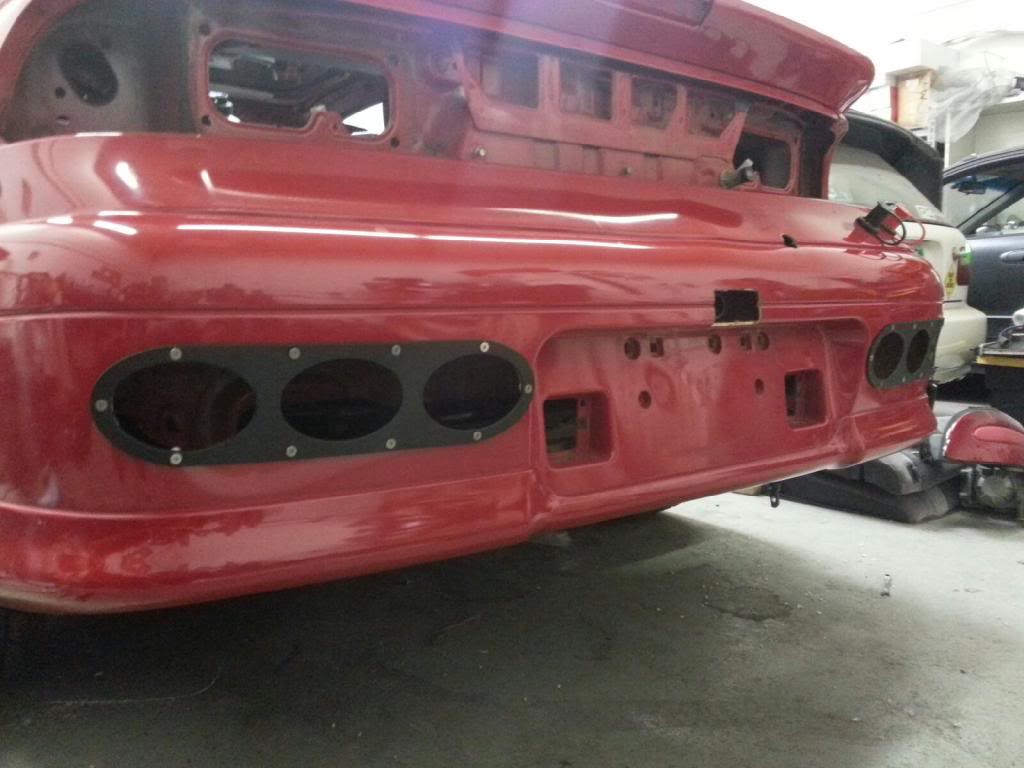
Class requirements also mean that car is to keep stock body lines, with few exceptions. All of which I am currently exploiting.
The Scoop's cross section vs. the 4" pre-turbo pipe is such that it will be sufficient almost regardless of shape concerns.
 [/IMG]

So trying to develop a rough itinerary of sorts.. This is mainly for my mental organization I suppose.
This week will involve:
Next week, depending on how badly I get slammed by other work this week..
Then presumably final checks, hook up the laptop and test fire?
After test fire is done, and the bigger injectors are swapped in for base tune.. time to wire wheel rust patches off the underbody, spray paint the spots before we finally bag/tape the parts of the undercarriage and coating with rhino liner material. Then let the detailer do his thing.
Photoshoot? lol
At which point it is time to schedule the dyno!
So potentially another 2-4 weeks and she'll be on the rollers by this estimate.
This week will involve:
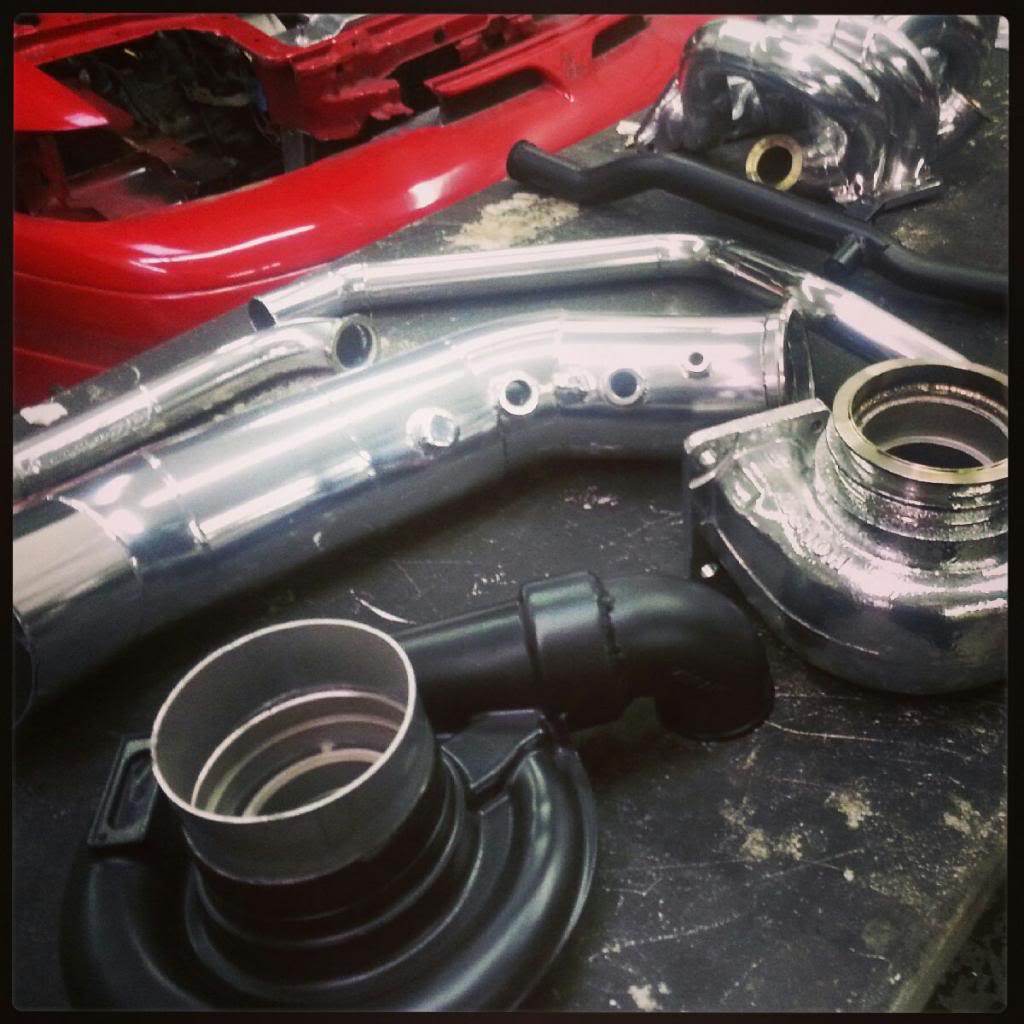
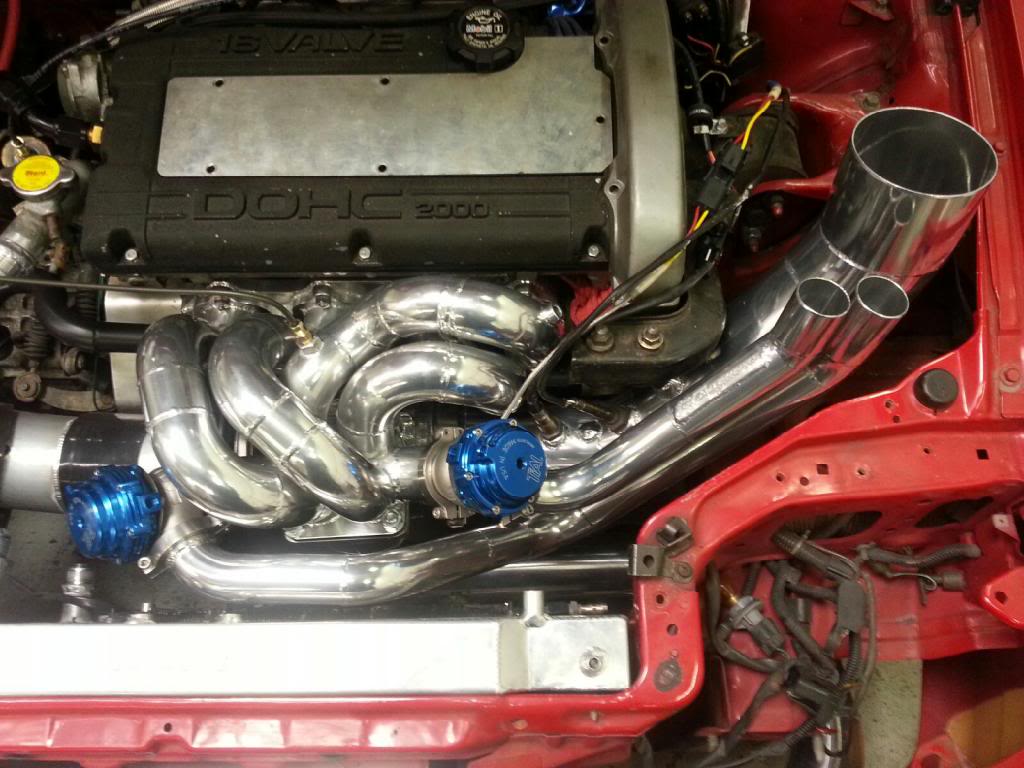
- Re-assembling intake/exhaust
- Making the Oil Feed Line/Filter/Pressure sensor assembly
- Connecting/checking all other fluid, mechanical and electrical connections
- Swapping in the new EGT gauge
- Re-assembly of the interior
- Rounding the corners off and painting the mounting plate for the overhead kill-switch
- Re-assembly of most of the exterior
- Forming the nose mask/airdam and intercooler ducting
- Ordering fluids and oil filter
Next week, depending on how badly I get slammed by other work this week..
- Finishing nose mask/ducting
- Finishing exterior assembly minus the two trim pieces in my garage
- Adding fluids (engine oil / coolant / trans / clutch / rad / brakes / fuel / anol)
- Installing battery (may need charge?)
- Testing Electrical systems
- Testing fluid pumps and checking for leaks
- Install ECU
Then presumably final checks, hook up the laptop and test fire?
After test fire is done, and the bigger injectors are swapped in for base tune.. time to wire wheel rust patches off the underbody, spray paint the spots before we finally bag/tape the parts of the undercarriage and coating with rhino liner material. Then let the detailer do his thing.
Photoshoot? lol
At which point it is time to schedule the dyno!
So potentially another 2-4 weeks and she'll be on the rollers by this estimate.

Fluids on order, started electrical testing and final re-assembly today.
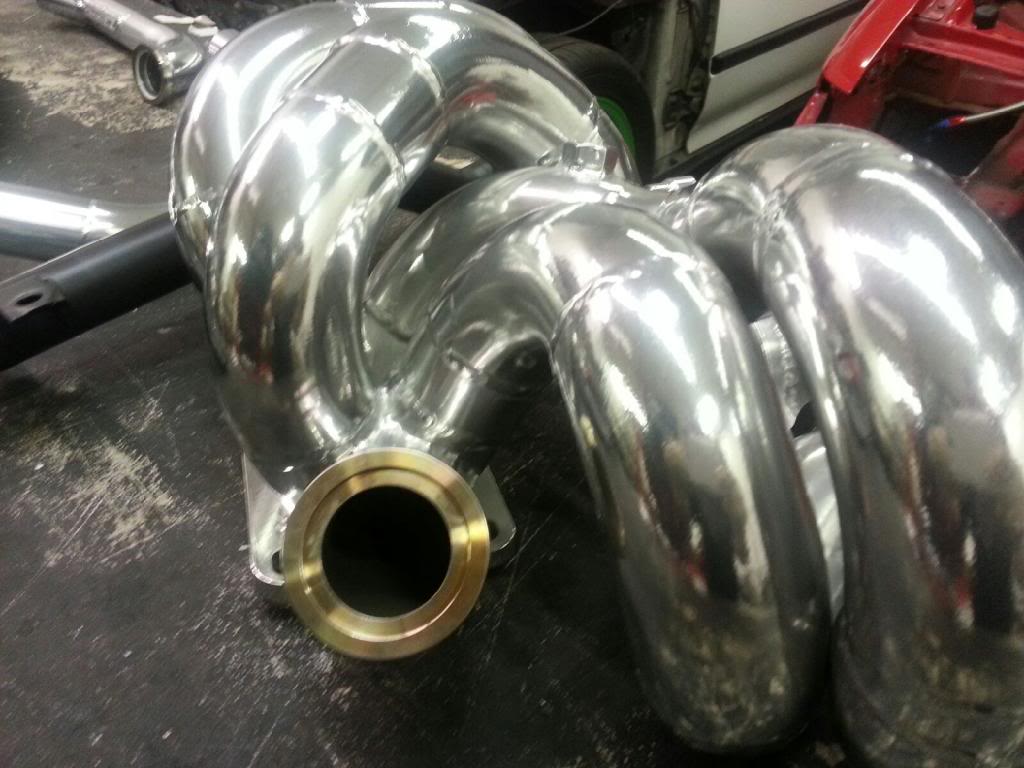
This is still got to be one of if not my favorite visual aspect of the car only made better by the ceramic coating on the pipes and black anodized bezel:
This is still got to be one of if not my favorite visual aspect of the car only made better by the ceramic coating on the pipes and black anodized bezel:
Finishing up some lines now that everything is back together, and discovering little stuff that needs addressing lol
Making a new SS clutch line from frame to trans and see a torn boot on the slave cylinder:
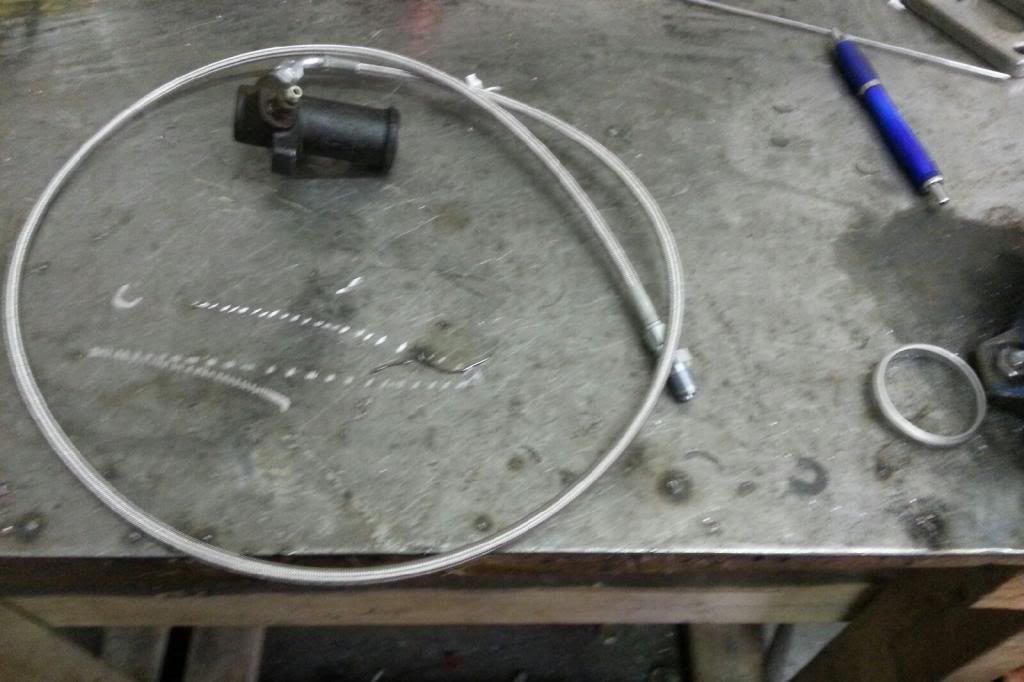
Making a new SS clutch line from frame to trans and see a torn boot on the slave cylinder:
Sensor for boost gauge installed between the turbo and the intercooler
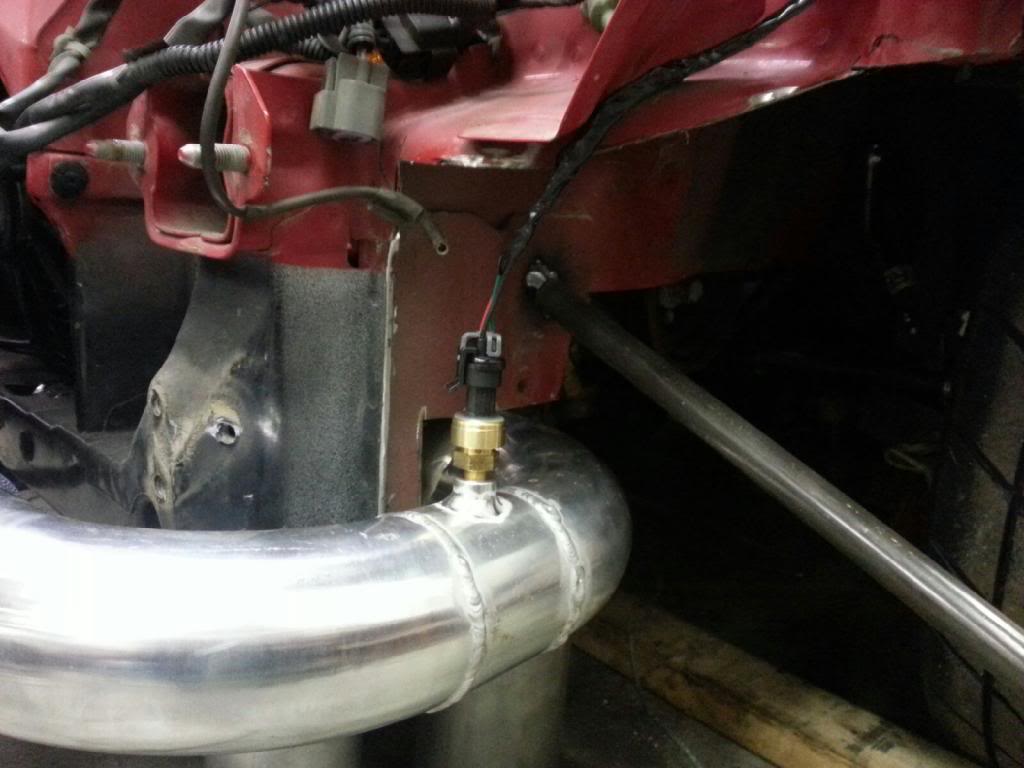
This will let me measure against the MAP sensor in the vacuum block to calculate pressure drop across the system!
This will let me measure against the MAP sensor in the vacuum block to calculate pressure drop across the system!