


What did you do to your GE fit today?


Member
Joined: Dec 2015
Posts: 1,655
From: San Diego, CA

I agree! Very close to the Dark Amytheyst Pearl of the EK hatch I used to have.
Look forward to it! Let us know how the install goes. I'm tackling mine tomorrow hopefully.
What year? My 2013 you can remove the entire fog assembly from the bumper with (1) phillips head screw. Then just remove the bulb socket and remove the plastic surround to get to the fog light assembly. Not sure how it works on the earlier GE models.
What year? My 2013 you can remove the entire fog assembly from the bumper with (1) phillips head screw. Then just remove the bulb socket and remove the plastic surround to get to the fog light assembly. Not sure how it works on the earlier GE models.

Member
Joined: Mar 2013
Posts: 238
From: Longview, TX
Same on my 09. Easy peasy, nothing more to it.



Member
Joined: Jun 2014
Posts: 887
From: Canada
Is the screw in the front? Did not see it...
But it would make sense as it would be really stupid to have to remove the bumper just to change a bulb (in my case I need to replace the fog light due to a cracked lense).

Member
Joined: Dec 2015
Posts: 1,655
From: San Diego, CA
5k and 3k? You think so?
It's their standard rate and thats already an improvement over my swifts which were 2.3k front and 2.1k rear? Double the current rate up front and 50% increase in the rear.
Also still an increase over the TEIN options which were 3k/2k. We will see.
It's their standard rate and thats already an improvement over my swifts which were 2.3k front and 2.1k rear? Double the current rate up front and 50% increase in the rear.
Also still an increase over the TEIN options which were 3k/2k. We will see.

Member
Joined: Jul 2014
Posts: 1,083
From: CA
Thanks! Please send template if possible. This sounds exactly how I would've made it. How is it attached to the car? Using the license plate hardware? Also did you put anything between the plastic and the paint/trunk area to protect the paint?
Also yeah Alpina was getting super busy at work last I heard...but that was over a month ago and he was a daily poster for a LONG time.
Also yeah Alpina was getting super busy at work last I heard...but that was over a month ago and he was a daily poster for a LONG time.
The template is large 24" across so I will break it into 3 parts and just tape them together when ready to trace the shape onto the acrylic sheet.

Member
Joined: Dec 2009
Posts: 167
From: Manteca CA
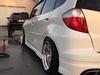
My Flex Z's came in today so, I went to work on the car. It started to rain pretty good over here. I only installed the kit and did a quick test drive. I had to help put my son to sleep. It took longer than usual because I lined up the plastic garnish that cover half the engine bay. Then it rained some more, haha! Basically pointless.
I included a pick of the rear instructions. People on Facebook thought I put the rear springs upside down. As you can see, I did not.
I included a pick of the rear instructions. People on Facebook thought I put the rear springs upside down. As you can see, I did not.


Member
Joined: Dec 2015
Posts: 1,655
From: San Diego, CA
My Flex Z's came in today so, I went to work on the car. It started to rain pretty good over here. I only installed the kit and did a quick test drive. I had to help put my son to sleep. It took longer than usual because I lined up the plastic garnish that cover half the engine bay. Then it rained some more, haha! Basically pointless.
I included a pick of the rear instructions. People on Facebook thought I put the rear springs upside down. As you can see, I did not.
I included a pick of the rear instructions. People on Facebook thought I put the rear springs upside down. As you can see, I did not.
As for the rear I have seen it done both ways. The way you have it, and the opposite way. I guess it just depends on the manufacturer.
I mean at least your instructions tell you. The instructions provided with the BC-racings I got just tell you how to adjust ride height. And there is a sticker that says the spring perch goes on the bottom of the spring.
Here are some pics of the coilovers. I took more, but will start a thread specific to the install and coilovers.
How long did your install take? I'd imagine it'd take about two hours for a drop in replacement. Jack rear up, support it, remove rear suspension...install rear suspension. Jack front up, support it, remove front suspension (think I have a hex long enough to not have to remove the cowl), install new suspension. Adjust to desired height.


Member
Joined: Dec 2009
Posts: 167
From: Manteca CA
Parts look good. Awesome that the fronts are preassembled. Did you just have to reuse the top OEM bushing? Or did you still have to disassemble the OEM suspension to get the washer bearing and washer bearing nut?
As for the rear I have seen it done both ways. The way you have it, and the opposite way. I guess it just depends on the manufacturer.
I mean at least your instructions tell you. The instructions provided with the BC-racings I got just tell you how to adjust ride height. And there is a sticker that says the spring perch goes on the bottom of the spring.
Here are some pics of the coilovers. I took more, but will start a thread specific to the install and coilovers.
How long did your install take? I'd imagine it'd take about two hours for a drop in replacement. Jack rear up, support it, remove rear suspension...install rear suspension. Jack front up, support it, remove front suspension (think I have a hex long enough to not have to remove the cowl), install new suspension. Adjust to desired height.
As for the rear I have seen it done both ways. The way you have it, and the opposite way. I guess it just depends on the manufacturer.
I mean at least your instructions tell you. The instructions provided with the BC-racings I got just tell you how to adjust ride height. And there is a sticker that says the spring perch goes on the bottom of the spring.
Here are some pics of the coilovers. I took more, but will start a thread specific to the install and coilovers.
How long did your install take? I'd imagine it'd take about two hours for a drop in replacement. Jack rear up, support it, remove rear suspension...install rear suspension. Jack front up, support it, remove front suspension (think I have a hex long enough to not have to remove the cowl), install new suspension. Adjust to desired height.
I would say It took me 3 1/2 hours to do front and rear. then I double checked the height measurements and rechecked them. LOL! I recommend to take off the cowl and windshield wiper motor. Its way faster then trying to work around it. Tein also recommended not to use an impact gun when tightening the strut nuts. I went slower than normal.


Member
Joined: Dec 2015
Posts: 1,655
From: San Diego, CA
I had to reuse the stock mounting bushings. Tein now provides English instructions! Thats a big plus!!
I would say It took me 3 1/2 hours to do front and rear. then I double checked the height measurements and rechecked them. LOL! I recommend to take off the cowl and windshield wiper motor. Its way faster then trying to work around it. Tein also recommended not to use an impact gun when tightening the strut nuts. I went slower than normal.
I would say It took me 3 1/2 hours to do front and rear. then I double checked the height measurements and rechecked them. LOL! I recommend to take off the cowl and windshield wiper motor. Its way faster then trying to work around it. Tein also recommended not to use an impact gun when tightening the strut nuts. I went slower than normal.

Get them installed!
Member
Joined: Dec 2009
Posts: 167
From: Manteca CA
I was able to make a run to the post office today. The car feels like stock but stiffer. I's hard to explain. Only the Japanese companies know how to pull these delicate balances off. This is why I didn't want to go with a non Japanese company. Yes I know that the main strut is made in Taiwan but, the QC of a Japanese company is above reproach.
Needless to say, I am very happy! Now I just need a little alignment and it's good to go!
HKS drop in filter is next. And then I'll be waiting on my Cusco strut bars.
Needless to say, I am very happy! Now I just need a little alignment and it's good to go!
HKS drop in filter is next. And then I'll be waiting on my Cusco strut bars.
Member
Joined: Jul 2014
Posts: 1,083
From: CA
You then use the [img] tags to post the link at it will show up.
I don't recommend using the forum image hosting as its a little wonky.

