
MODS/ACCESSORIES for the GK


Member
Joined: Jul 2014
Posts: 227
From: Los Angeles
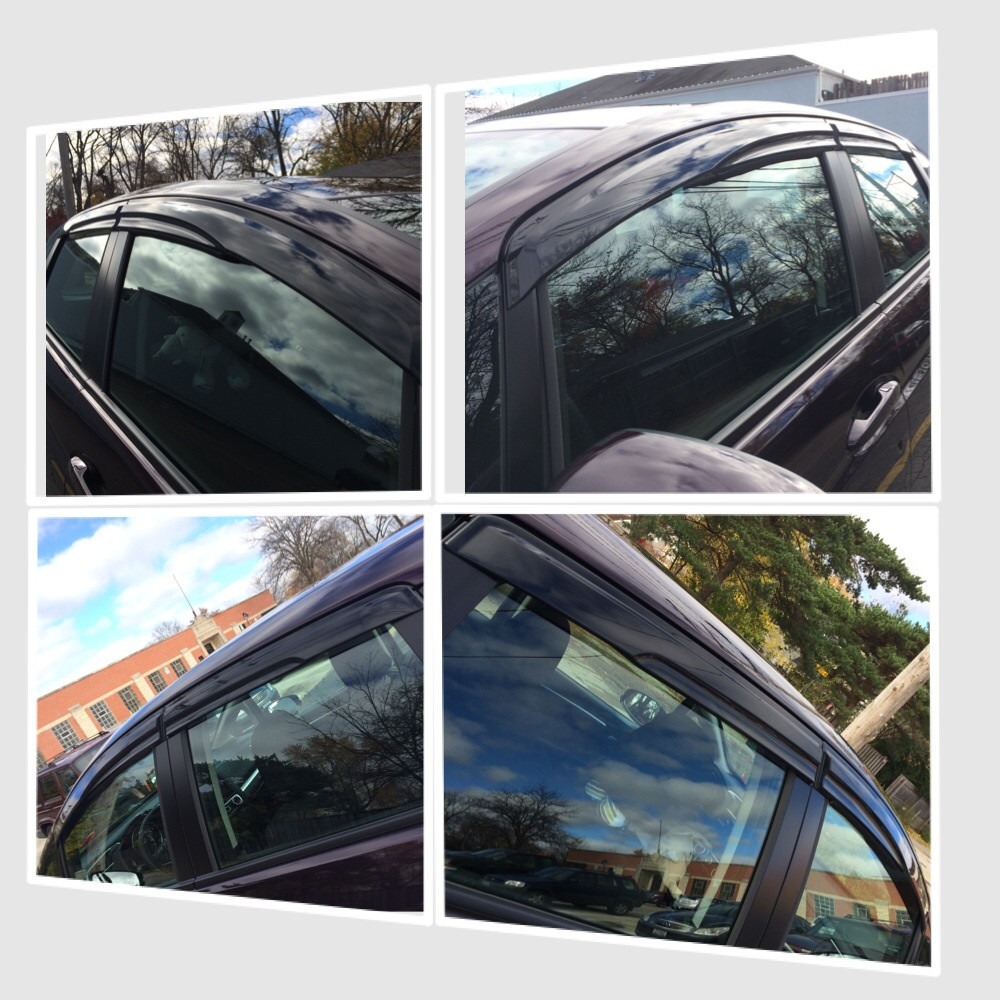
Rott can you take a picture of your tails from farther away? I want to see what the mismatch looks like between the uppers and lowers, when you don't replace the lowers.
Thanks!
REply: Here ya go!
- rttby
Thanks!
REply: Here ya go!
- rttby
Last edited by ROTTBOY; Nov 2, 2014 at 01:40 AM.
Thread Starter
|
Someone that spends his life on FitFreak.net
Joined: Mar 2014
Posts: 1,116
From: Hawaii: relocated to Western Canada Sept, 2015
Reinstall 90% done
With the majority of the ICE wiring tidied up, today was reinstall time plus the addition of a couple of accessories.
Front seats back in:
REar seats in:
Second boot light installed on left wheel well trim cover:
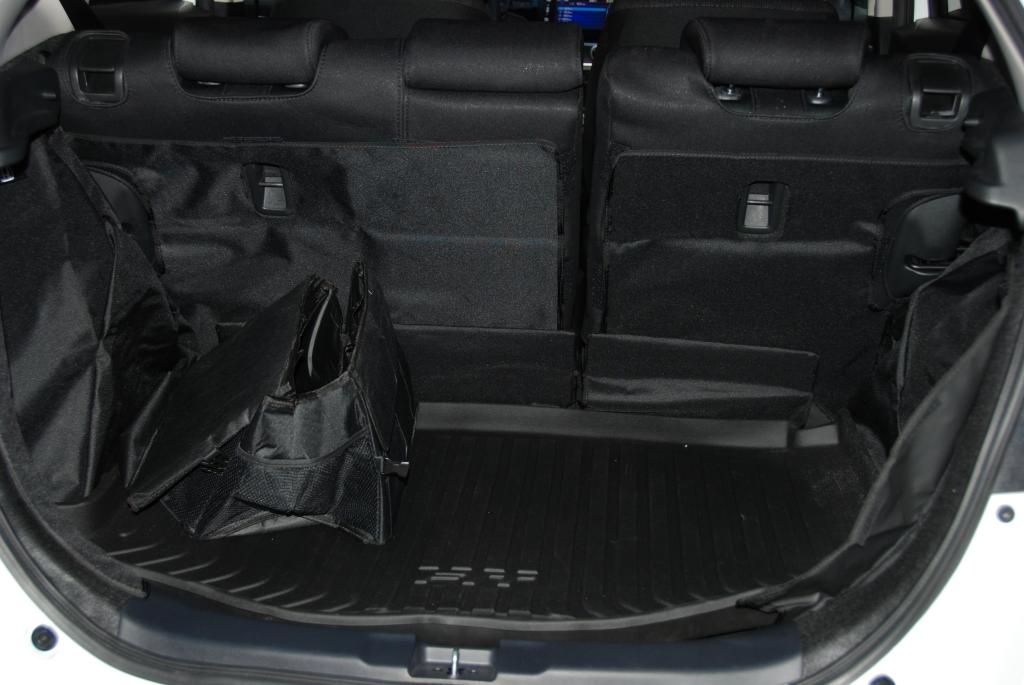
Quickly installed OEM cargo liner (collapseable boot bag was the wife's contribution):
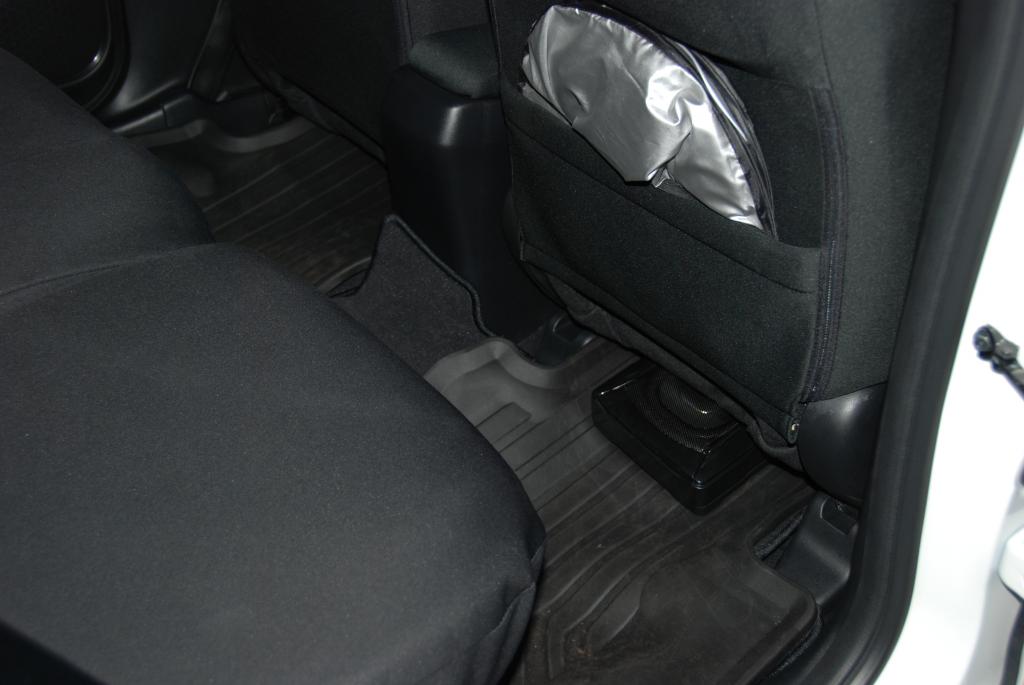
Found a place for the powered sub under the right front seat:
Took her for a drive to check for anything loose or rattles. Nothing there, however, with the seats out for 3 weeks, the airbag light stayed on. Had to reset and now, all is good.
For some reason, the upgraded stereo sounds better with the interior in place. No wonder the guys at the stereo shop didn't want to EQ my sytem until the interior was back in.
Finally, the Rottboy project is nearing its conclusion. Probably won't install the rear park sensors. The little Fit is just looking too busy.
Front seats back in:
REar seats in:
Second boot light installed on left wheel well trim cover:
Quickly installed OEM cargo liner (collapseable boot bag was the wife's contribution):
Found a place for the powered sub under the right front seat:
Took her for a drive to check for anything loose or rattles. Nothing there, however, with the seats out for 3 weeks, the airbag light stayed on. Had to reset and now, all is good.
For some reason, the upgraded stereo sounds better with the interior in place. No wonder the guys at the stereo shop didn't want to EQ my sytem until the interior was back in.
Finally, the Rottboy project is nearing its conclusion. Probably won't install the rear park sensors. The little Fit is just looking too busy.
Last edited by ROTTBOY; Nov 2, 2014 at 10:31 AM.

Member
Joined: May 2014
Posts: 1,917
From: Delaware


Many thanks pal - rttby
Last edited by ROTTBOY; Nov 2, 2014 at 01:42 AM.


New Member
Joined: Oct 2014
Posts: 7
From: Sunny Diego
Has anyone had a clear bra installed? I am considering getting this for my Aegean Blue EX since I went through quite the effort to find my FIT in that color, definitely want to preserve it for as long as possible. I've been researching and it seems it is quite pricey to have it installed... has anyone had any success installing it on their own?
REply: Lotsa guys have done it. It is pricey if you want it done right. There are a couple of threads/posts on this. IMO, one of the best things to purchase for your Fit if you want to preserve the finish and prevent those deadly road chips.
Post your result. Pics too!!! Happy shopping!!! - rttby
REply: Lotsa guys have done it. It is pricey if you want it done right. There are a couple of threads/posts on this. IMO, one of the best things to purchase for your Fit if you want to preserve the finish and prevent those deadly road chips.
Post your result. Pics too!!! Happy shopping!!!
- rttby
Last edited by ROTTBOY; Nov 2, 2014 at 08:10 PM.


Thread Starter
|
Someone that spends his life on FitFreak.net
Joined: Mar 2014
Posts: 1,116
From: Hawaii: relocated to Western Canada Sept, 2015
SIRIUS XM ONYX wired & tested
Well wishes much appreciated!
Am pretty tired too just spending all this time on mod installs. Feels good though, when a job is done right and neat. If anything would ever go wrong, at least I'll know how all the accessories were put together.
With all the months spent waiting for delivery, the accessory buying mode transformed into full gear - thanks to reading all mod posts from the FF GD and GE guys who are the "trend setters".
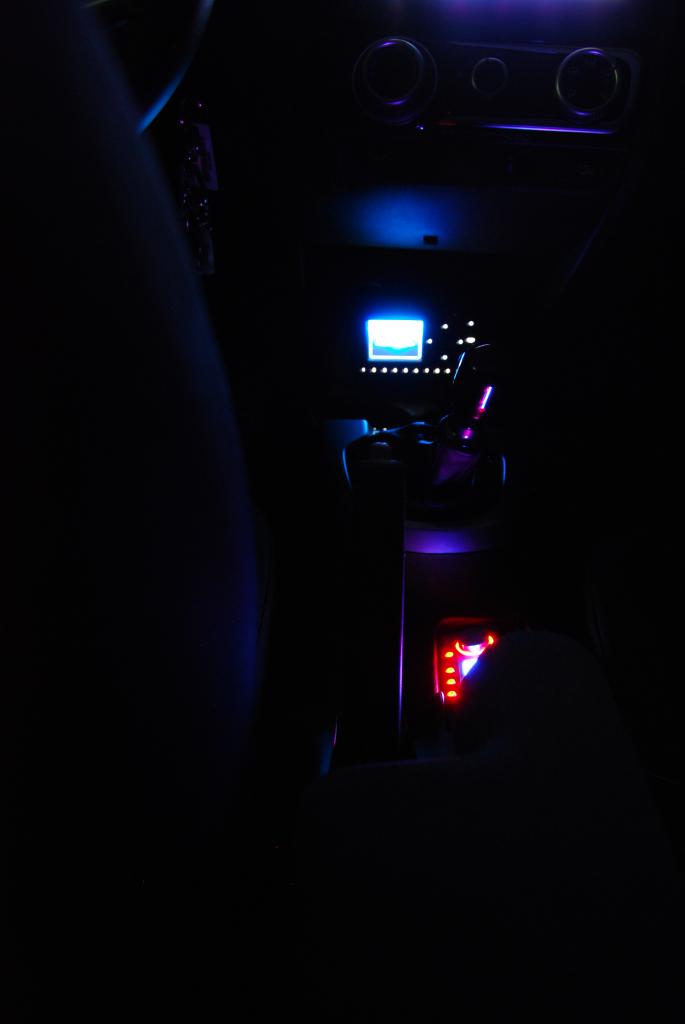
Before and in between today's football games, found to time to temporarily power-up the sat radio. Pre-fed the line the day before. Except for a faulty audio cable, it works great and sounds deadly, clear, clean and firm. Have the sat radio's audio out jack go into the Audison SP's Aux input. Very clean sounding indeed!!!
Am pretty tired too just spending all this time on mod installs. Feels good though, when a job is done right and neat. If anything would ever go wrong, at least I'll know how all the accessories were put together.
With all the months spent waiting for delivery, the accessory buying mode transformed into full gear - thanks to reading all mod posts from the FF GD and GE guys who are the "trend setters".
Before and in between today's football games, found to time to temporarily power-up the sat radio. Pre-fed the line the day before. Except for a faulty audio cable, it works great and sounds deadly, clear, clean and firm. Have the sat radio's audio out jack go into the Audison SP's Aux input. Very clean sounding indeed!!!

Member
Joined: Jul 2014
Posts: 334
From: Florida, USA
Rottboy, can you lend any insight into how difficult it might be to add a switch to the OEM ambient light kit? I think yours looks great BTW. Awesome work on all of your mods. You are an inspiration to all of us FitFreaks.
Anyway, my hope would be to just splice a switch into the light kit, maybe after the wiring harnesses and before where it splits into the two light modules. I don't want to change how it connects to the vehicle,; I just want to have the option of switching it off. I want to put the switch into one of the blanks a la SilverEX15. Having done the install, and because you seem pretty skilled at wiring in general, can you comment on how hard this might be?
My "fear" is that Ill cut the OEM kit to find 6 multi-colored wires and I'll have no idea what they do or where to attach the switch. Any input is helpful input. Thanks!!
EDIT: Oh and I like your shift knob! I have the same one in the torch blue to match my ABM Fit. I got the other adapter ring on ebay, the one the is more conical. I'll try and post pics, but I must say I live the low-pro one that you and apexracing had.
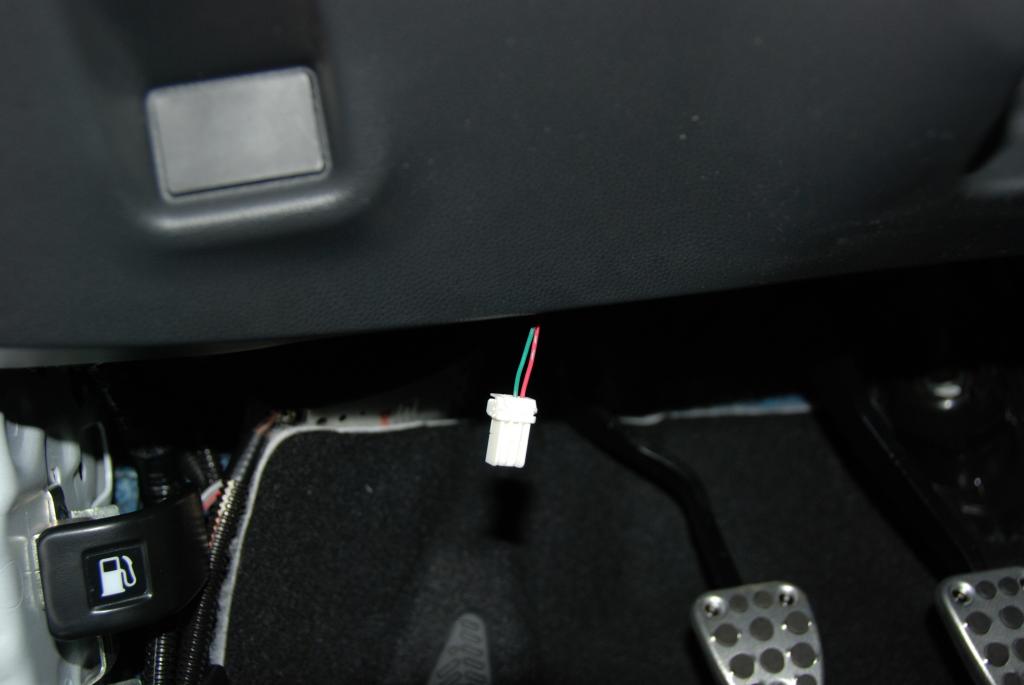
REply: Took out the connectors for both ambient light and there are only two wires (red and green) which can easily be tapped. Find those same colored wire in the main connector of the wire harness PLUG and the tap for the switch can go there. Depending on the switch you decide on, if you don't need the switch be lighted, only one of the wires can be used. The switch will interrupt the power (no matter which color is chosen). If you want the switch light to work then both wires have to be tapped. As always, when working with any electrical connection, unhook the negative terminal from the battery.
Driver's side Ambient light connector
I do suggest that before tapping any wires, install the ambient lights first. See if you can live with the lights going on (only when the park/headlight switch is on). IMO they are not overly bright. Sorta like they give a warm look to the front footwell areas.
As for the gearshift knob, your gonna like using that adaptor. A little tricky to do the final zip tie but worth the effort. If it wasn't for the guys on the FF forum who brought up this issue, made suggestions and found the solution - I would still be searching for an answer!!!
Post what you decide to do. - rttby
REPLY to ROTTBOY REPLY:
Sweet! Thank you! I will take that advice and install as is for now; I think you bring up a good point on them being subtle and not overly bright. It's good to know that it would be easy to add the switch down the road though. As for the knob, I love it. Every time I unscrew it, I'm surprised again by how heavy it is. Thanks to your instructions for removing the console, I was able to switch the boot ring fairly easily (albeit in way more steps than I expected). The adapter ring I got is about an inch and a half long with a sort of conical shape. The curve and diameter at the top match the blox knob perfectly, so it looks like they came together. It is a bit tall though, and I am not sure that I like how big the whole set-up looks. It shifts so nicely with the extra height and weight though.
Thanks again for the reply. Rottboy comes through again!
Anyway, my hope would be to just splice a switch into the light kit, maybe after the wiring harnesses and before where it splits into the two light modules. I don't want to change how it connects to the vehicle,; I just want to have the option of switching it off. I want to put the switch into one of the blanks a la SilverEX15. Having done the install, and because you seem pretty skilled at wiring in general, can you comment on how hard this might be?
My "fear" is that Ill cut the OEM kit to find 6 multi-colored wires and I'll have no idea what they do or where to attach the switch. Any input is helpful input. Thanks!!
EDIT: Oh and I like your shift knob! I have the same one in the torch blue to match my ABM Fit. I got the other adapter ring on ebay, the one the is more conical. I'll try and post pics, but I must say I live the low-pro one that you and apexracing had.
REply: Took out the connectors for both ambient light and there are only two wires (red and green) which can easily be tapped. Find those same colored wire in the main connector of the wire harness PLUG and the tap for the switch can go there. Depending on the switch you decide on, if you don't need the switch be lighted, only one of the wires can be used. The switch will interrupt the power (no matter which color is chosen). If you want the switch light to work then both wires have to be tapped. As always, when working with any electrical connection, unhook the negative terminal from the battery.
Driver's side Ambient light connector
I do suggest that before tapping any wires, install the ambient lights first. See if you can live with the lights going on (only when the park/headlight switch is on). IMO they are not overly bright. Sorta like they give a warm look to the front footwell areas.
As for the gearshift knob, your gonna like using that adaptor. A little tricky to do the final zip tie but worth the effort. If it wasn't for the guys on the FF forum who brought up this issue, made suggestions and found the solution - I would still be searching for an answer!!!
Post what you decide to do. - rttby
REPLY to ROTTBOY REPLY:
Sweet! Thank you! I will take that advice and install as is for now; I think you bring up a good point on them being subtle and not overly bright. It's good to know that it would be easy to add the switch down the road though. As for the knob, I love it. Every time I unscrew it, I'm surprised again by how heavy it is. Thanks to your instructions for removing the console, I was able to switch the boot ring fairly easily (albeit in way more steps than I expected). The adapter ring I got is about an inch and a half long with a sort of conical shape. The curve and diameter at the top match the blox knob perfectly, so it looks like they came together. It is a bit tall though, and I am not sure that I like how big the whole set-up looks. It shifts so nicely with the extra height and weight though.
Thanks again for the reply. Rottboy comes through again!
Last edited by ROTTBOY; Nov 3, 2014 at 01:50 PM.
Member
Joined: Jul 2014
Posts: 227
From: Los Angeles
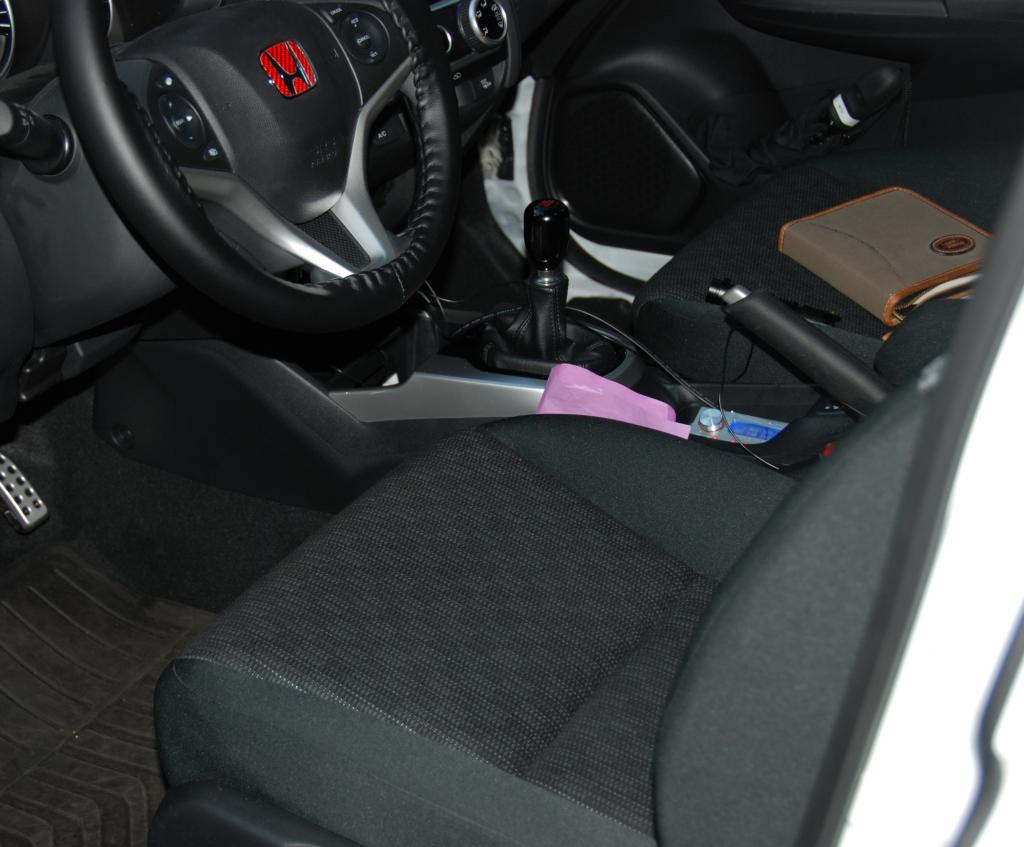
Rott, what under-seat powered sub do you have? In the picture on the last page, is that passenger seat all the way back? The seat clears the sub completely, going back and forth?
I made various boxes of different sizes, to match some of the powered under seat subs I've been looking at, and so far nothing fits under the passenger seat.
I am contemplating dusting off the fiberglassing skills and making a box for the rear left trunk area, but if an under-seat sub fits I'll do that. How's the sub sound? Looking to add just a little low end to the nonexistent stock sytem...
NM scrolled further back, you're using a Kenwood KSC-SW11
I did rig up a box for that, and it didn't seem to fit...
With it sitting where it is, does the passenger feel anything through the seat? Does it slide any further in?
REply: BbadVoDooGu, the Kenwood powered sub is installed under the right front passenger seat. It clears completely (at least on an LX) back and forth. Definitely can install further in but when testing, most of the bass boom is absorbed by the seat cushion. Therefore I installed in half-way. The pic has the seat in mid-portion. If its extended back all the way, it covers the sub.
My right rear seat passengers will have no space to extend their feet under the passenger's seat. (that said, its usually only me and wife riding around - back passengers, mostly, are relegated for my canine household members). The bass can be heard irregardless of placement, but I wanted to feel the medium "thumP' this little thing is more than capable of pumping out. There is free movement back and forth. As posted on the ICE threads, I find this little Kenwood amazing!!! Speaker design is rectangular but actually works!!!
The install consisted of using the black metal frame touching the carpet. Only the front passenger seat has this and that's what the sub is anchored too. Didn't want to drill anything so I fabricated a metal piece to act as a big washer against the oblong frame holes. Only the forward portion is bolted in (the underneath of the sub is lined with CCF to prevent vibration/rattles). The rear floor mat slips under the sub's unbolted area giving it a firm cushion with no up/down movement.
JL also makes a power sub with a small footprint. Its rated pretty good. I went the cheaper route via the Kenwood.
Hope this helps somehow. Good luck and happy listening to us all!!!! - rttby
Last edited by ROTTBOY; Nov 3, 2014 at 06:48 PM.


Member
Joined: Sep 2014
Posts: 95
From: New York
Is that rear hatch trim plasti dipped? I like that and was thinking about adding some color to mine that way instead of replacing it with the black LX trim.


Yes it's blaze purple with a violet metalizer top coat. The blaze colors fade really bad so maybe experiment with the other types to find what color you're looking for.
Member
Joined: Jul 2014
Posts: 227
From: Los Angeles
Rott, would that SW11 sub fit where you put your amp?
I looked at the foam piece, it has a slanted grade to it. I was thinking of cutting it out enough to fit the SW11 in there flush.
REply: It will fit except for the depth. You'll have to carve it out a bit. If your gonna do this, test the sub first covered in that area. Did a test, uncovered, cause initially was gonna let it sit in the boot area as it does have quick disconnectors as standard equipment. IMO, it doesn't sound as substantial as with the rear seat area. Am certain that the foam can take some modification to accept the sub. It's made of quality foam.
Once you decide and install, post your results. - rttby
Last edited by ROTTBOY; Nov 5, 2014 at 07:40 PM.
Thread Starter
|
Someone that spends his life on FitFreak.net
Joined: Mar 2014
Posts: 1,116
From: Hawaii: relocated to Western Canada Sept, 2015
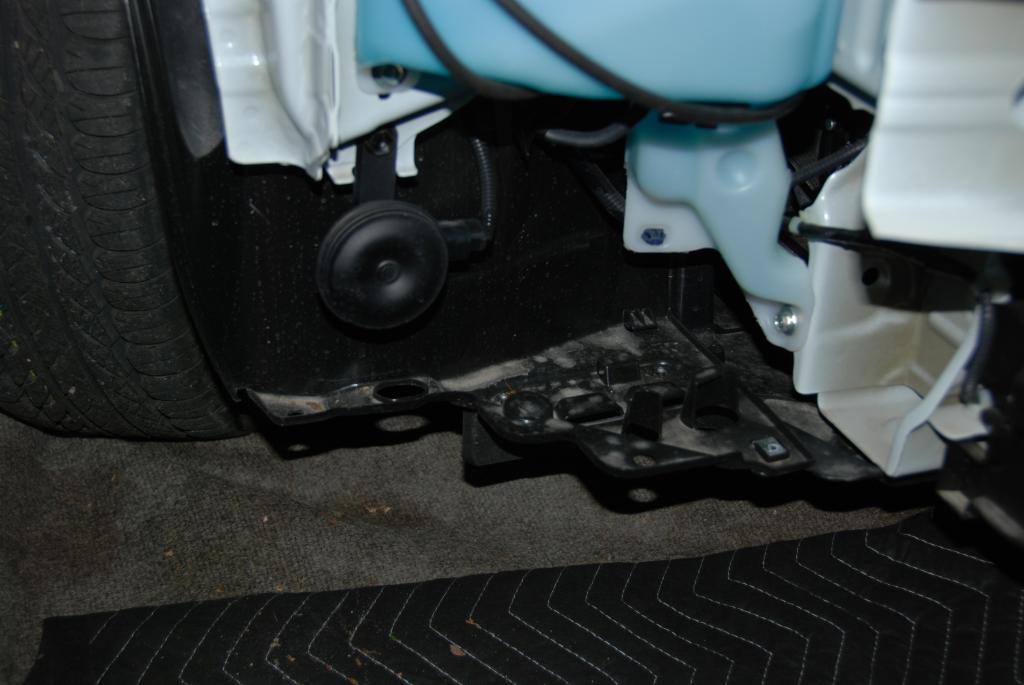
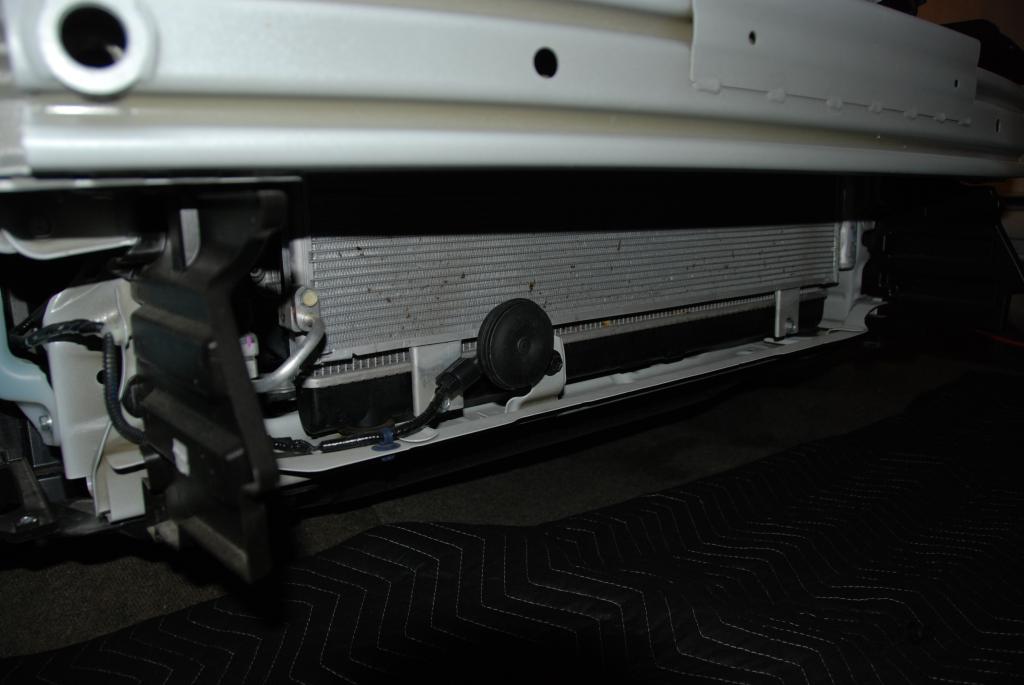
Horn install
Decided to install a pair of Hella horns which requires front bumper removal. Took me around three hours for the whole process. Instead of a high-tone beep the OEM's have, the Hella's are more of a "honk". Loudness is similar with the OEM's piercing as compared to the softer sounding Hella's.
Bumper off:
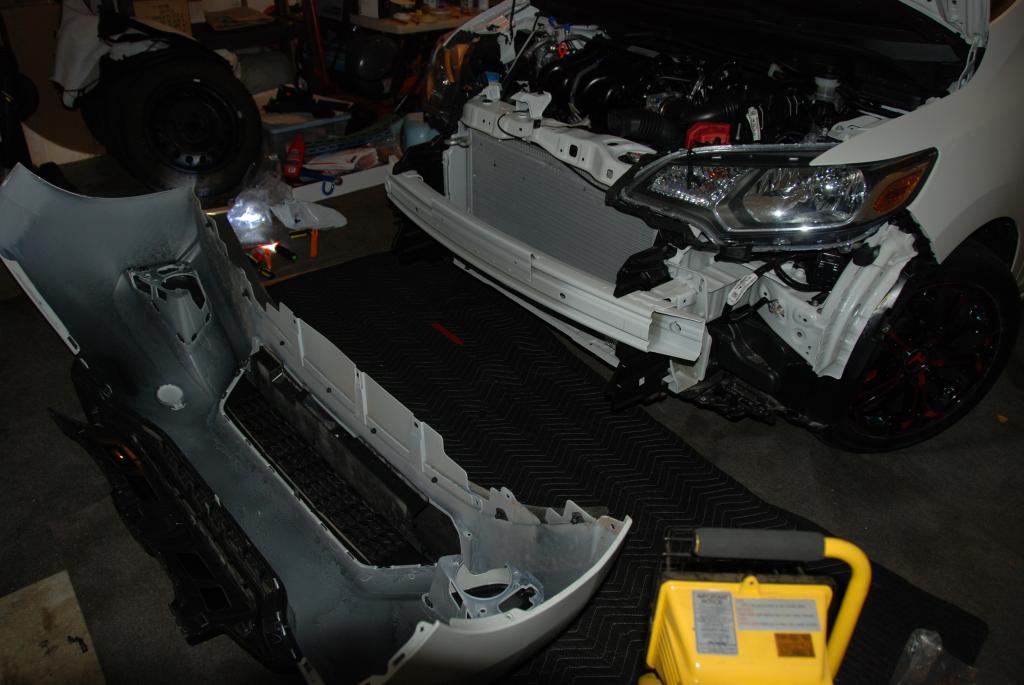
OEM horns. Under the bumper, they are located in front of the right tire and the other, in the center under the a/c condensor.
Hella's wired and installed.

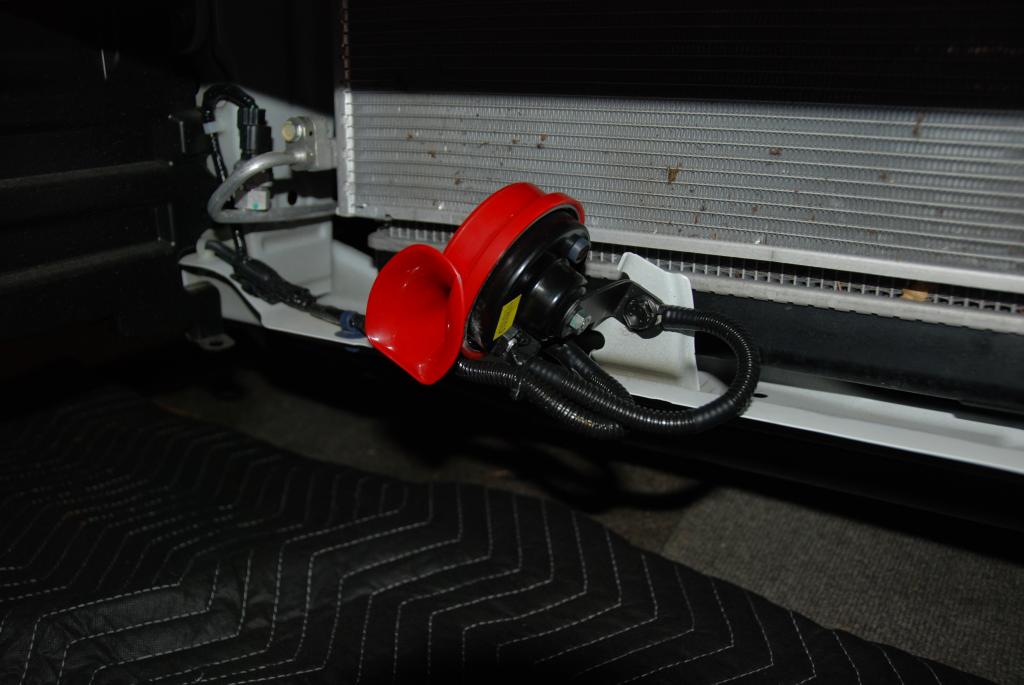
IMO, not a necessary mod. Just did it cause the horns were bought months ago thinking that Honda may put just a single horn like I got in my GD. I hated it!!!!
Well, at least, when I toot it'll sound like a different Fit.
Bumper off:
OEM horns. Under the bumper, they are located in front of the right tire and the other, in the center under the a/c condensor.
Hella's wired and installed.
IMO, not a necessary mod. Just did it cause the horns were bought months ago thinking that Honda may put just a single horn like I got in my GD. I hated it!!!!
Well, at least, when I toot it'll sound like a different Fit.

Member
Joined: Oct 2014
Posts: 342
From: Modesto, CA
It would be funny if you installed one of those semi truck horns with the expression "Get the hella out of my way cuz Fit is coming through!!"
Cool mod tho. So far the OEM horn seems to work ok but it does sound weak.
Cool mod tho. So far the OEM horn seems to work ok but it does sound weak.

Member
Joined: Jun 2014
Posts: 128
From: Bay Area, CA
Has anyone heard of anyone ever doing that?