
Sprintex Supercharger Install


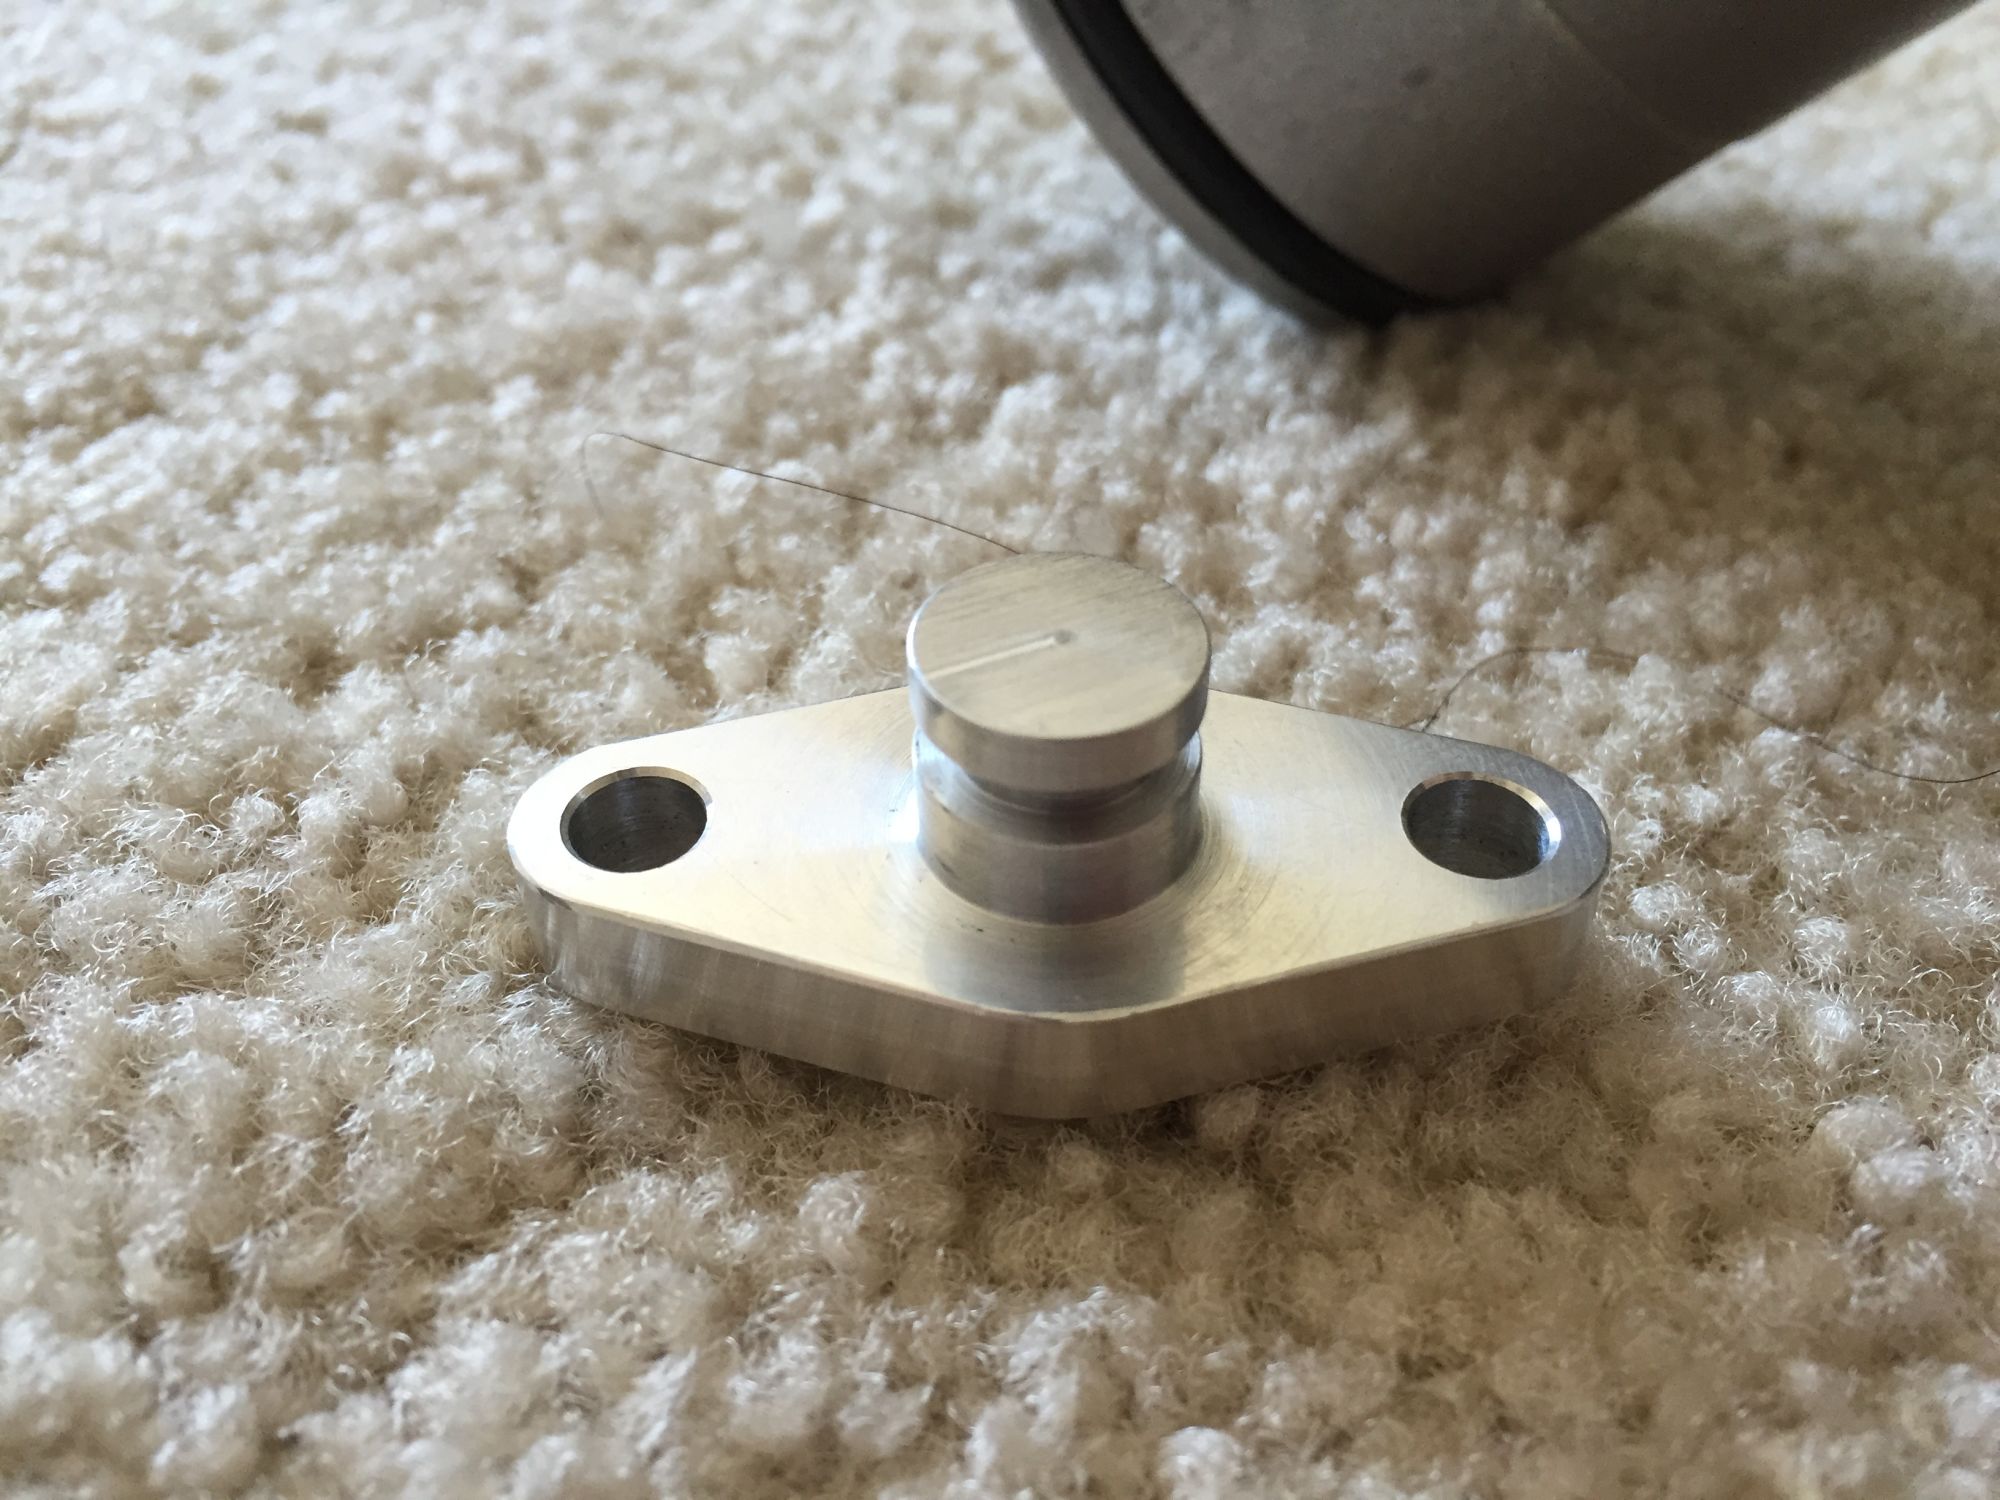
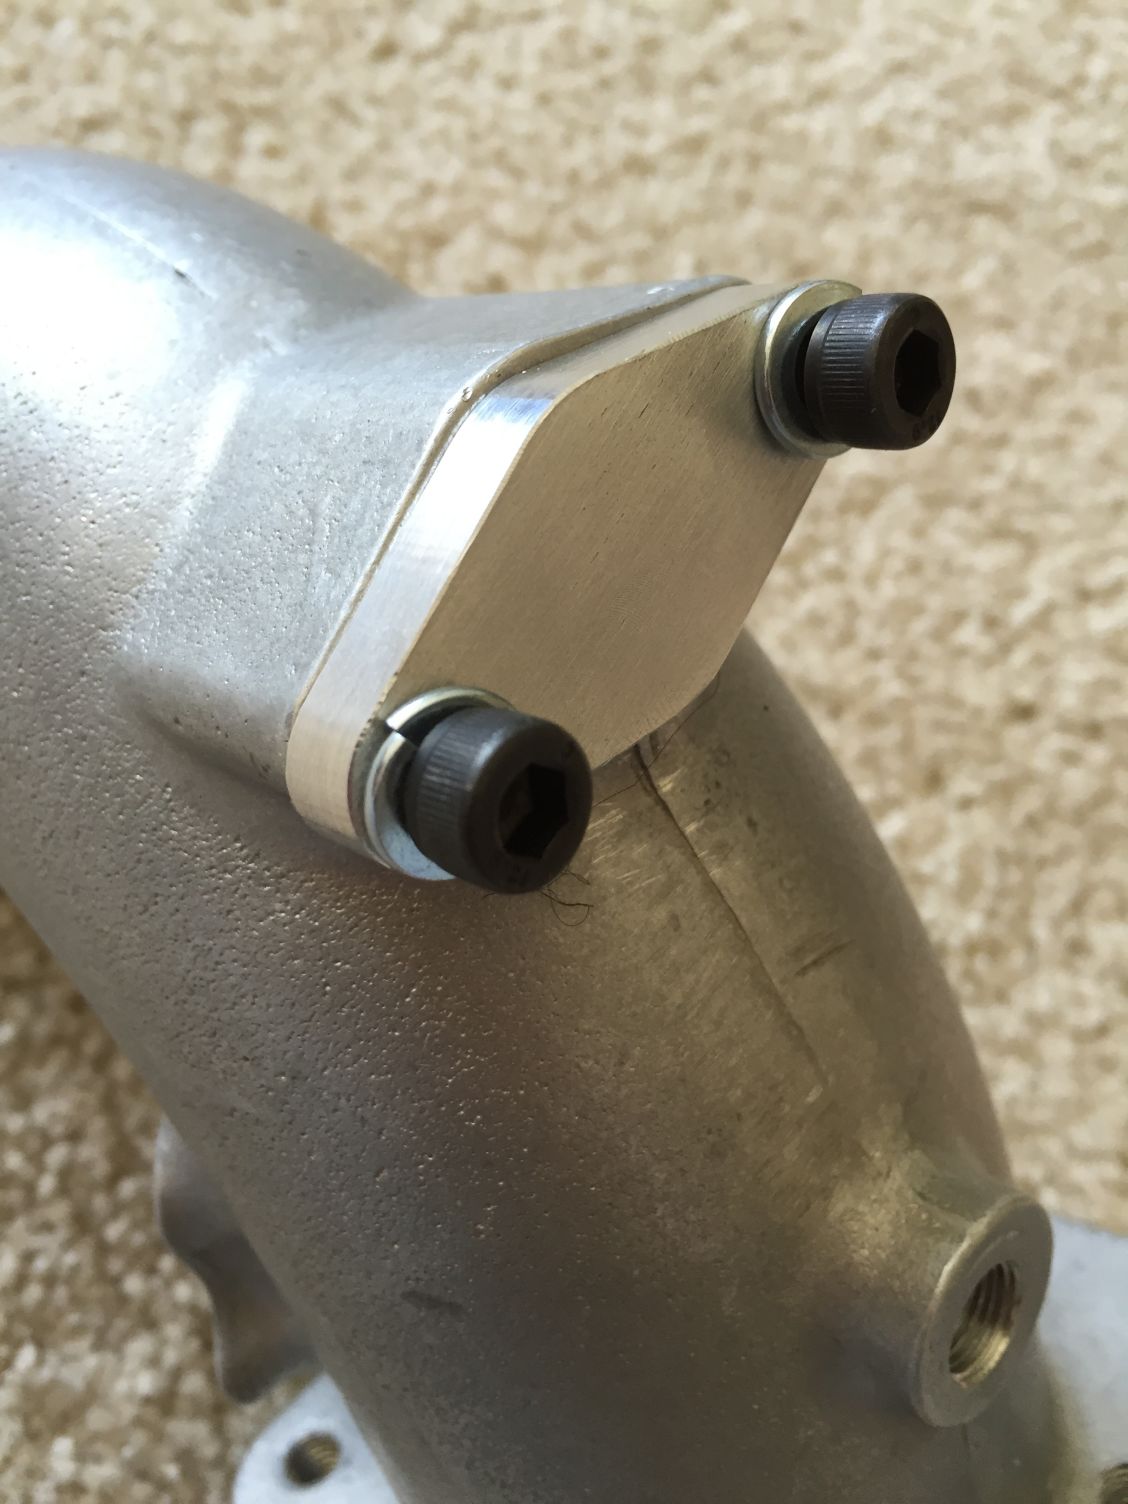
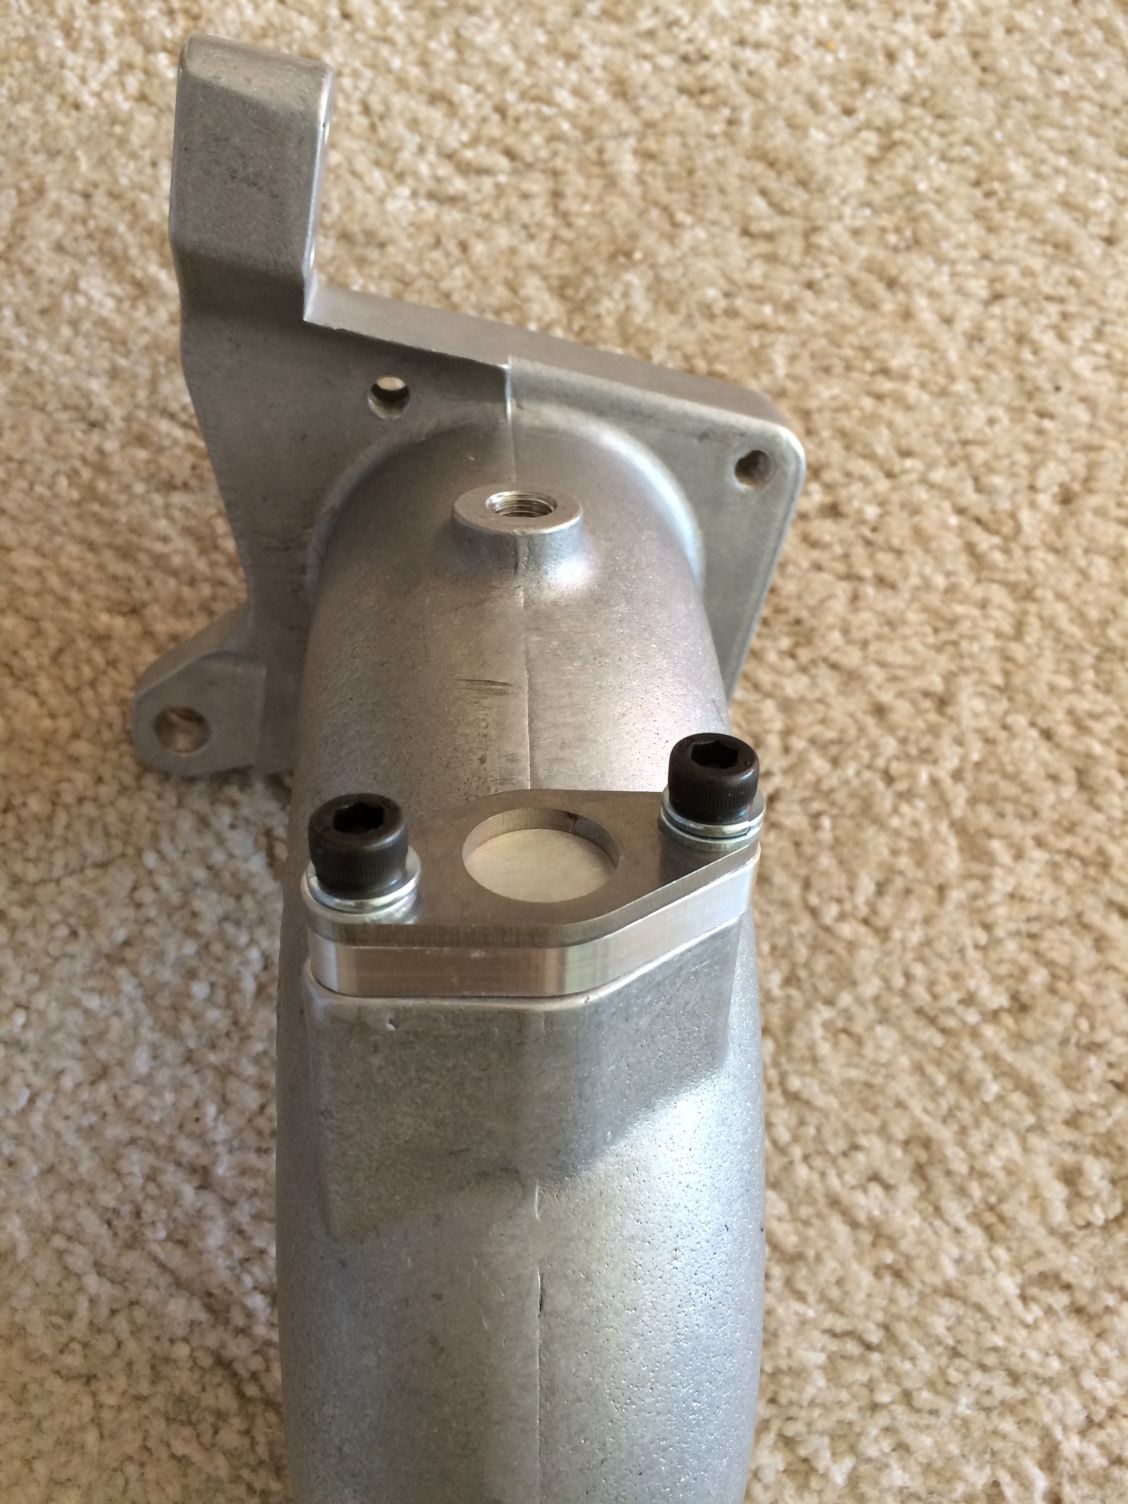
Today my CNC Machined 6061-T6 Aluminum Blocking Plate for the 5th injector on the intake elbow arrive and fit perfectly.
I also had bought several Viton O-Ring for this blocking plate...
the only parts that I still need to buy before I can install Sprintex is the Fuel Pump Wrench Tools that I just order today from Bernardi Honda so I can change my fuel pump... oh... and K-Tuner if I found the relay installation for VTEC activation that I plan to do this weekend not working well...

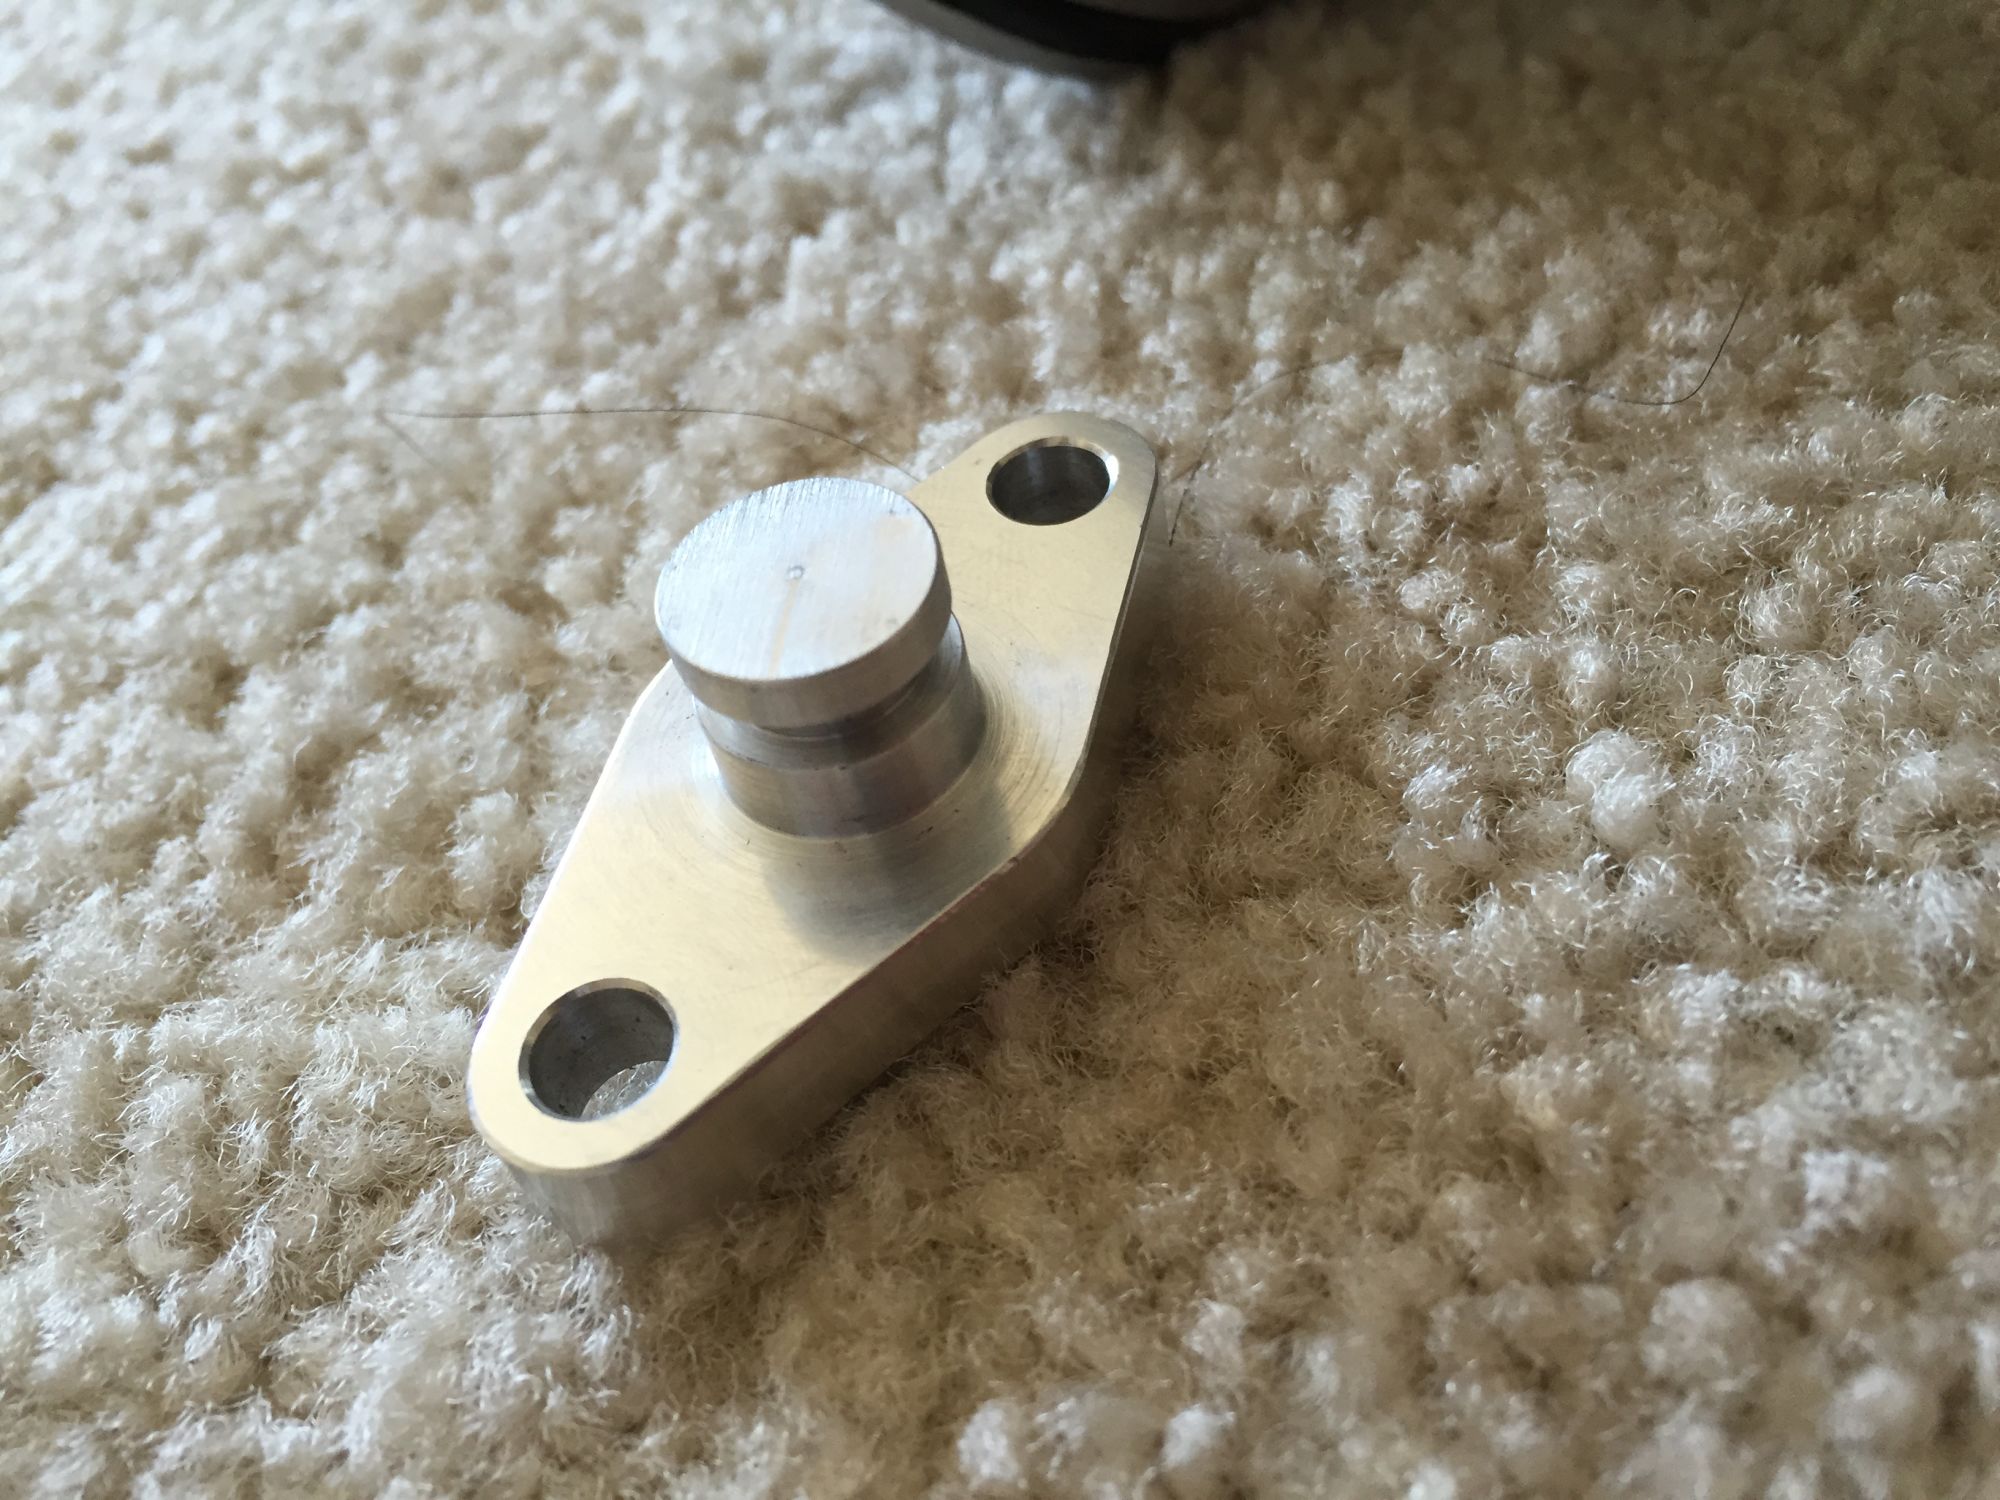
Put two Viton O-Ring size 12mmx1mm and 9mm x 2.5mm,
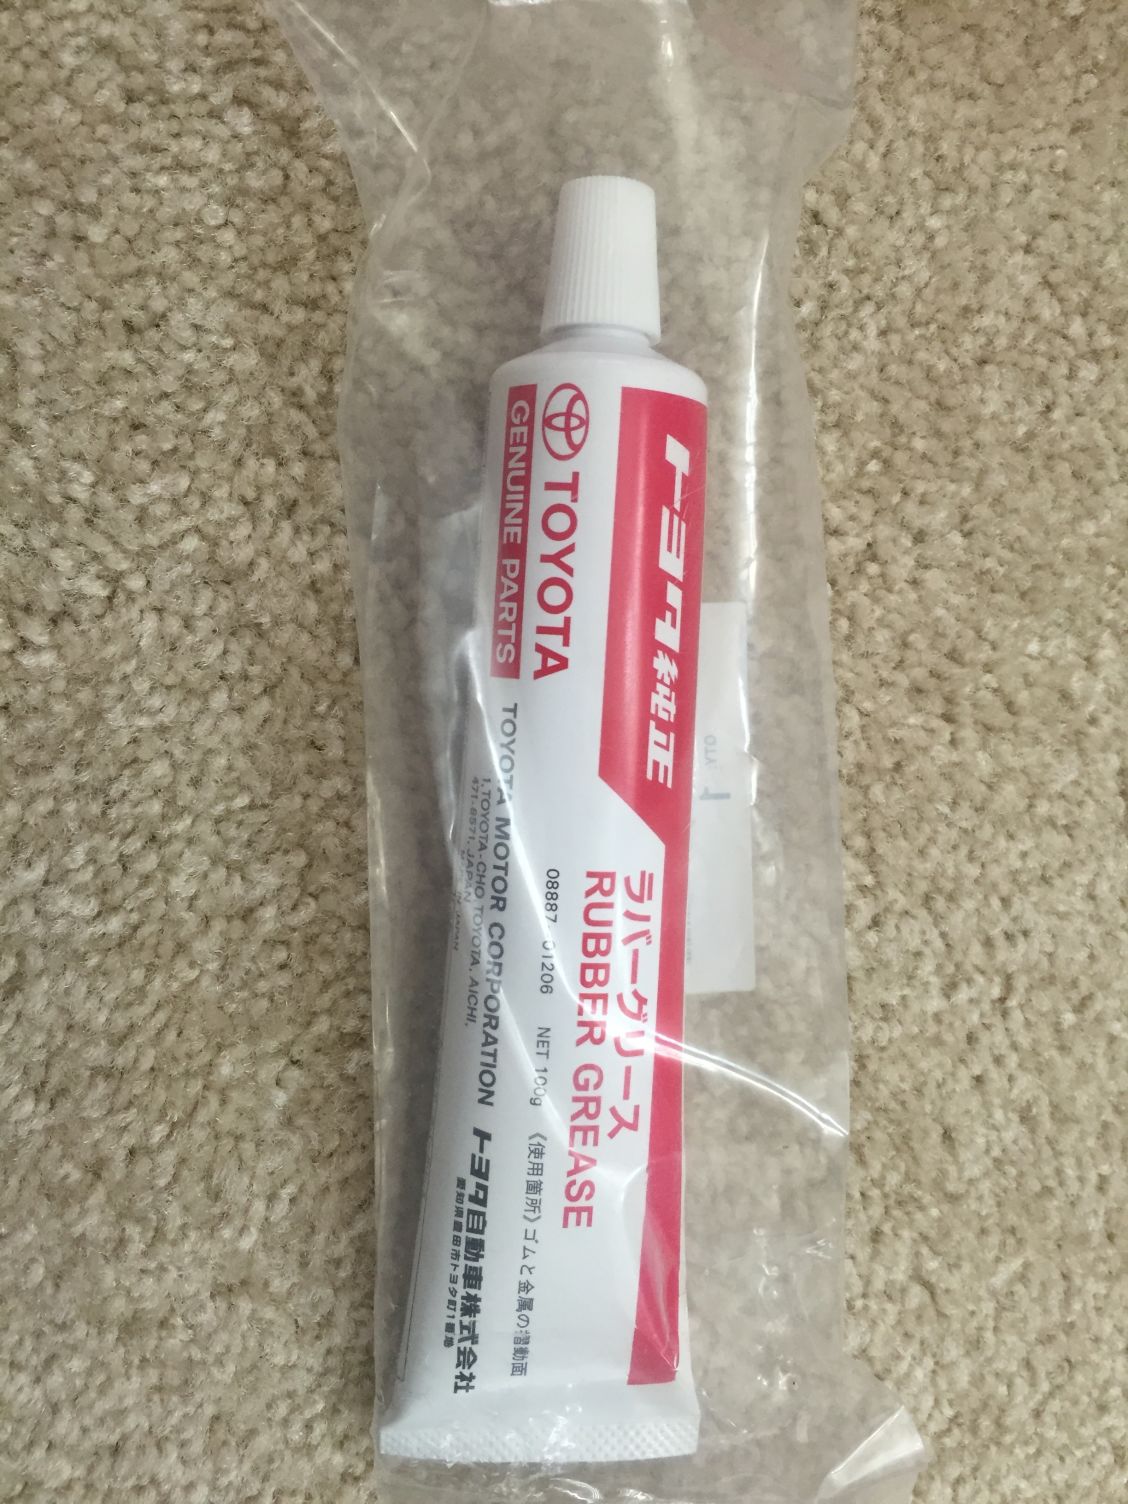
Use Rubber Grease so I can slide it in easily:
Tighten it using the original 5th injector as extra plate and some locking ring and nice Hex bolt:
I also had bought several Viton O-Ring for this blocking plate...
the only parts that I still need to buy before I can install Sprintex is the Fuel Pump Wrench Tools that I just order today from Bernardi Honda so I can change my fuel pump... oh... and K-Tuner if I found the relay installation for VTEC activation that I plan to do this weekend not working well...
Put two Viton O-Ring size 12mmx1mm and 9mm x 2.5mm,
Use Rubber Grease so I can slide it in easily:
Tighten it using the original 5th injector as extra plate and some locking ring and nice Hex bolt:
Last edited by BMW ALPINA; Jun 24, 2016 at 08:12 PM.
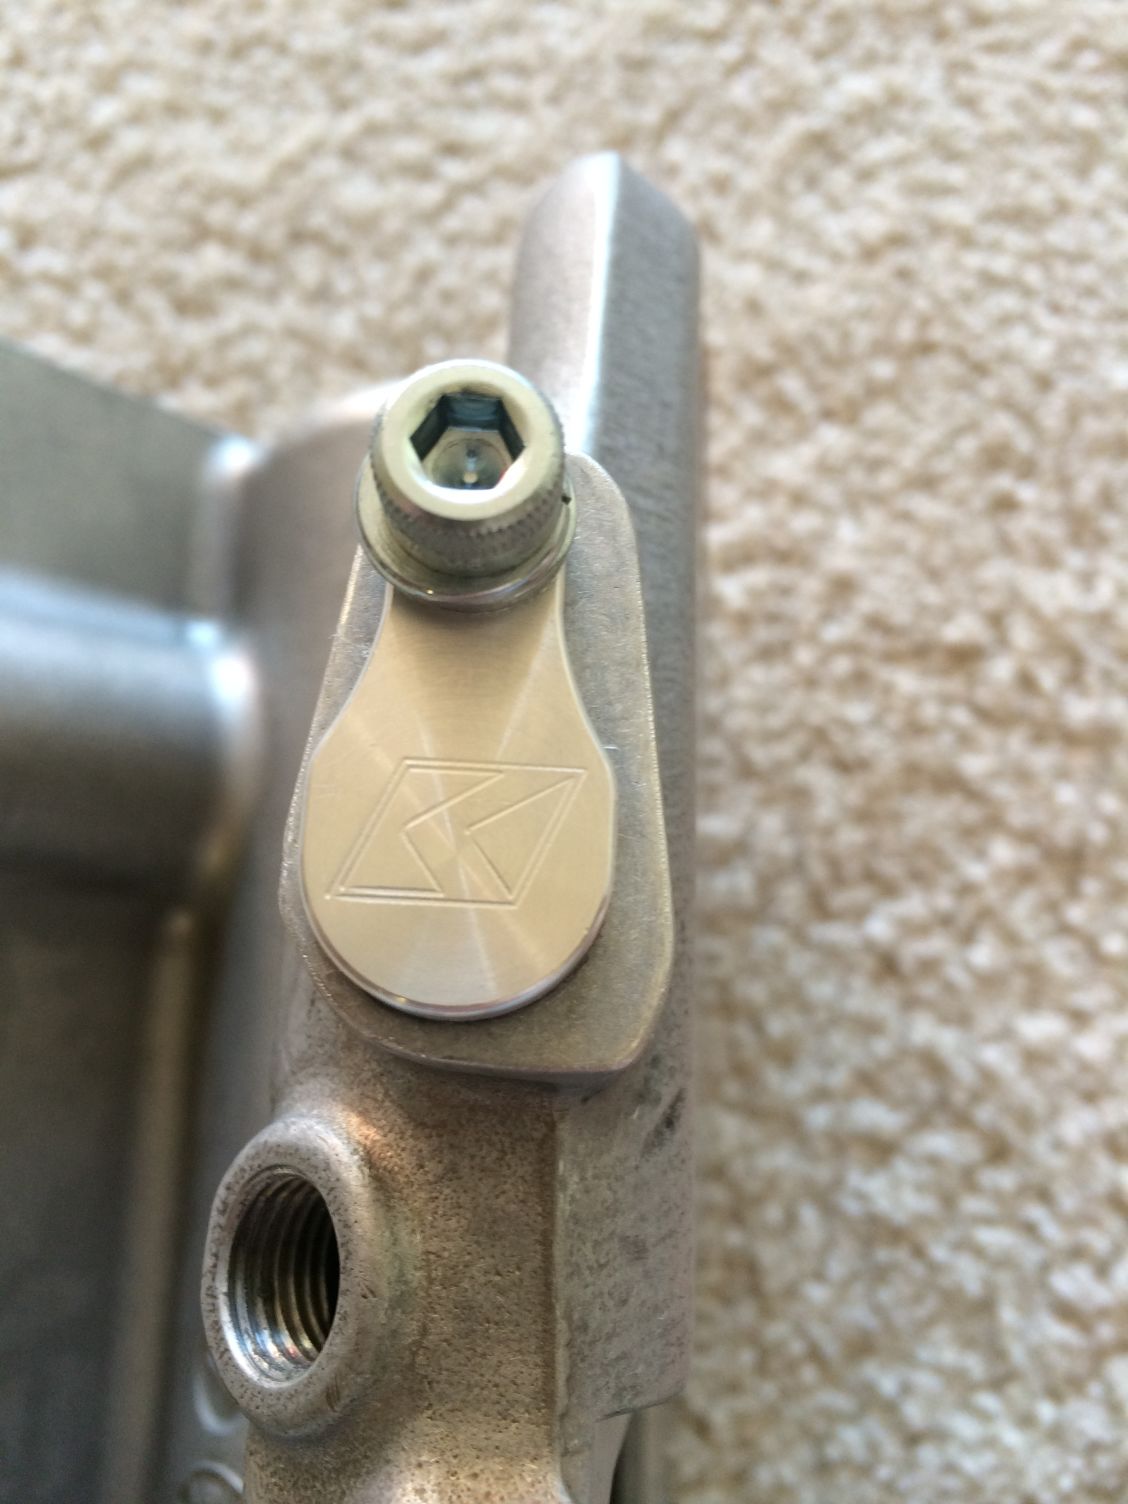
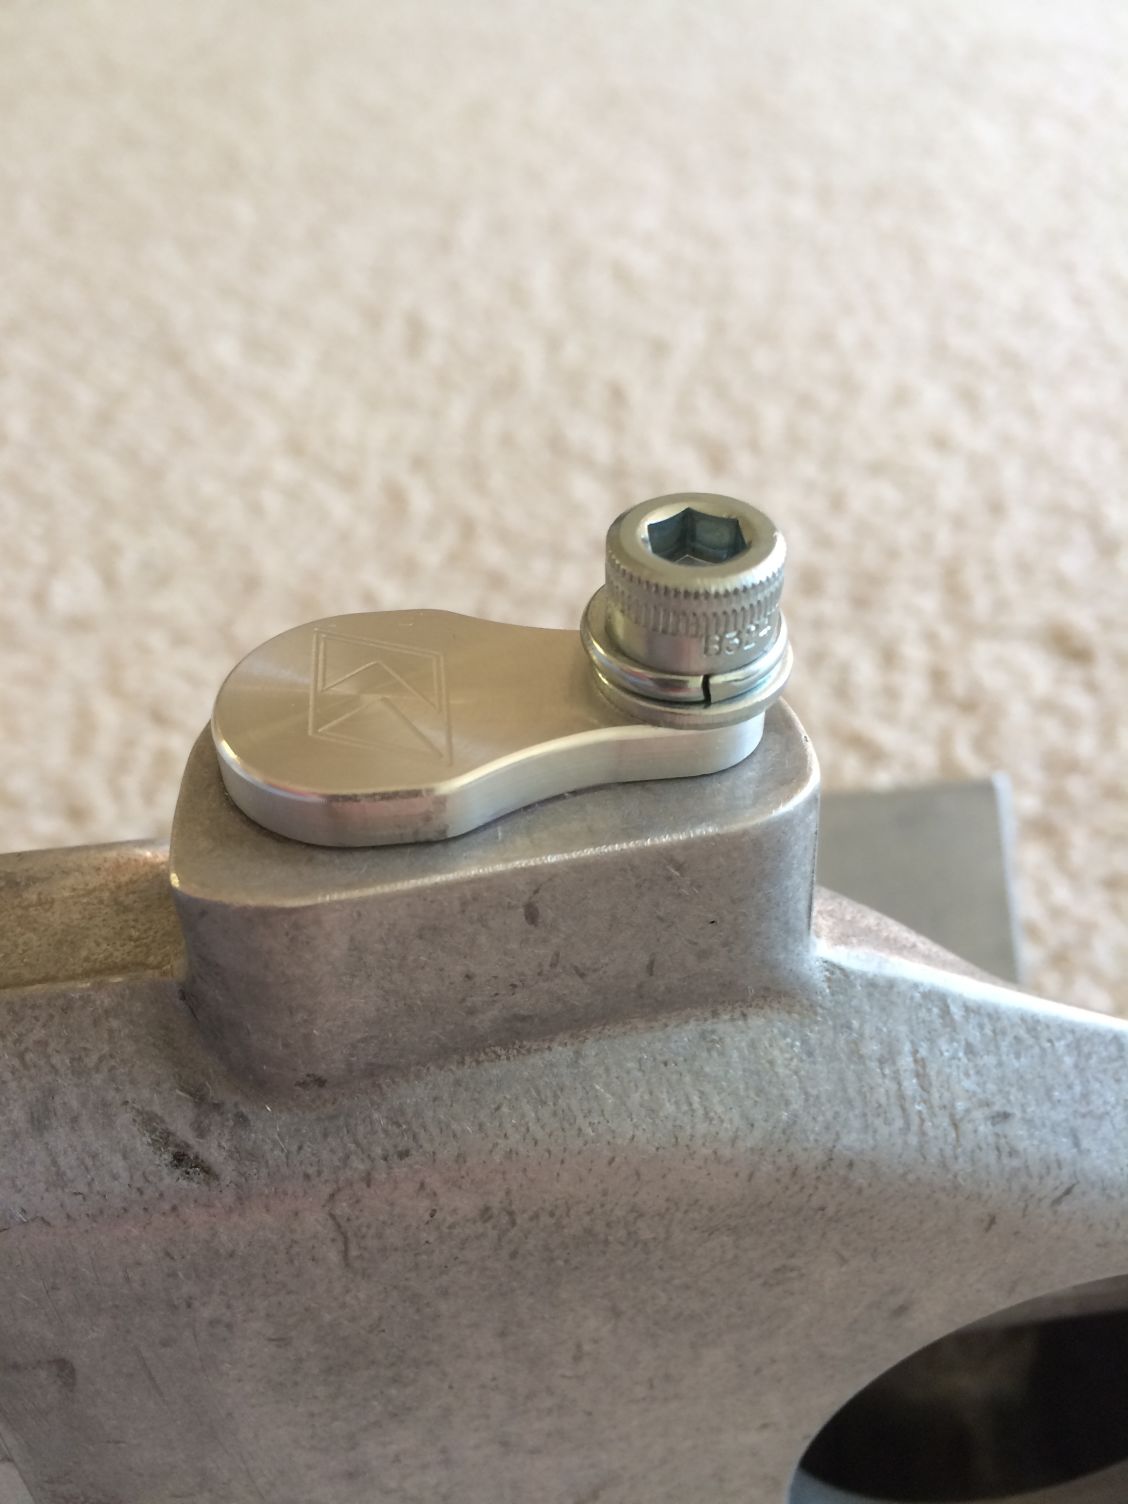
Now its time to block the MAP port plug on the Sprintex intake manifold.
I won't be using MAP sensor since I don't use Sprintex piggy back or K-Tuner for tuning it,
so I bought K-Tuned MAP Port Plug, put a different O-Ring to fit the larger MAP holes
and enlarge the bolt through holes on the K-Tuned MAP Port Plug,
http://k-tuned.3dcartstores.com/MAP-...lug_p_433.html
and here it is installed:
SlimChriz inform me that he used the original Sprintex Fuel Line that goes to the 5th injector as the line for his fuel pressure gauge (since we both not using 5th injector anymore) so following his path,
I try to used the original Sprintex Fuel Line but since I am not familiar with the quick connect fuel clip, I manage to broke the clip that goes to the 5th injector...
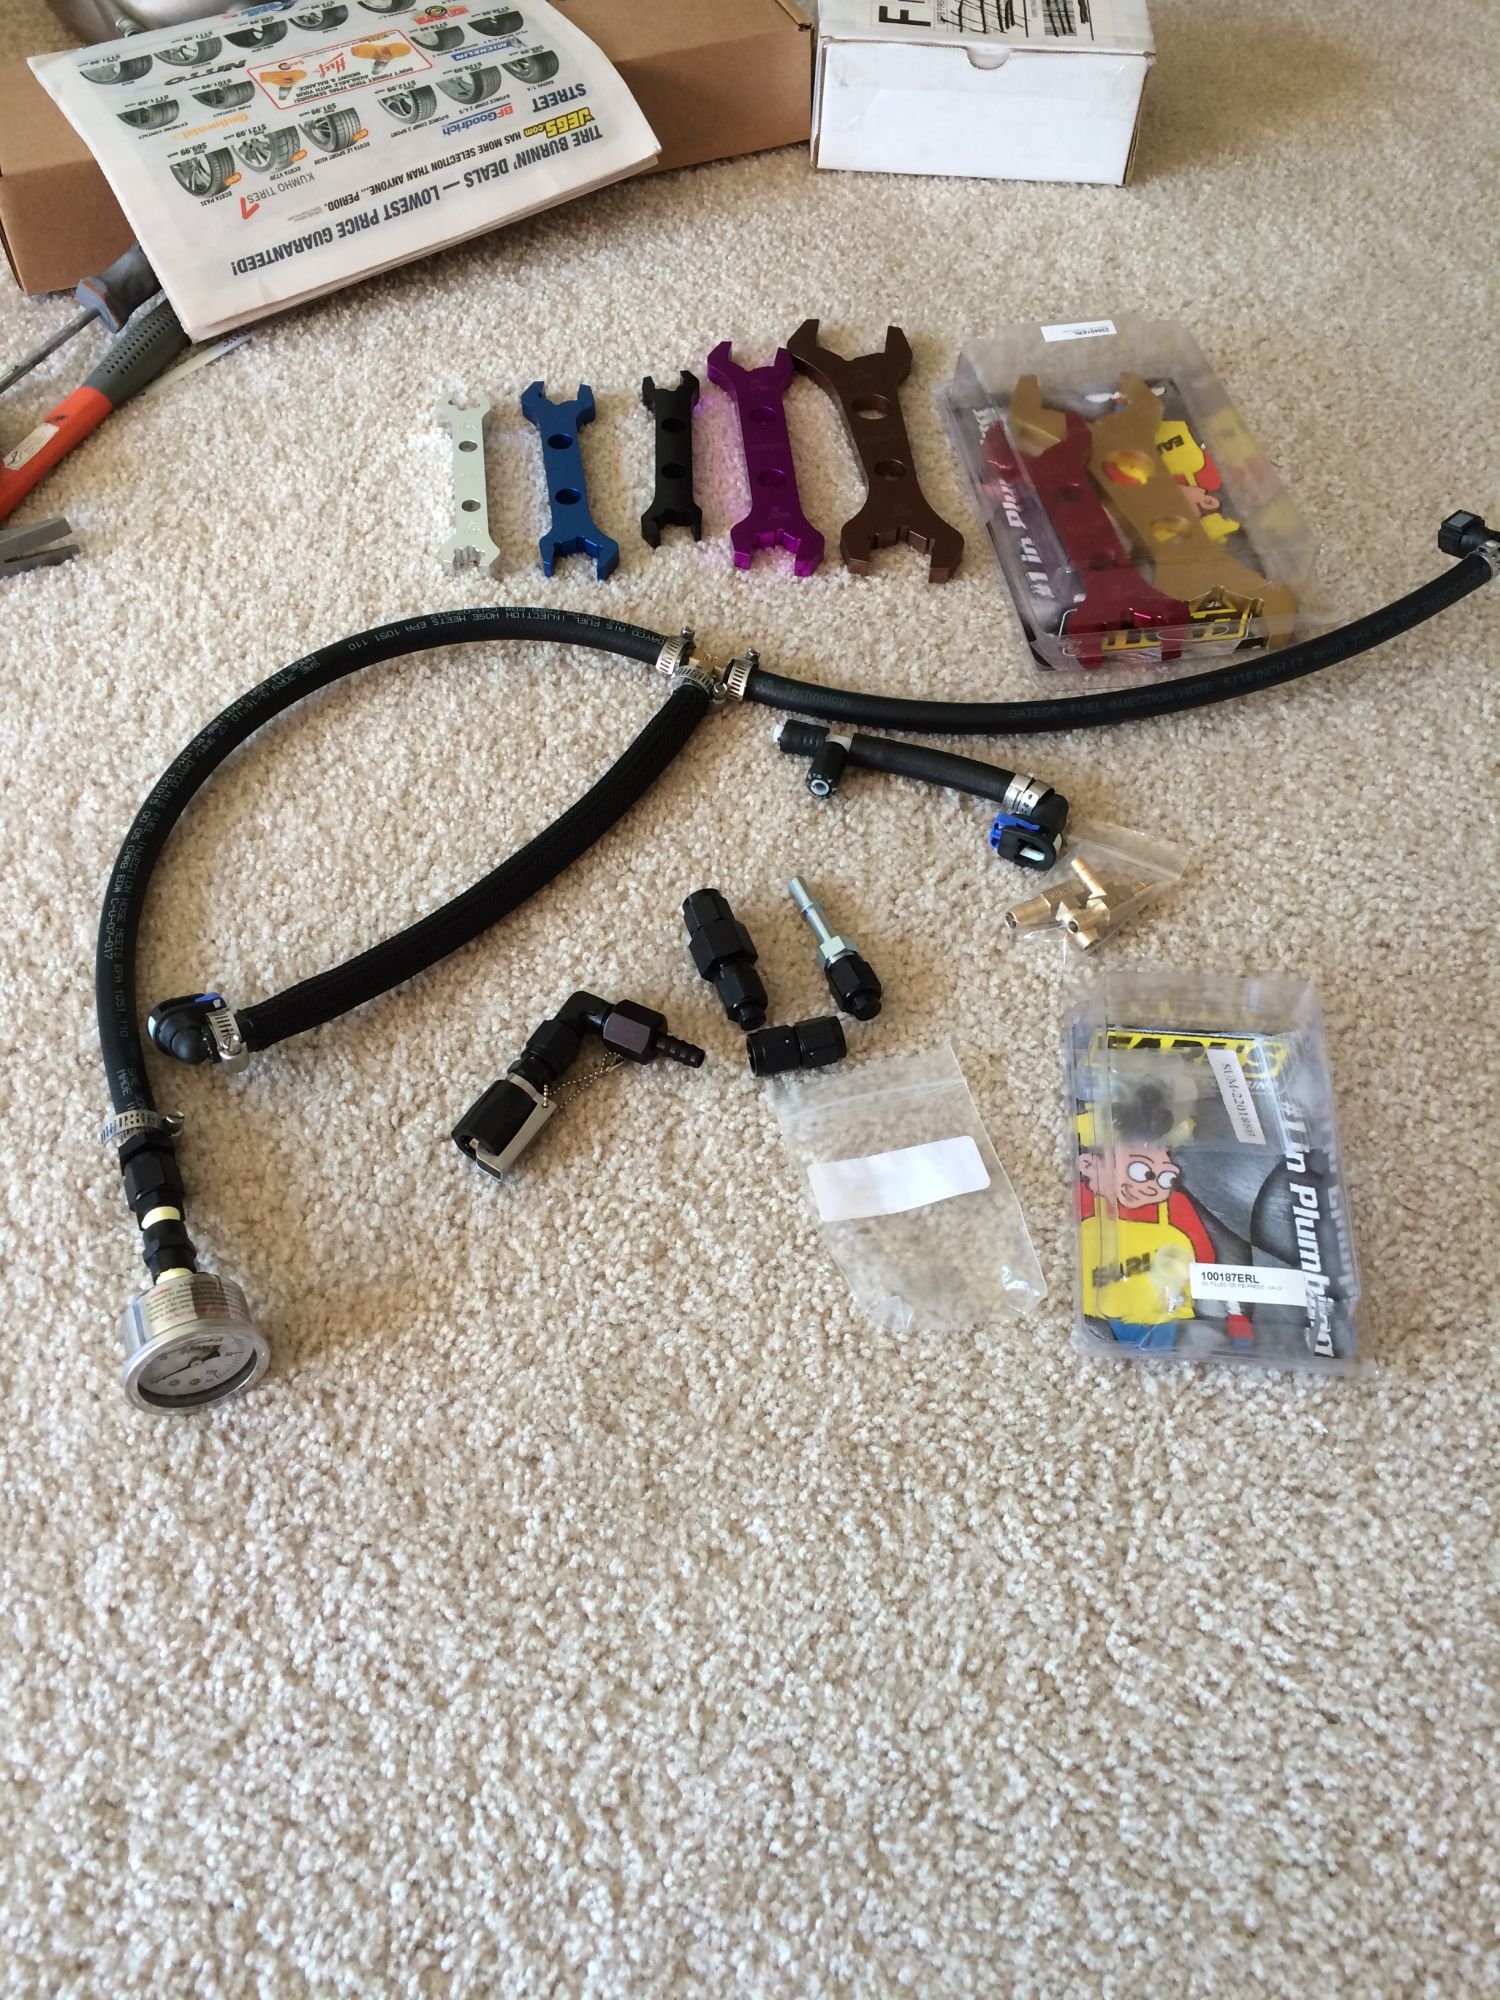
so I decided to modified the Sprintex fuel line, and replace/upgrade some parts:
a. I replace the white plastic TEE fitting to brass fitting,
b. I replace the short hose that goes to the 5th injector with longer hose so
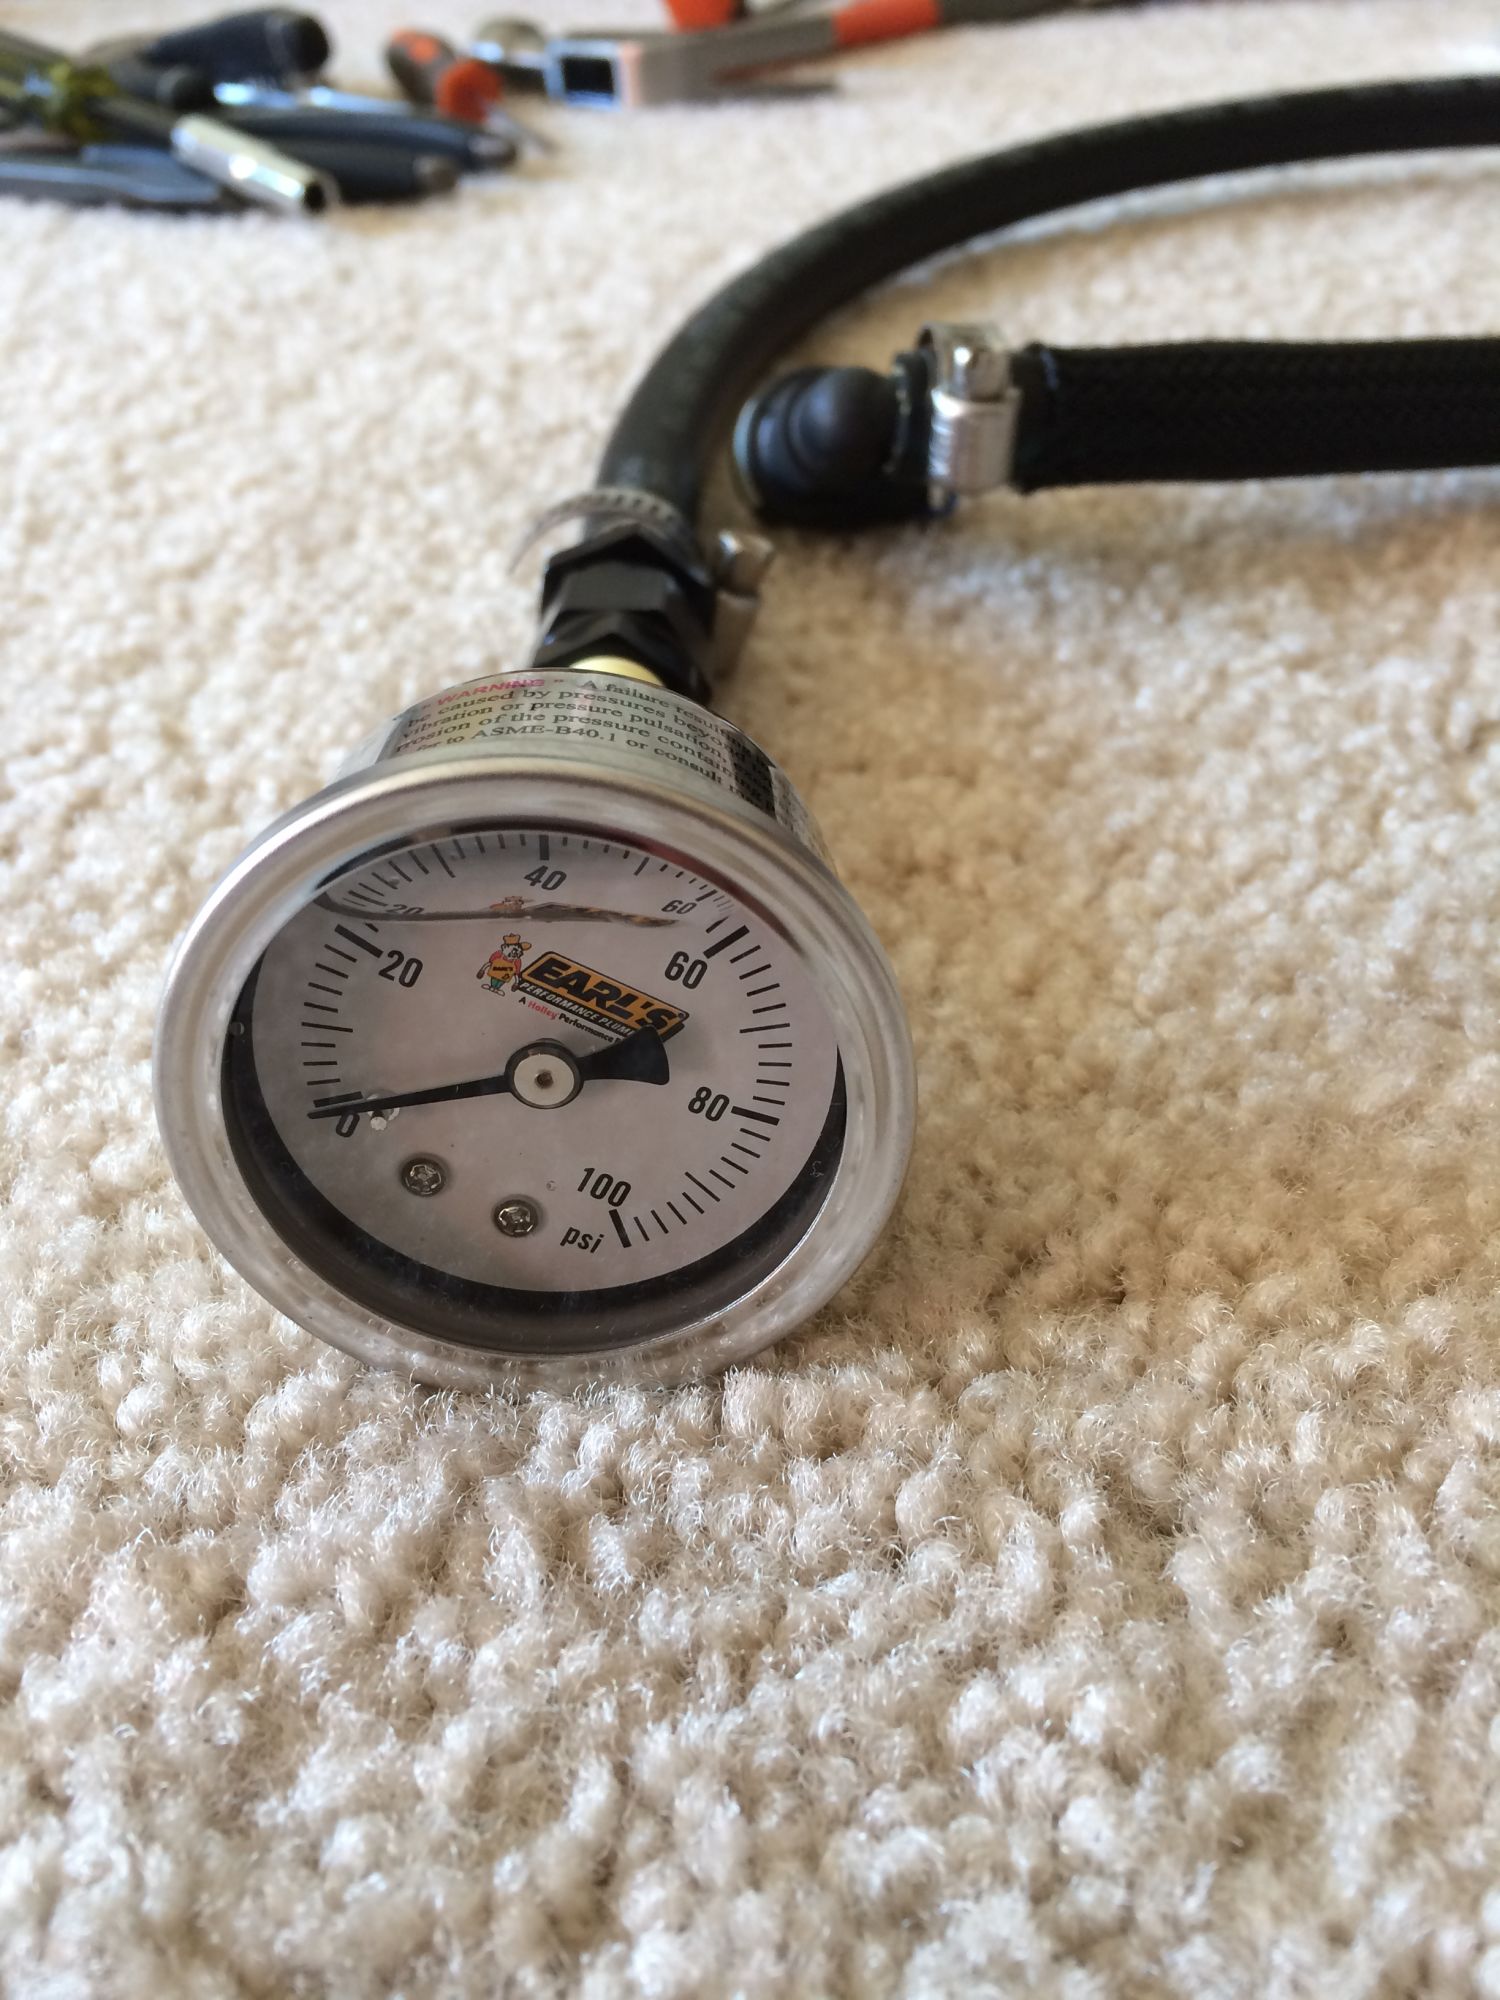
I can route the Earl's fuel pressure gauge upfront, between the throttle body and airbox so I can read it easily
c. I use combination of both Earl's and Summit Racing AN fitting for this purpose.
d. I also bought extra Earl's and Russel -6AN fitting for future upgrade to Goodridge 811 hose (with Goodridge end hose fitting) and extra adaptor so I can install Defi Fuel Pressure Gauge (electronic) inside the interior in the future.
At this moment, I am not doing the Goodridge -6AN fuel line upgrade because I am going to test the fuel pressure after I install the Denso fuel pump.
if the Denso fuel pump cause too much increase in fuel pressure, I will install Aeromotive Fuel Pressure Regulator with RETURN Line so if that is the case, I will need to buy longer -6AN fuel hose but if the pressure if not differ much,
then I will buy shorter -6AN fuel hose (Goodridge 811).
here are the pictures of the modified Sprintex fuel line with Earl's gauge
and the other Earl's, Summit Racing, and Russell fitting for future upgrade:
I try to used the original Sprintex Fuel Line but since I am not familiar with the quick connect fuel clip, I manage to broke the clip that goes to the 5th injector...
so I decided to modified the Sprintex fuel line, and replace/upgrade some parts:
a. I replace the white plastic TEE fitting to brass fitting,
b. I replace the short hose that goes to the 5th injector with longer hose so
I can route the Earl's fuel pressure gauge upfront, between the throttle body and airbox so I can read it easily
c. I use combination of both Earl's and Summit Racing AN fitting for this purpose.
d. I also bought extra Earl's and Russel -6AN fitting for future upgrade to Goodridge 811 hose (with Goodridge end hose fitting) and extra adaptor so I can install Defi Fuel Pressure Gauge (electronic) inside the interior in the future.
At this moment, I am not doing the Goodridge -6AN fuel line upgrade because I am going to test the fuel pressure after I install the Denso fuel pump.
if the Denso fuel pump cause too much increase in fuel pressure, I will install Aeromotive Fuel Pressure Regulator with RETURN Line so if that is the case, I will need to buy longer -6AN fuel hose but if the pressure if not differ much,
then I will buy shorter -6AN fuel hose (Goodridge 811).
here are the pictures of the modified Sprintex fuel line with Earl's gauge
and the other Earl's, Summit Racing, and Russell fitting for future upgrade:
Installed the Fuel Pressure Gauge,
AT IDLE, the Fuel Pressure is about 46 to 48psi (I seen 50psi once)
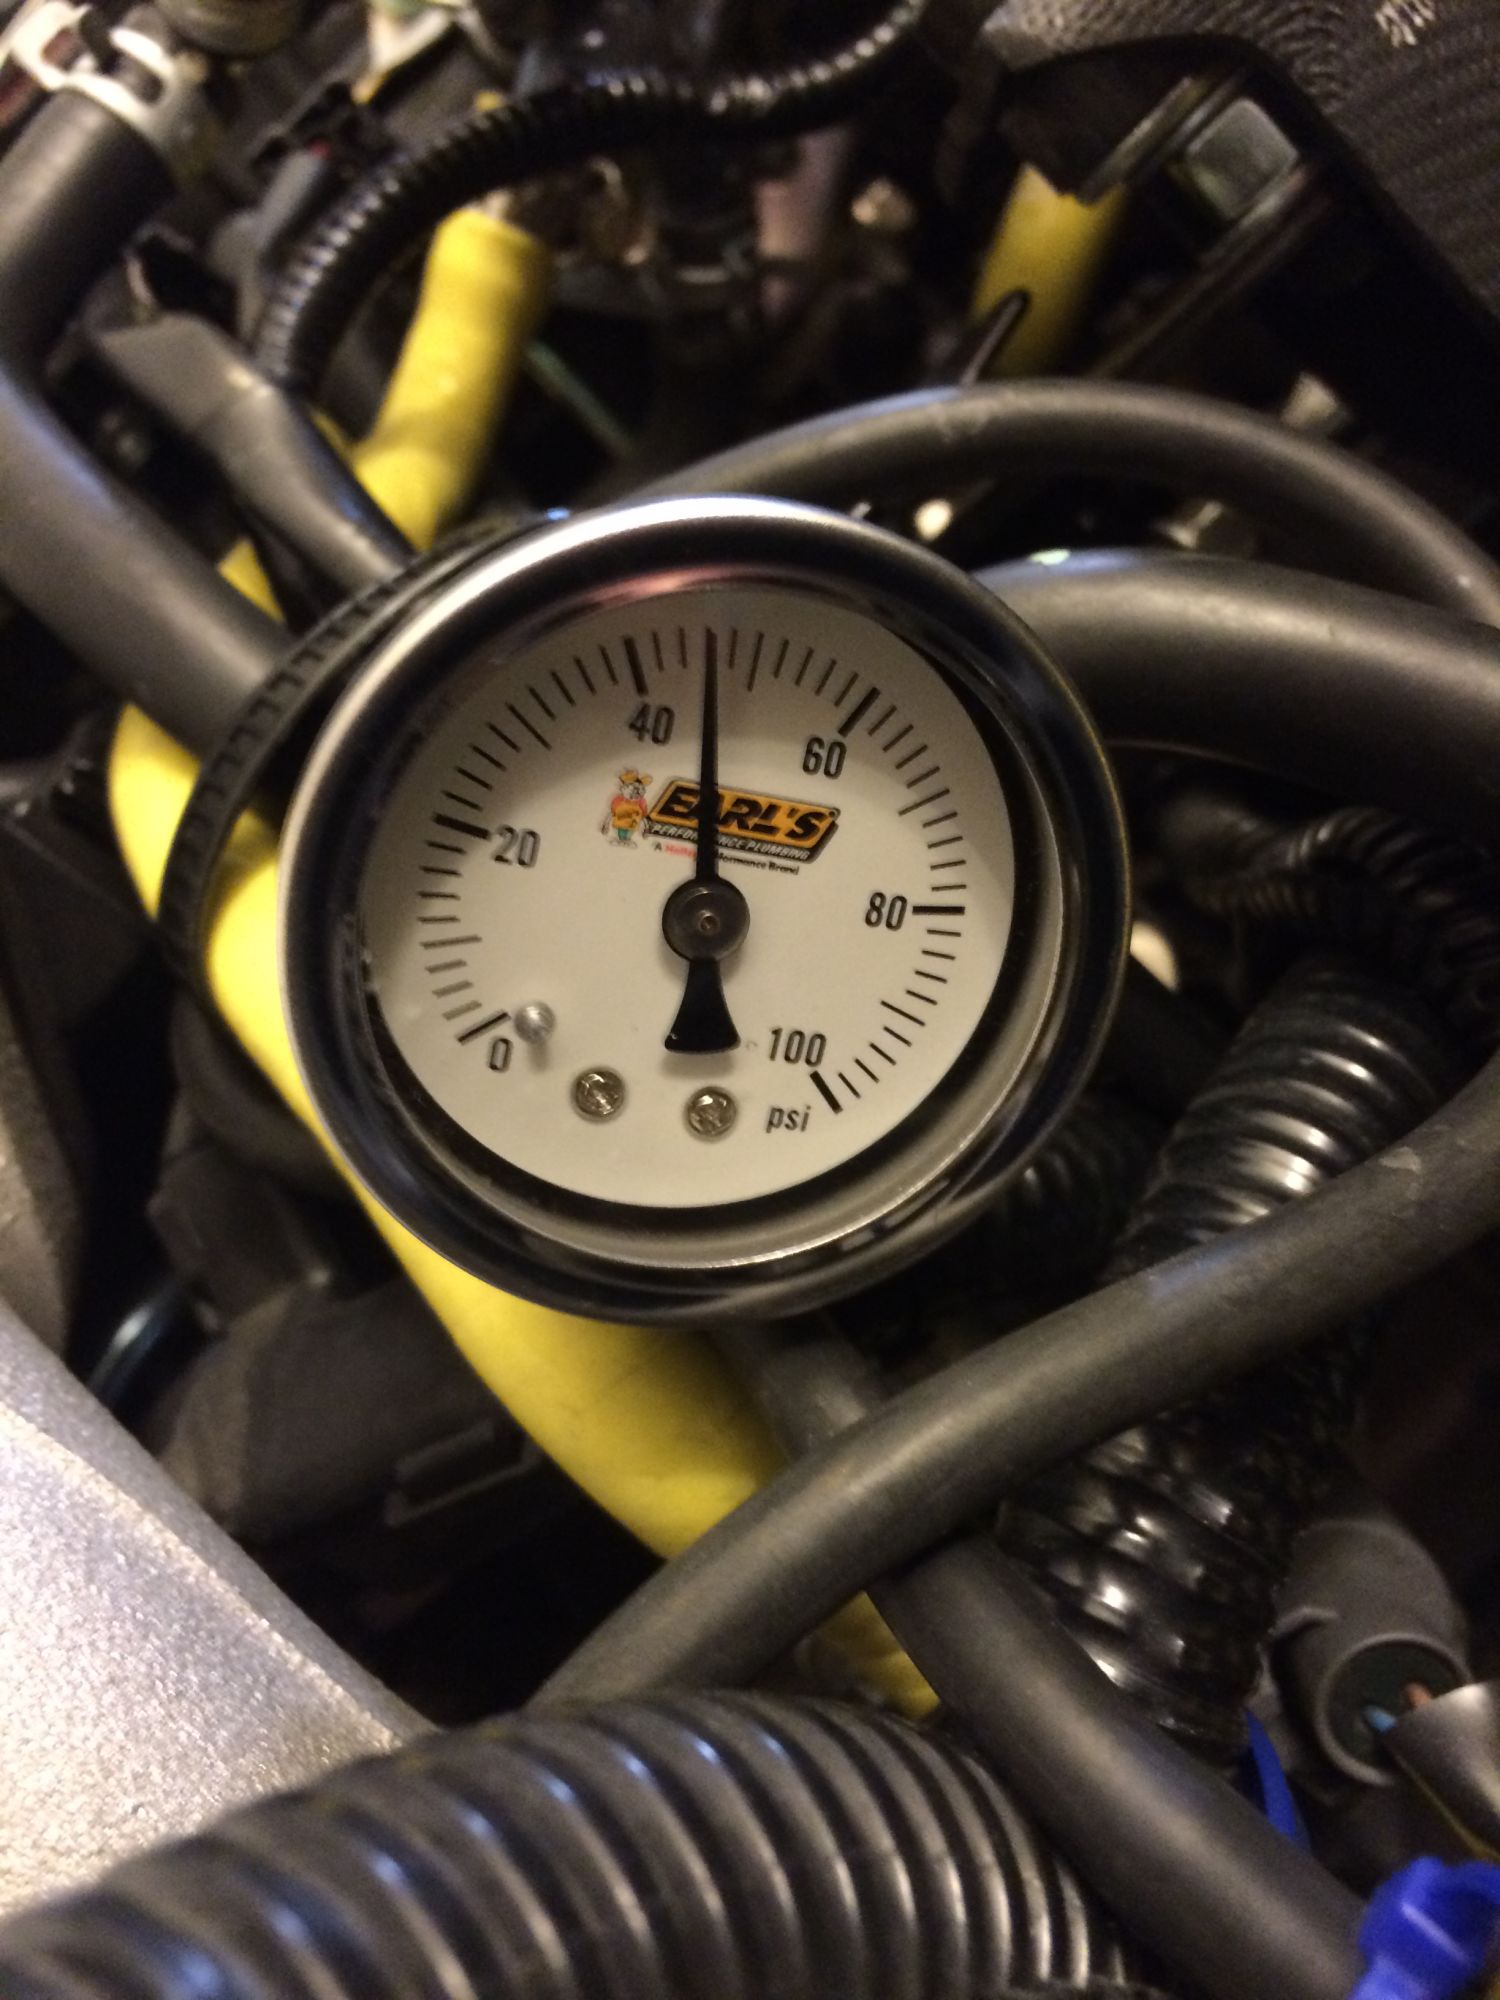
When engine off, the pressure drop to 42psi:
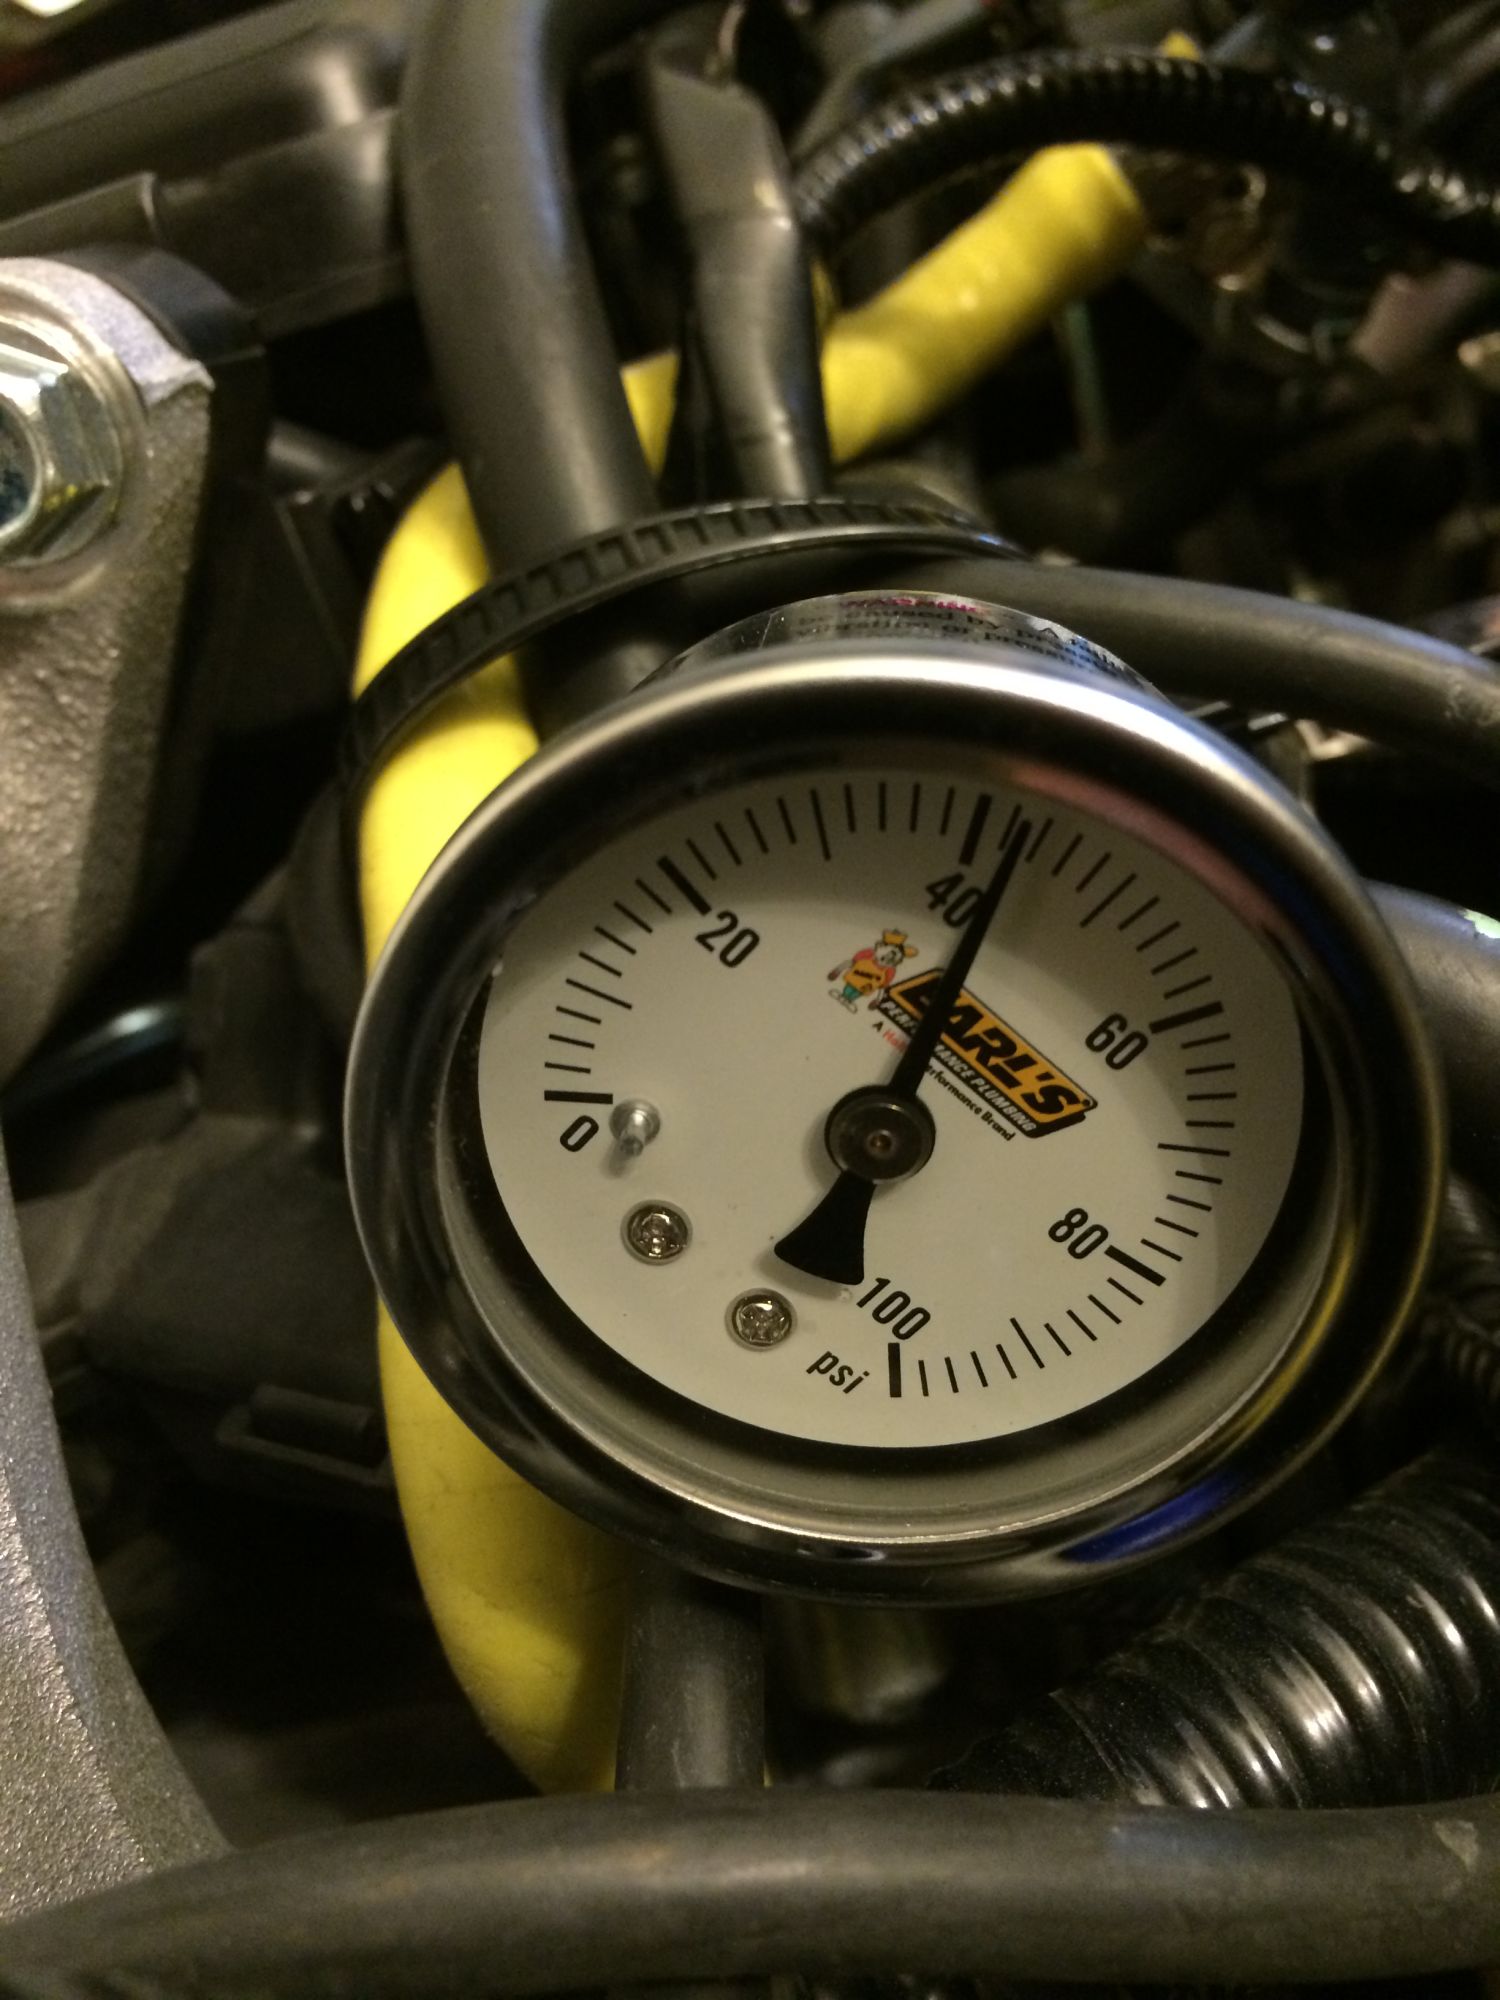
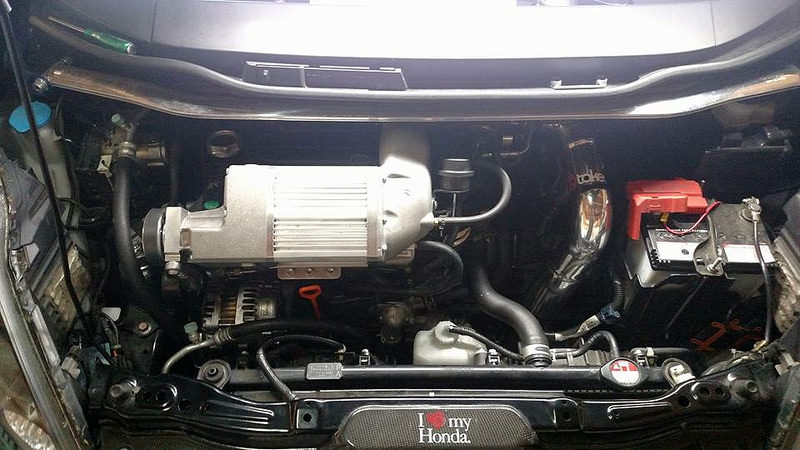
This is how it looks on engine bay now,...
This is just temporary until I upgrade to 811 Goodridge hose and
Install Defi Fuel Pressure Gauge (electronic so I can monitor while driving)
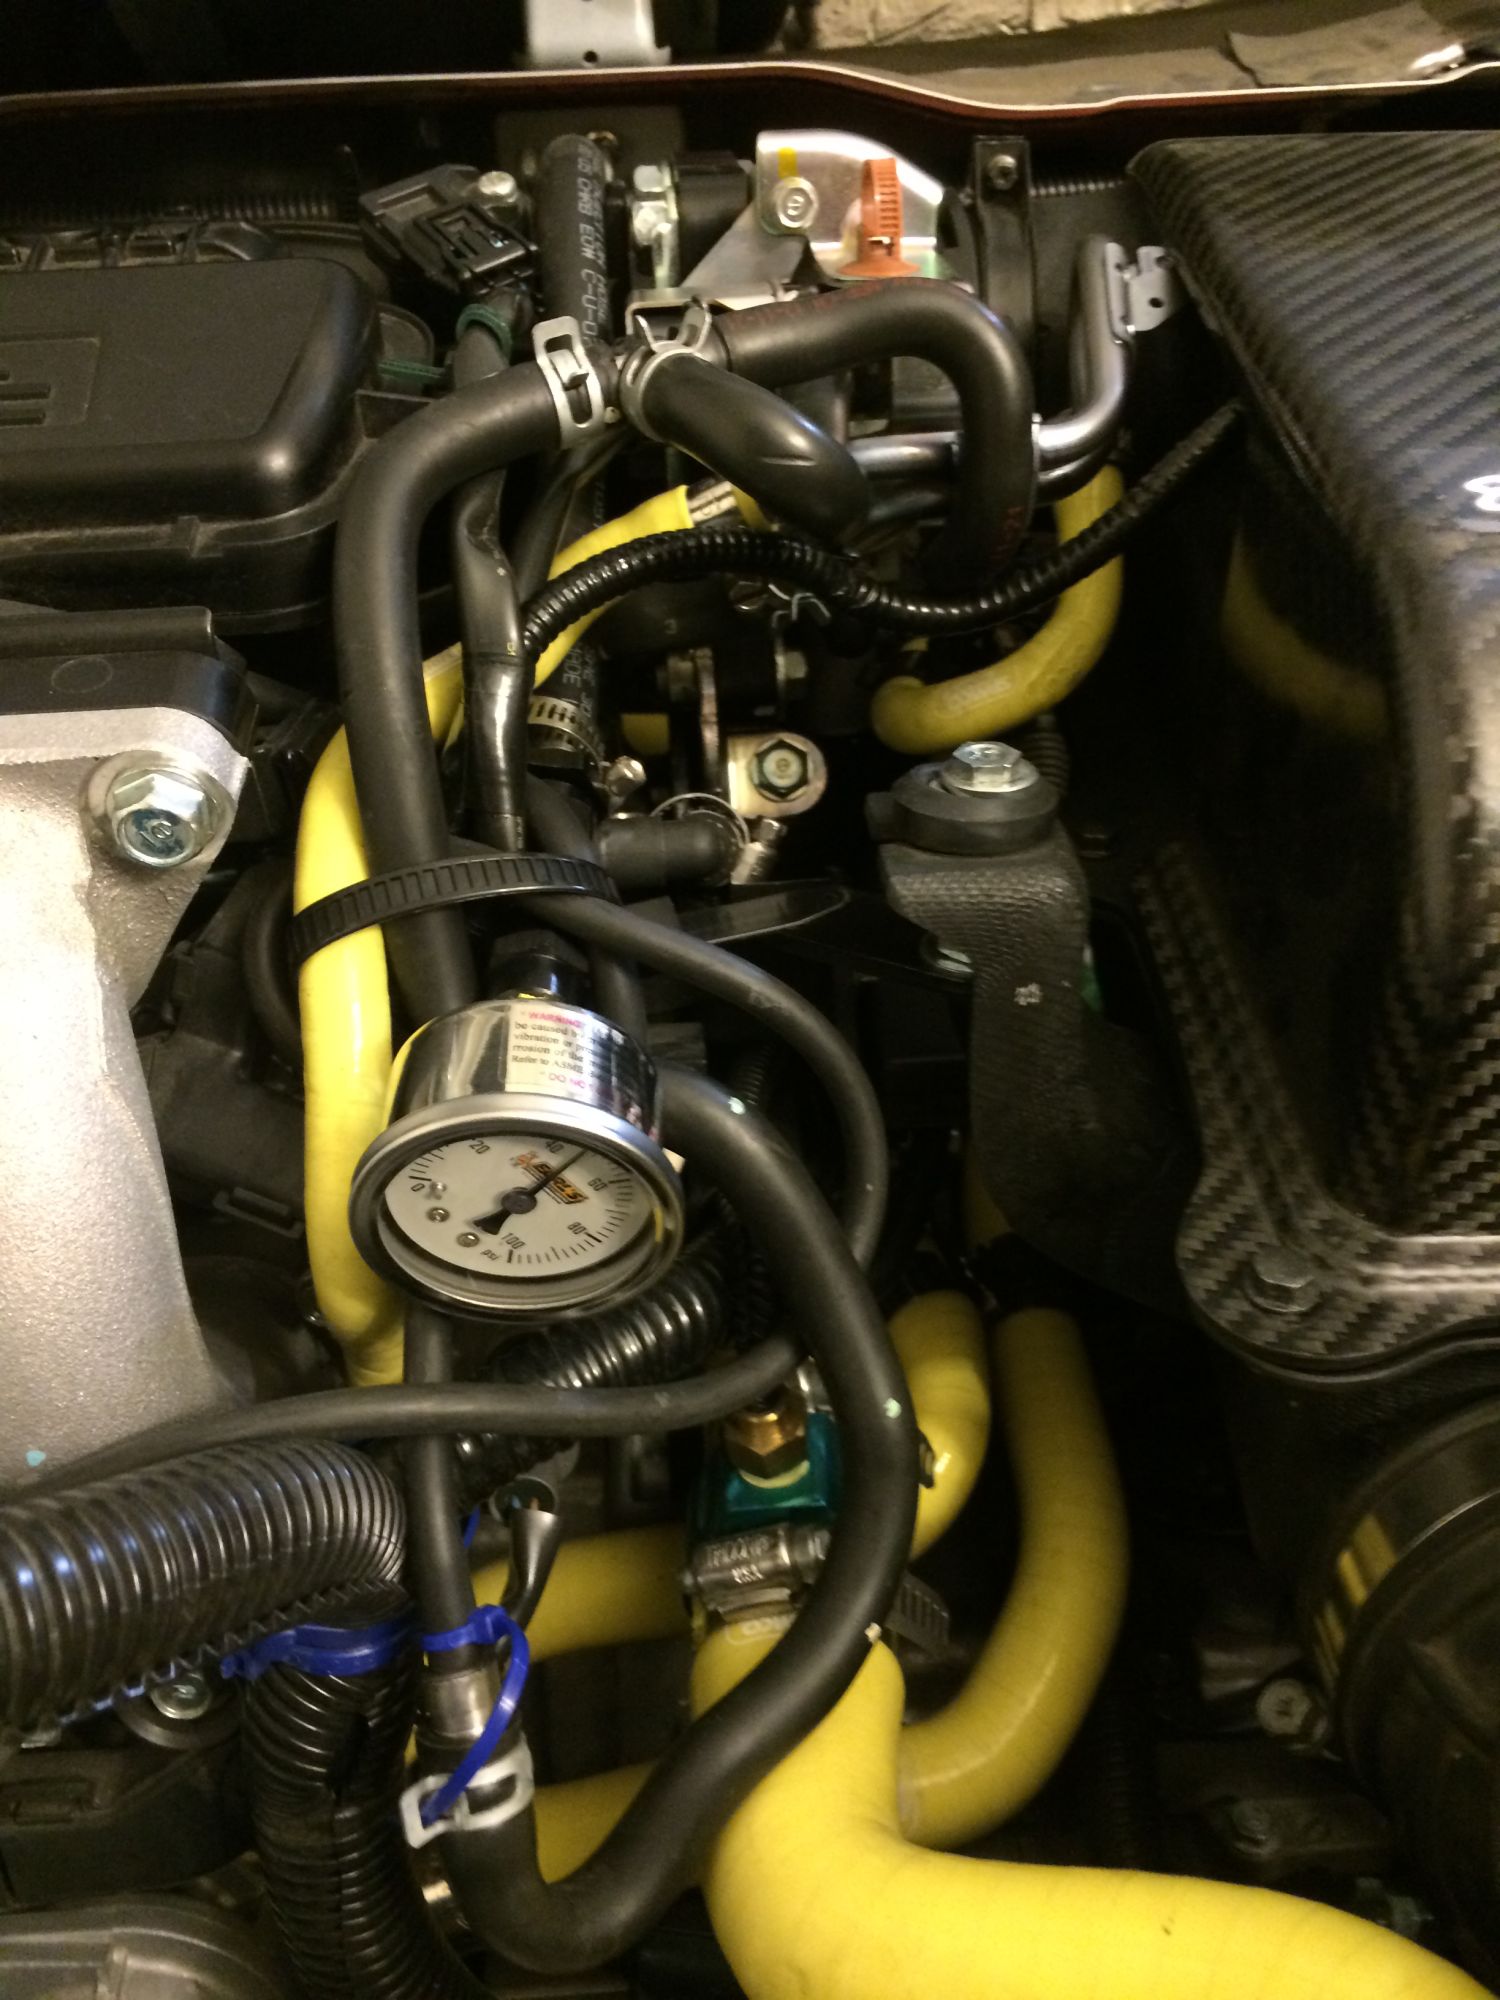
I can't wait for the tools to open the fuel pump cover to arrive,... just order them from Bernardi Honda,
so I can install the higher flow Denso fuel pump, hopefully it do not increase the fuel pressure too much so I don't have to run a custom return fuel line...
I also connect the onboard MAP sensor on the AEM F/IC-6 to vacuum hose from the throttle body today (temporary vacuum source)
AT IDLE, the Fuel Pressure is about 46 to 48psi (I seen 50psi once)
When engine off, the pressure drop to 42psi:
This is how it looks on engine bay now,...
This is just temporary until I upgrade to 811 Goodridge hose and
Install Defi Fuel Pressure Gauge (electronic so I can monitor while driving)
I can't wait for the tools to open the fuel pump cover to arrive,... just order them from Bernardi Honda,
so I can install the higher flow Denso fuel pump, hopefully it do not increase the fuel pressure too much so I don't have to run a custom return fuel line...
I also connect the onboard MAP sensor on the AEM F/IC-6 to vacuum hose from the throttle body today (temporary vacuum source)

Thanks and also Thanks for your guidance, you really help me learn a lot

By the way, currently the AEM F/IC-6 and the ECU work well again,
and when I do WOT, the scangauge show 0 fuel trim which mean ECU able to go into open loop again (unlike before)...
the only differences is I do another calibration (both TPS and RPM) and also connect the vacuum hose to the MAP hose inlet nipple on the AEM F/IC-6.
I check and my Boomslang wiring have a TPS sensor wire connected to AEM F/IC-6 TPS input, I also able to do a TPS calibration on the AEM F/IC-6 so I think on mine the AEM F/IC-6 able to monitor the TPS.
I will update you with my progress... (or lack of progress)

Thanks again


Hello,
Yes, it is a one off, I make the drawing, choose the material and submit it to Coleman Racing to CNC Machine it. I usually want to use 7075-T6 but I figure for this blocking purpose, I might need a material that is softer to make sure it block it well, so I decide to go with 6061-T6 instead...
It took me more than 1 month since I submit the drawing and after several revision...
It cost me $174.72 including shipping (by UPS Ground) to be exact
oh, that and also few bucks for the cost of several Viton O-Ring from eBay

I'm cheap! I tapped mine with NPT threads 1/8 th inch I think, and screwed in a $3 Home Depot fitting. FYI the aluminum fuel injector adapter that comes with the kit is threaded but it is BSP threads like most the fittings on the sprintex
 hard to find in us for obvious reasons.
I'm cheap! I tapped mine with NPT threads 1/8 th inch I think, and screwed in a $3 Home Depot fitting. FYI the aluminum fuel injector adapter that comes with the kit is threaded but it is BSP threads like most the fittings on the sprintex
hard to find in us for obvious reasons.I guess my intake elbow which is revision 2... is slightly different than yours
because the fuel injector adapter is not threaded on mine...
Also my intake elbow had it's restrictor cast so I had to port and polish it...
Nice! Welcome to the club.
Cold air intake is a good idea with the sprintex installed too. Where does the filter sit with that intake?
May also want to insulate the elbow from the TB to the SC inlet and the fuel line too if you have 5th injector installed. They run right above your header basically and the dash overhangs with insulation under it. Great for trapping heat when not at speed.
I removed the insulation there to let out more of that sweet SC whine!
Yes using KTuner.
Took about 4 hours to bolt everything up. Didn't even pull the cowl lol.
Nice! Welcome to the club.
Cold air intake is a good idea with the sprintex installed too. Where does the filter sit with that intake?
May also want to insulate the elbow from the TB to the SC inlet and the fuel line too if you have 5th injector installed. They run right above your header basically and the dash overhangs with insulation under it. Great for trapping heat when not at speed.
I removed the insulation there to let out more of that sweet SC whine!
Cold air intake is a good idea with the sprintex installed too. Where does the filter sit with that intake?
May also want to insulate the elbow from the TB to the SC inlet and the fuel line too if you have 5th injector installed. They run right above your header basically and the dash overhangs with insulation under it. Great for trapping heat when not at speed.
I removed the insulation there to let out more of that sweet SC whine!
Not sure what you're talking about on the restrictor lol.
Yes using KTuner.
Took about 4 hours to bolt everything up. Didn't even pull the cowl lol.
Filter sits right next to the trans. Just to the right of the rad/ac condenser. I may do that. Kinda hoping the JDP vented hood actually does some venting too lol.
Yes using KTuner.
Took about 4 hours to bolt everything up. Didn't even pull the cowl lol.
Filter sits right next to the trans. Just to the right of the rad/ac condenser. I may do that. Kinda hoping the JDP vented hood actually does some venting too lol.
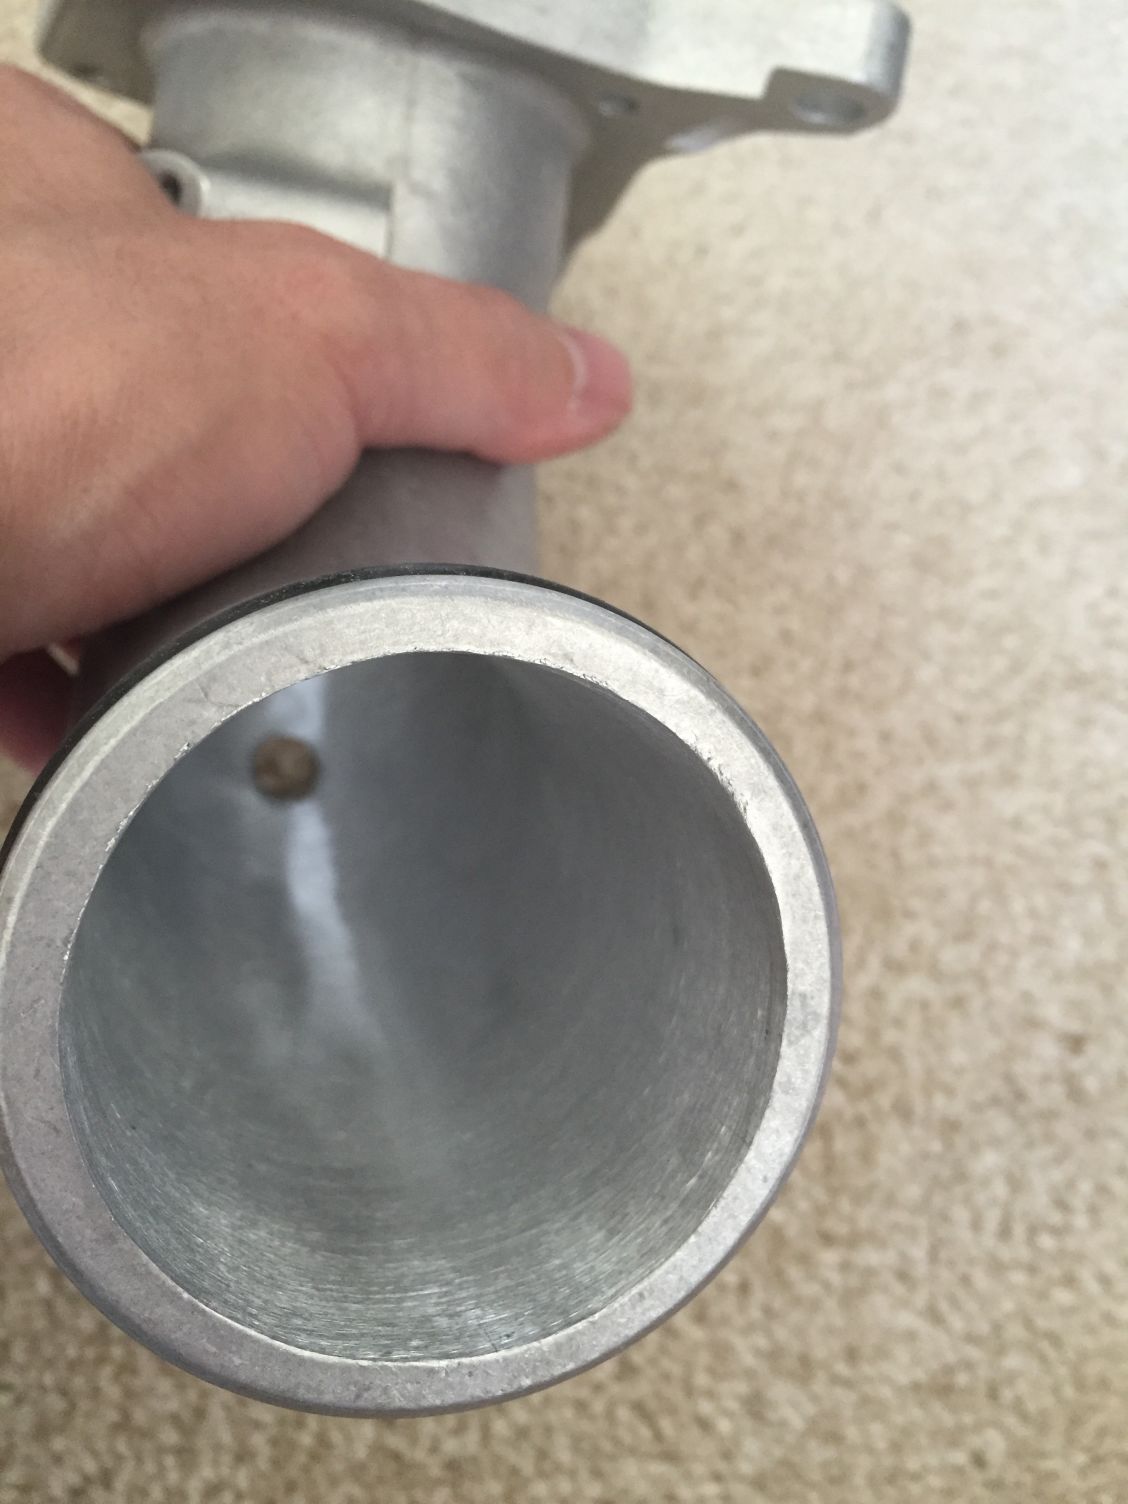
Did you buy this supercharger used or brand new?
If you bought it used, perhaps the old owner had remove the restrictor so you don't notice it,
so,
The Older version of Sprintex supercharger have a ring restrictor welded on the inlet of the intake elbow like on this picture, and you can easily cut the welding to remove that restrictor.
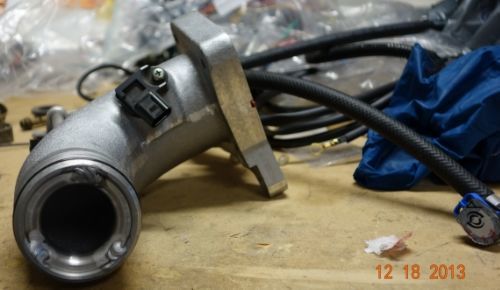
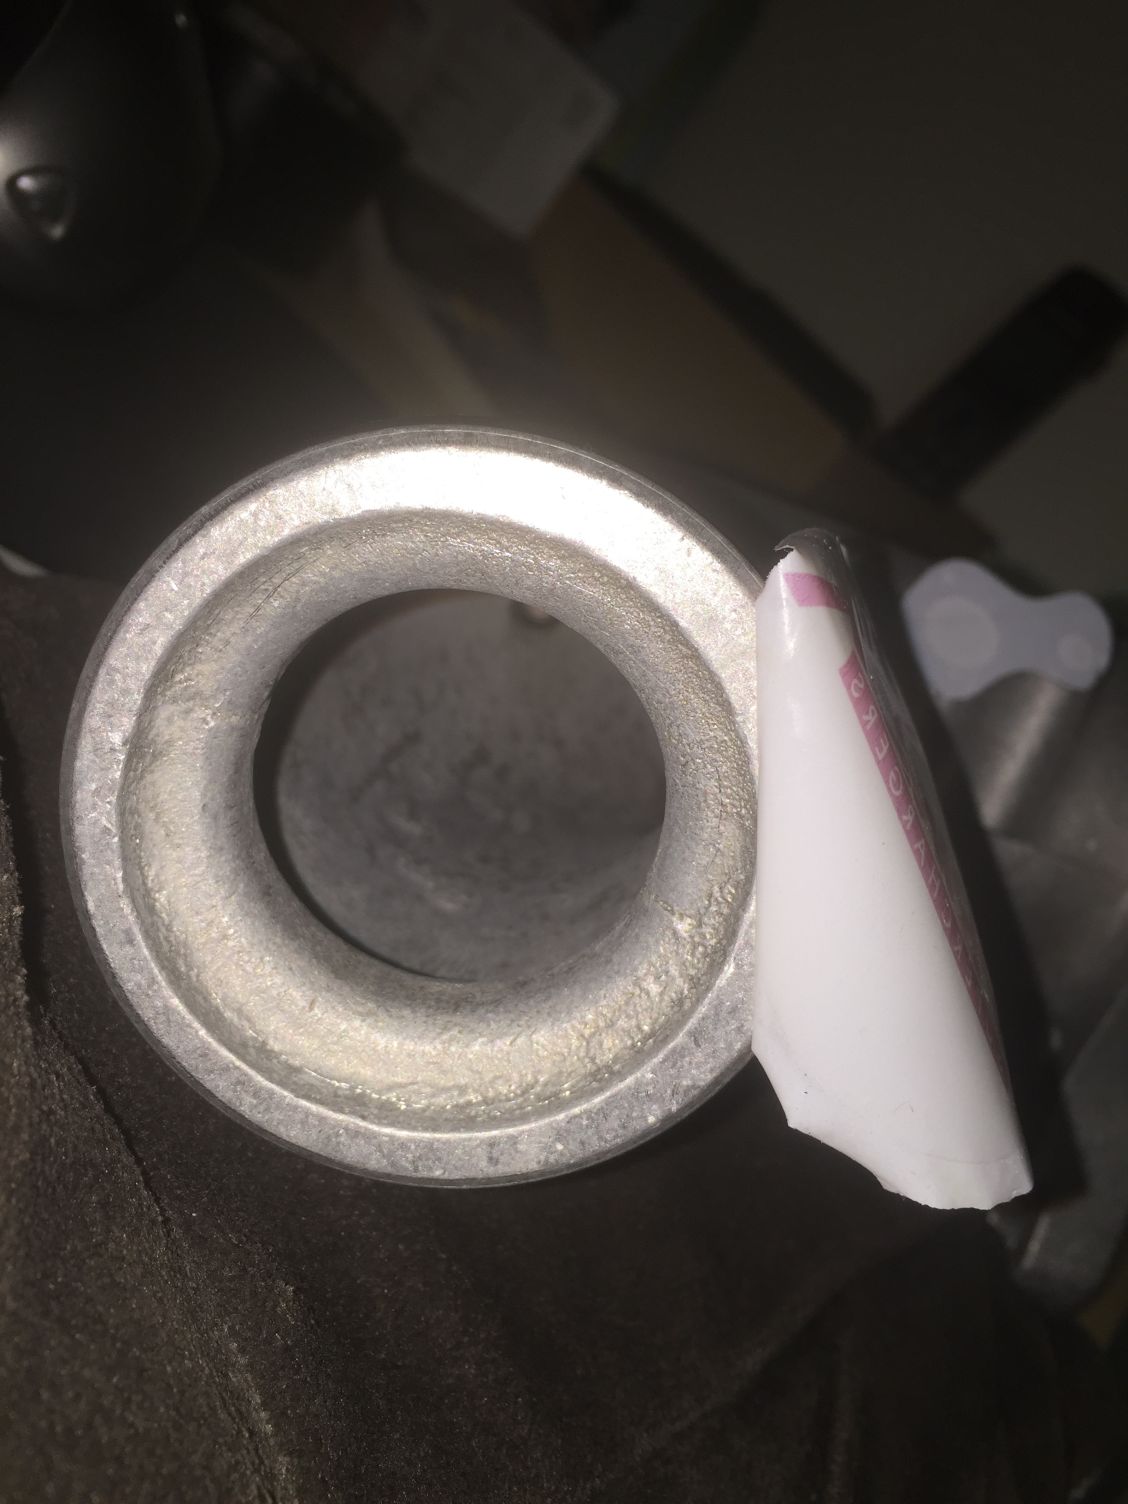
The newer version like mine have the restrictor CAST with the elbow, making it more difficult to remove and I need to send it to shop that used to do Cylinder Head Porting to port and polish it...
here is mine before and after porting:
Also do you currently have the JDP Vented Hoods in your car?
I am also going to buy it later...
Does the vent really work well ?
Thanks

Too bad I am in So Cal while you are in Nor Cal, otherwise, I would come visit you to help (if needed) and also learn/observe before I install mine

Member
Joined: Oct 2008
Posts: 106
From: Detroit, Mi

I'm going to jump in and join the club on Sprintex limp-mode Fits. So frustrating. Mine was with also with the plug and play harness. I'm not a particularly skilled technician when it comes to electrical modifications. Going to have to find the time to pull the PNP harness out to futz with the wiring. Does anyone have a pin-out diagram for the ECM? I did see the info on the Rocker arm Oil Pressure code that Gary Turner provided another member many pages ago...
I'm getting the typical Rocker Arm Oil Pressure code, as well as the EGR code that other people got. Is it possible that these two wires are swapping places from one end of the PNP to the other and causing each other to throw codes?
Any help would be greatly appreciated! Thanks guys – Brian
I'm getting the typical Rocker Arm Oil Pressure code, as well as the EGR code that other people got. Is it possible that these two wires are swapping places from one end of the PNP to the other and causing each other to throw codes?
Any help would be greatly appreciated! Thanks guys – Brian
Last edited by linus011; Jul 11, 2016 at 08:22 PM.